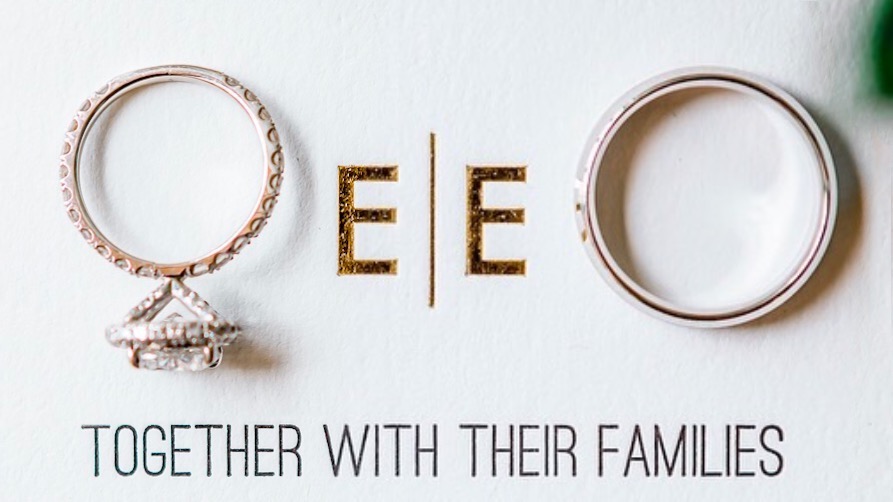
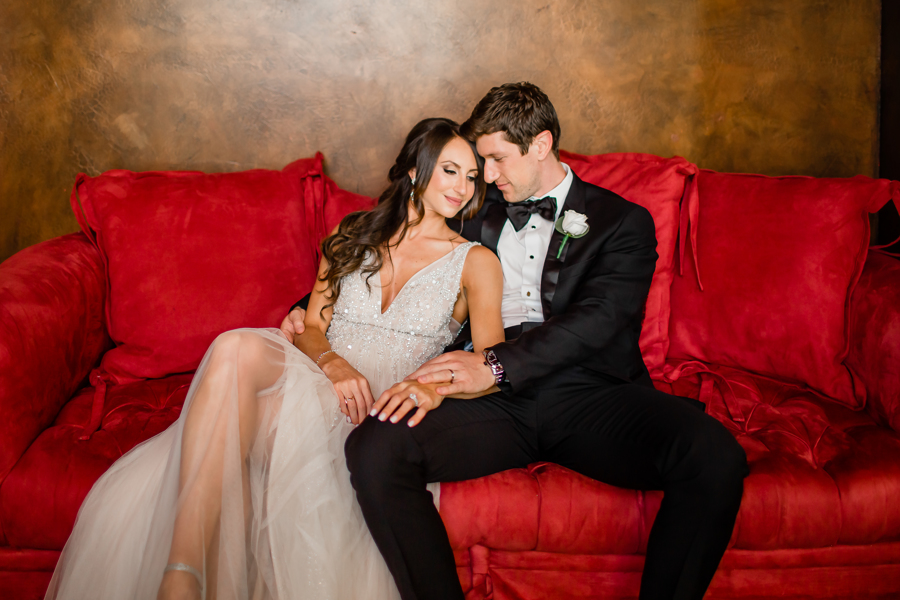
You get engaged and there is a rush of emotions. Surprise, happiness, love, so much excitement you don’t even know what to do with it all. But then people start asking you, “So when are you getting married?” And you literally have no idea. No idea when, no idea where, no idea how much money it will cost. Luckily for me, most of my closest friends had just recently gotten married and I was able to pick their brain when it came to the details (google helped too).
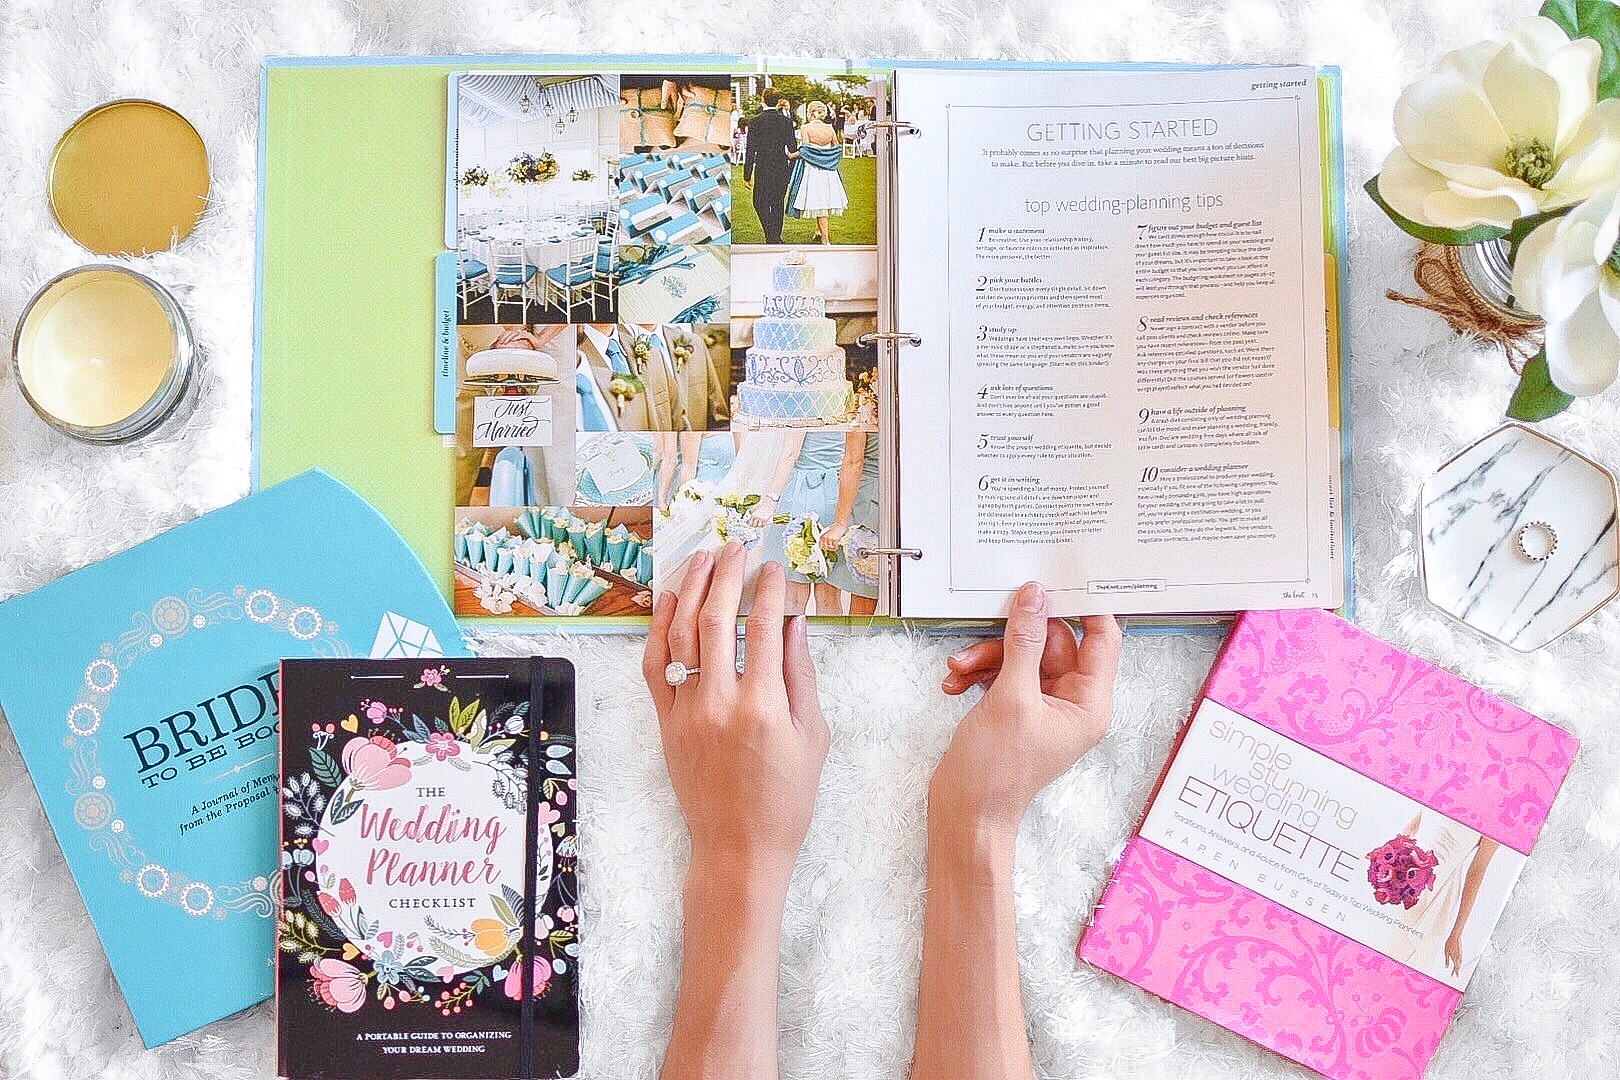
I am no expert wedding planner, but I will say I think we did a pretty good job with ours, and we had some of the best vendors I could have ever imagined working with. With their help our wedding vision became a reality. In this blog post I am going to tell you guys how we planned everything from start to finish, including budgeting and the timeline of who we booked when, and some of the DIY projects we created on our own.
At the end of each section, I included questions that you should be asking, in addition to the vendors we used for each category (both local and online) with links to their websites. Hopefully this article is helpful in making your wedding planning a bit easier!
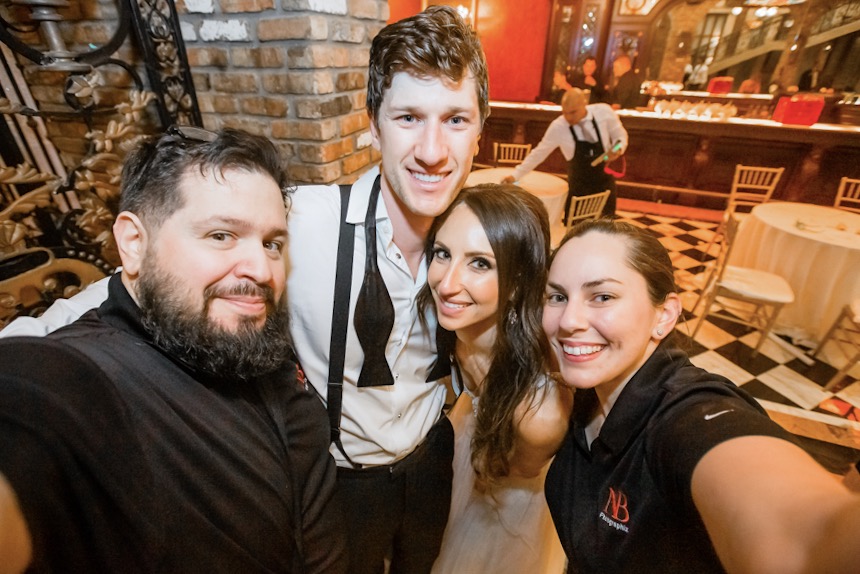
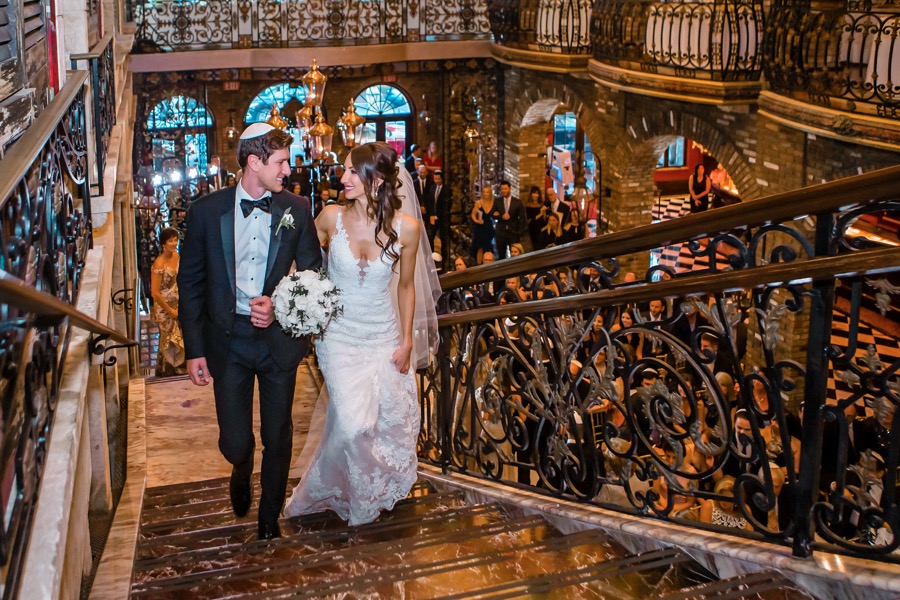
 *Unless otherwise stated, all photos are by our amazing photographers Nat and Bryan
Step 1: Budgeting
First, Erik and I came to an agreement on a total budget based on what we could afford (with help from our parents). We did some googling to get average prices of each vendor, and then we decided what we wanted to allocate more money towards (photographer, videographer, DJ), and what we didn’t think was as necessary to go all out with (florals, catering, invitations). Once we did this, we decided (roughly) how much money we could spend on each. Leave yourself some wiggle room, there are always added costs that you don’t think of initially.
The list of things you have to budget for will vary based on your venue and what is included, but at the very end this was what was on ours: Venue, rentals, valet, ceremony music, DJ, food, beverages, photographer, videographer, florist, invitations, officiant, planner, hair, makeup, photo booth, wedding favors, party paraphernalia, hotel room, transportation, welcome bags, seating chart, cake topper + cutter, sandals to give out, sparklers, gifts for our parents and bridal party, and tips for vendors. And don’t forget about your dress, accessories, and a tuxedo; can’t get married without those.
Step 2: Picking a Date and Venue
We had a time frame in mind, but no specific date set. This will depend largely on the venue you choose and what dates they have available. This is the first thing you should do because A. Dates fill up quickly, especially for the more popular venues, and B. your idea of the perfect venue might change once you start visiting locations in person. For example, I initially thought I wanted an outdoor venue and when we started looking, each one we visited had something we didn’t like. Also, outdoor venues in Florida are extremely risky (especially if you’re planning during hurricane season – which luckily we weren’t).
The easiest way to pick out a venue is by downloading the wedding wire and/or the knot apps. You can then put in information like the city you are looking at, the theme you are going for, and even a general budget. This will then generate a list of venues to scroll through, photos you can look at, and links to their websites. Once we singled out about 6-8 venues we wanted to see, we started emailing them to set up site visits.
Try to schedule 1-2 if you are going on a weekday after work and 2-3 if you are going on a weekend. Each visit should take no longer than an hour, and this way you can knock out a few at once. Most of the venues we looked at were all in South Miami, which is about a 30 minute drive from where we live, so we made sure to do as many visits on the same day as we could.
Once you start visiting locations, keep a list of pros and cons for each one, and any deal breakers you might encounter. Ask questions like what vendors are included (ex: food/alcohol), and which ones you would need to supply on your own? If it is outdoors what is their backup plan for rain/snow? Are there any noise restrictions or cut off times at the end of the night? Do they require you to use a wedding planner and/or do they supply one for you? (a lot of hotels do this). What additional fees are there (ex: service fees, taxes, up-charges for certain things)?
Lastly, once you decide on the venue that is right for you, find out what dates they have available. Unless you are dead set on a specific date and will only choose a venue that has it available, choosing the venue first and then selecting a date is the better order. Pick a date that is not around any major holidays, and if you live in a big city find out what else is going on those weekends (ex: we tried avoiding having our wedding the same weekend as Ultra in Miami but then they went and changed the date on us! Luckily it didn’t interfere too much).

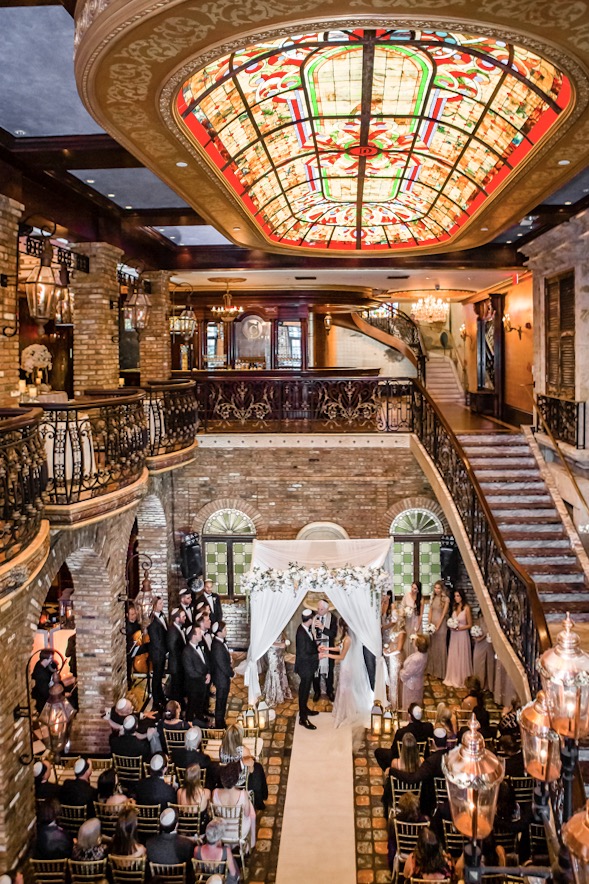
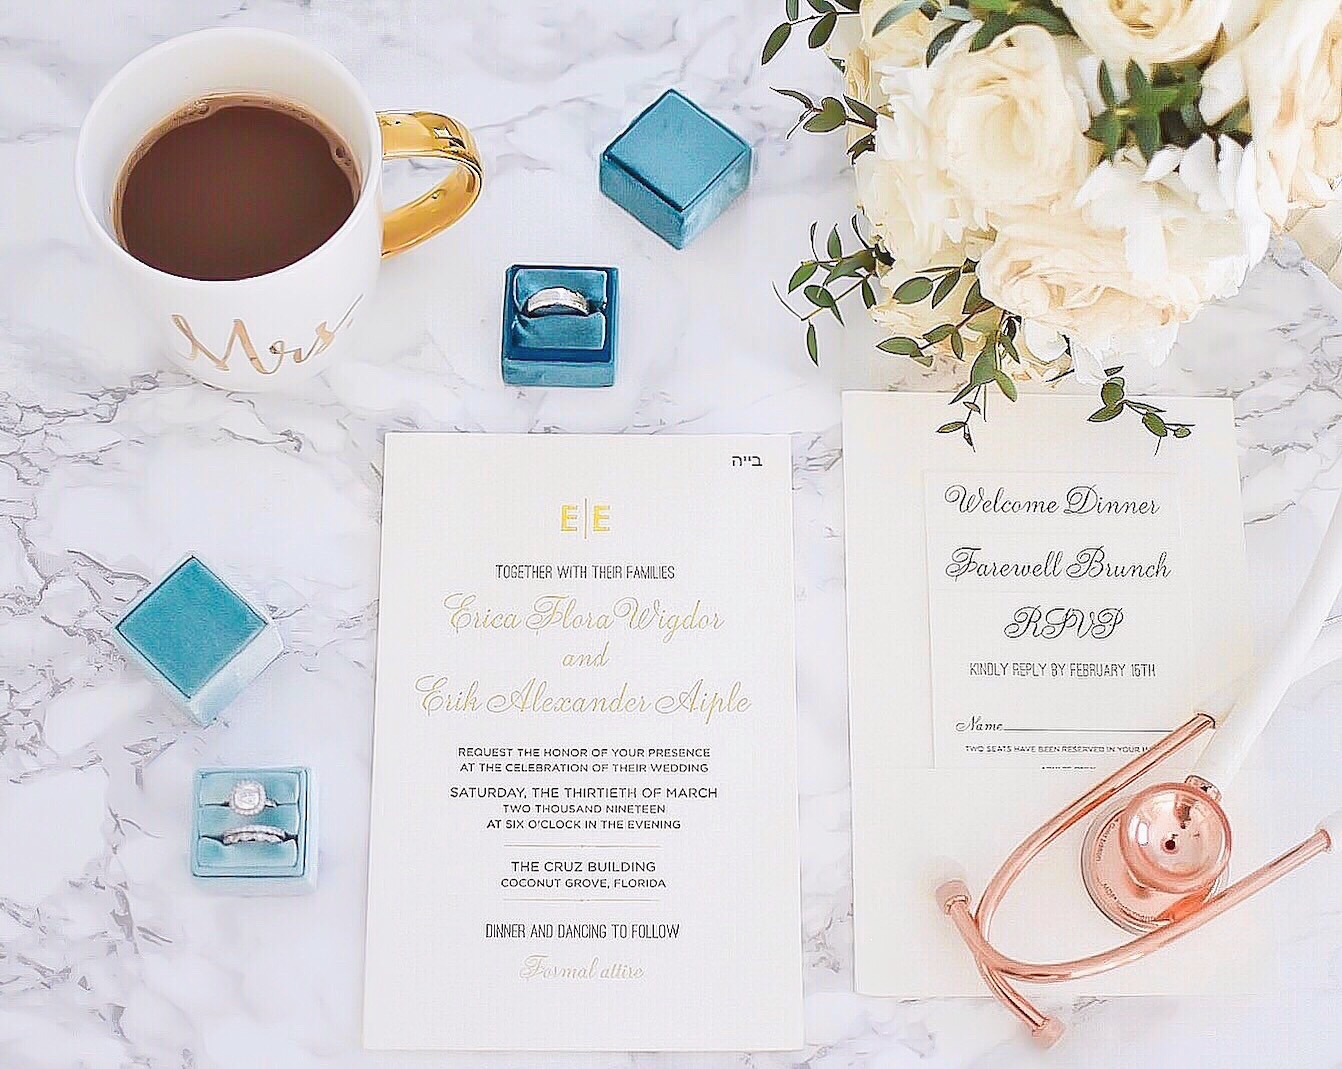
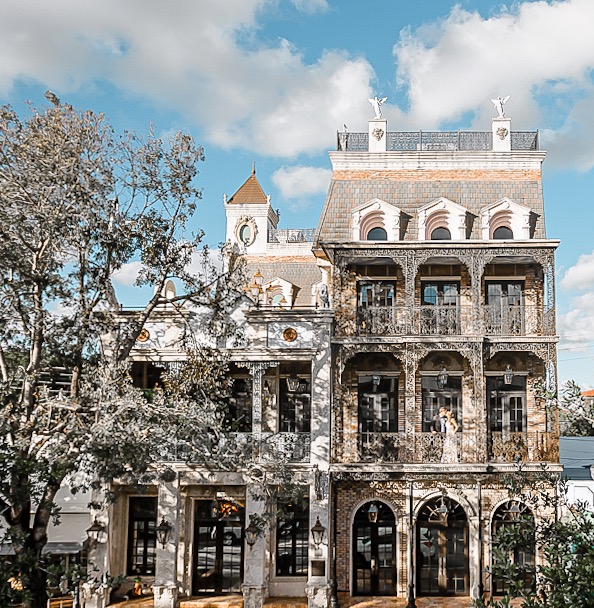
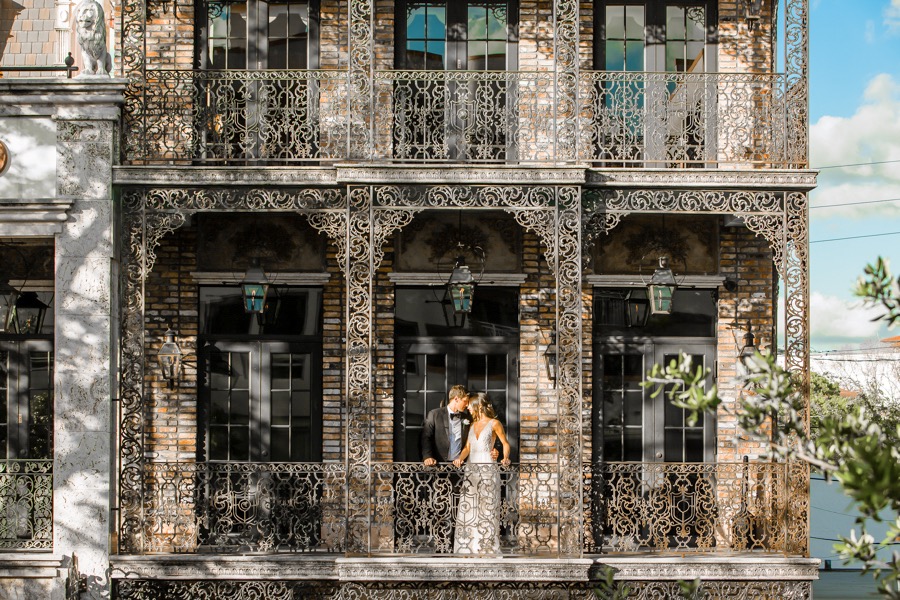
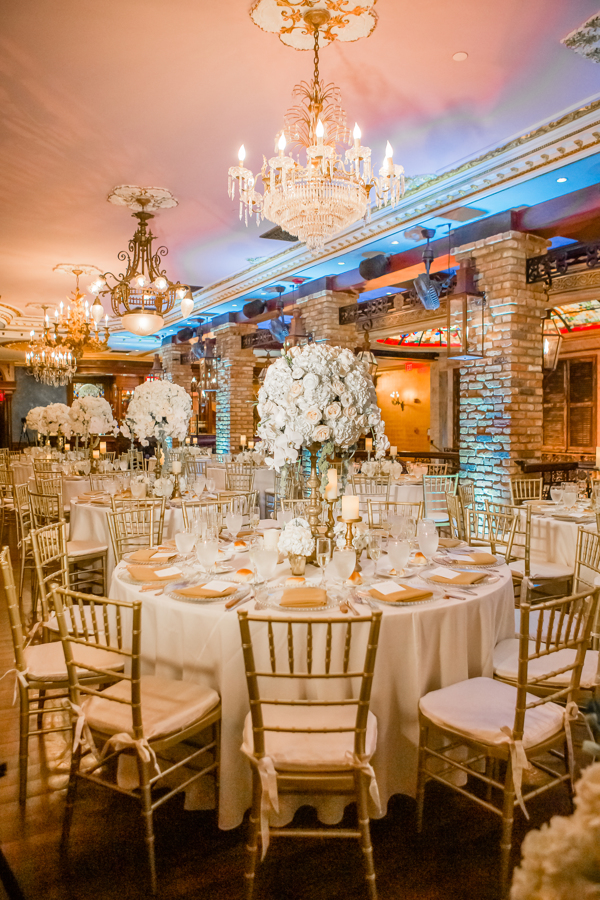
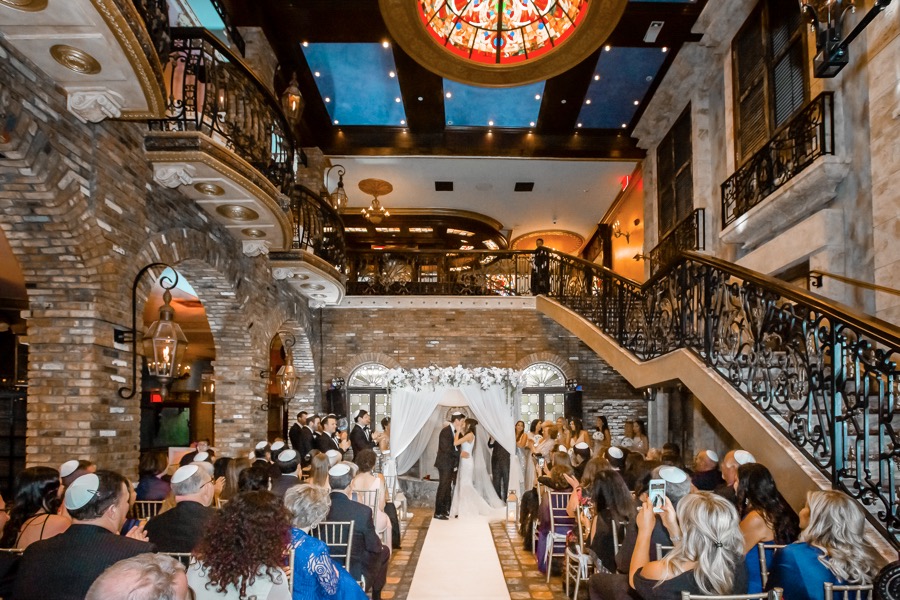
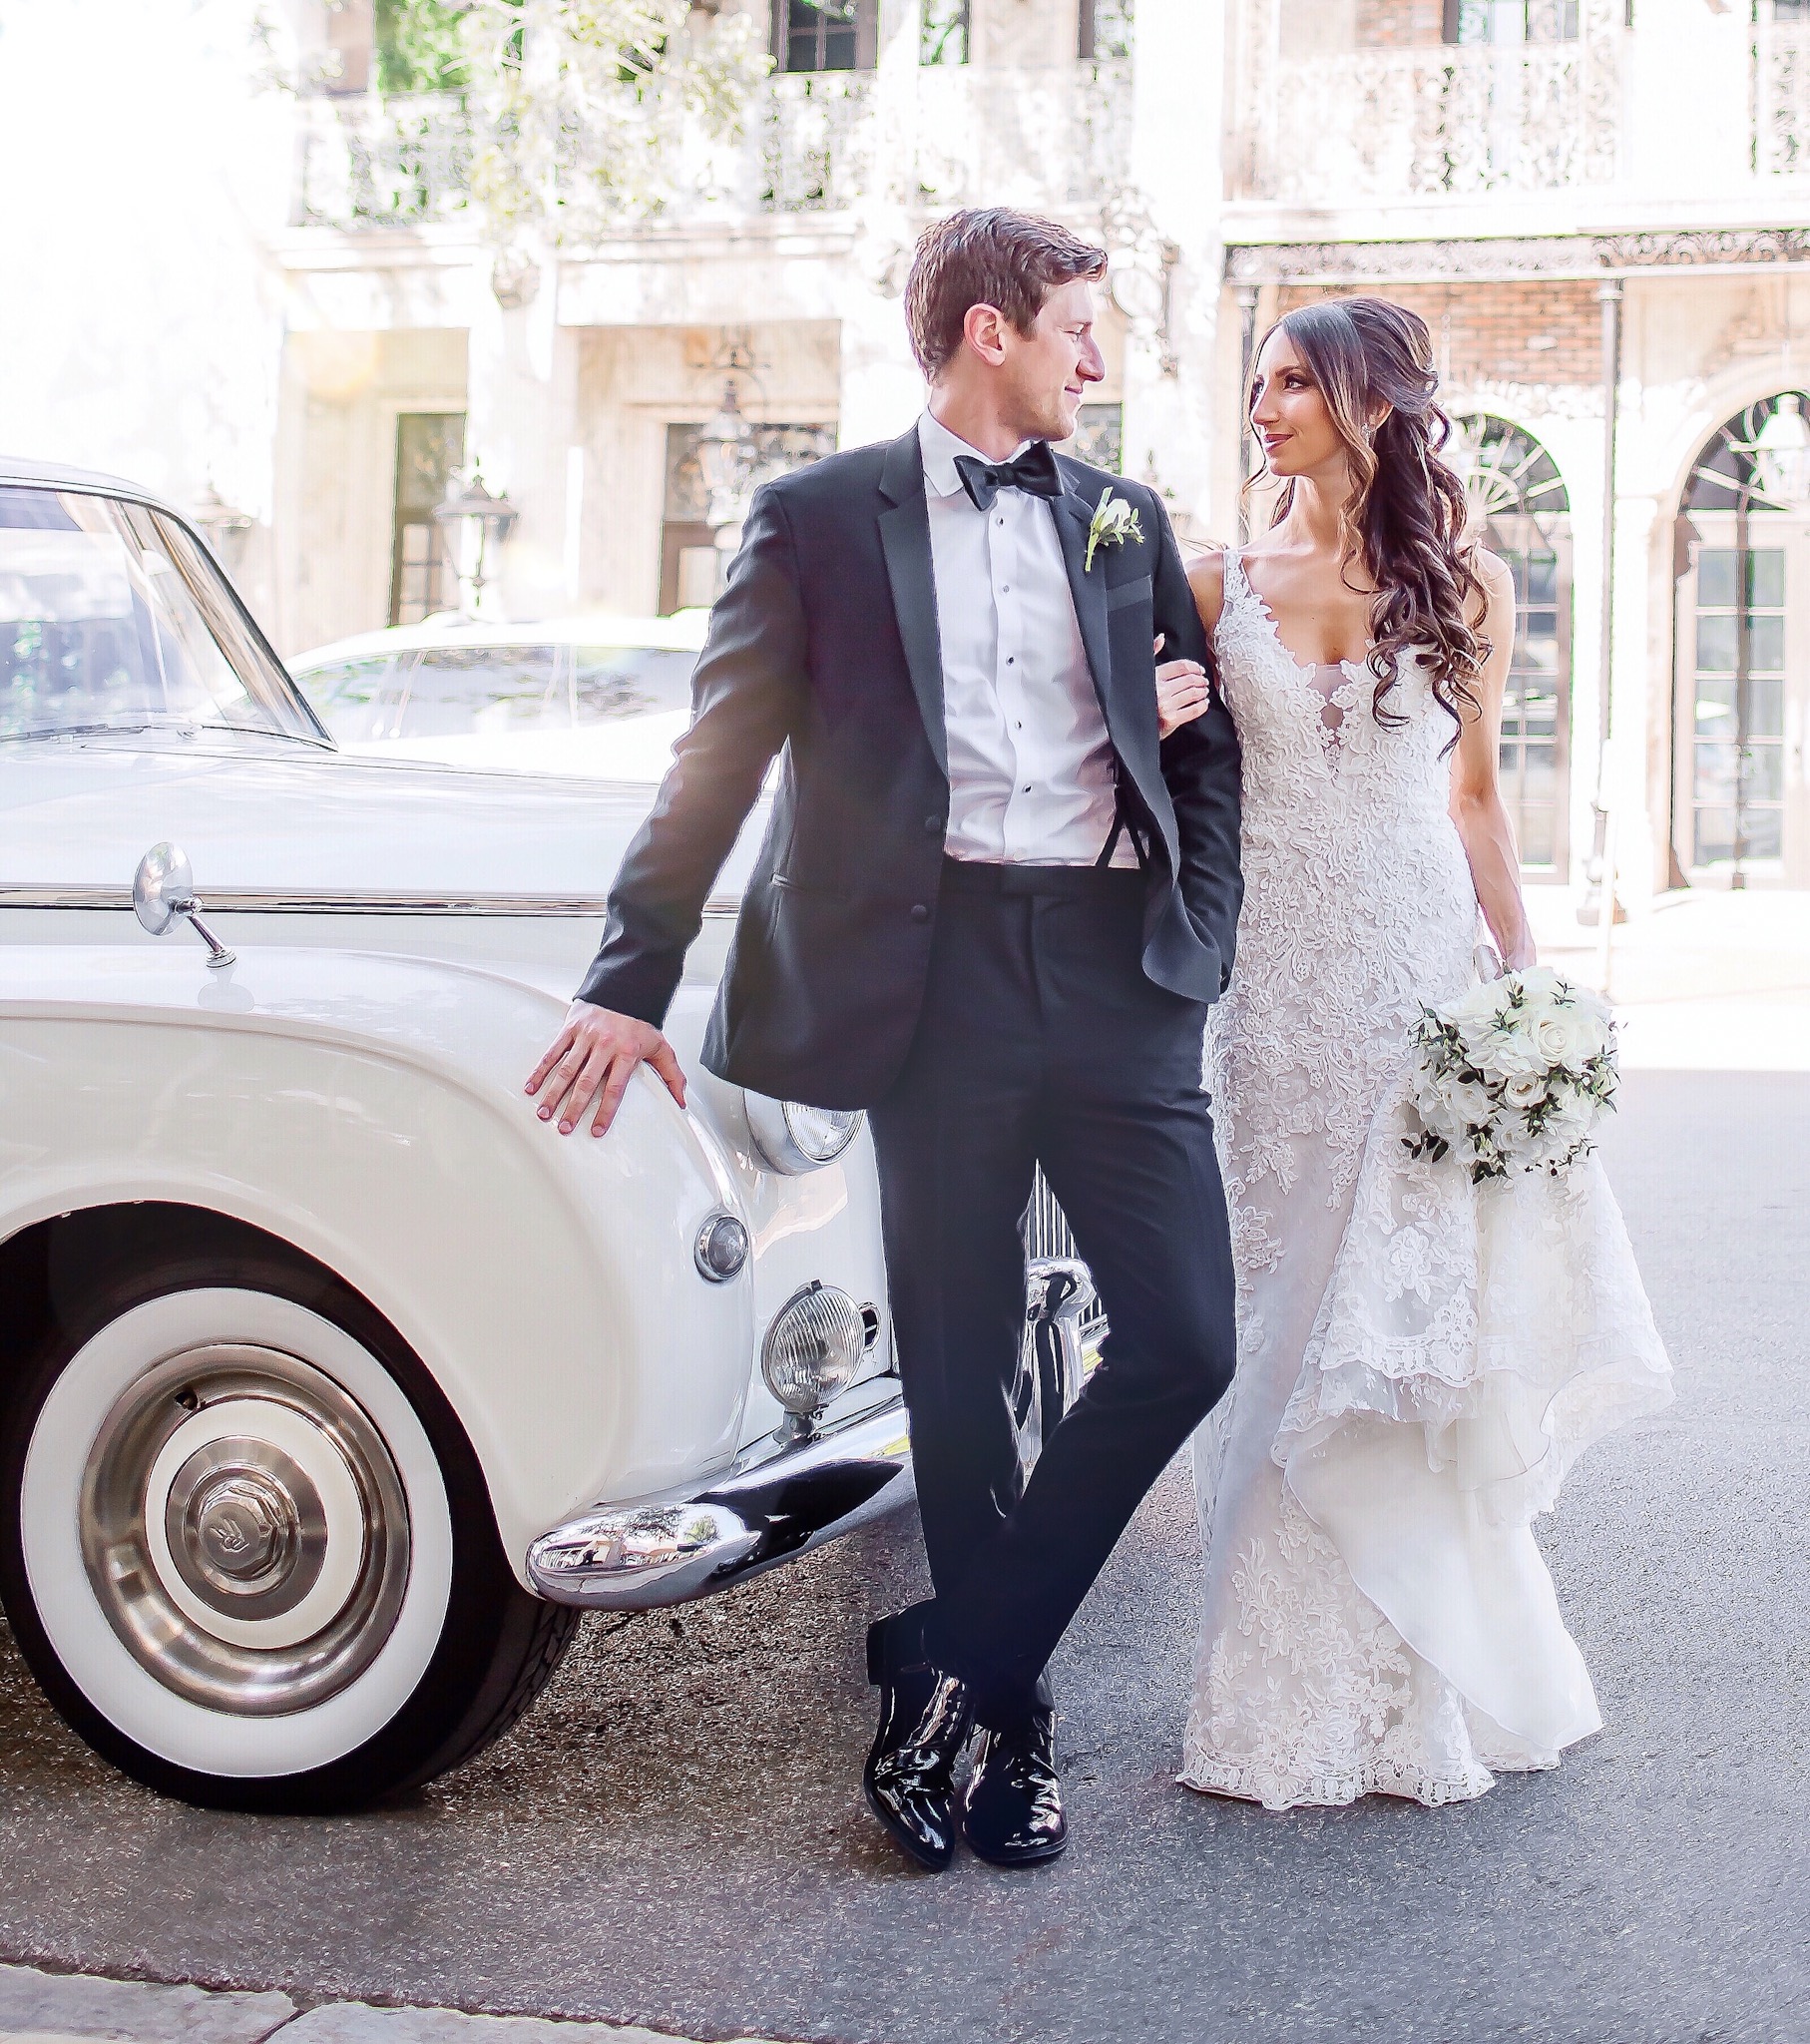
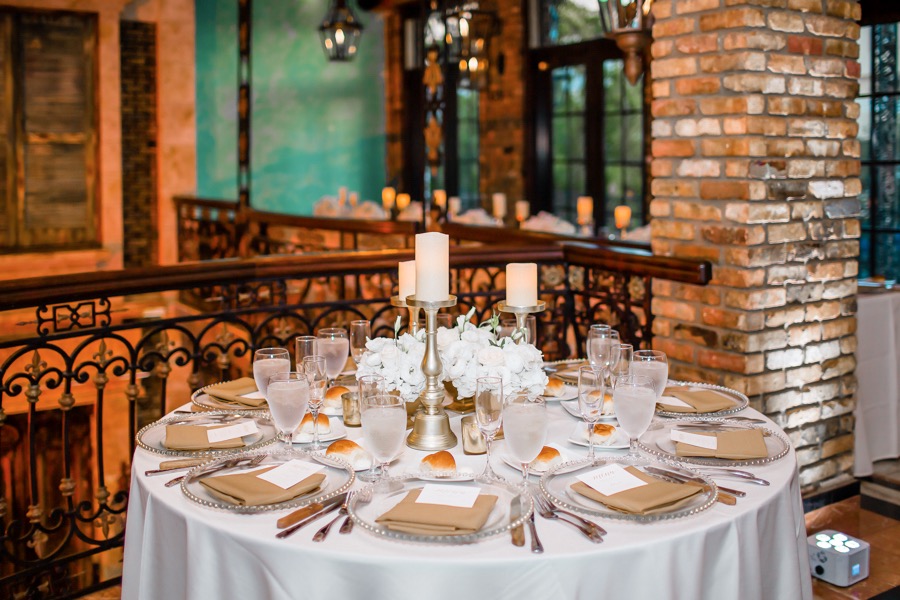
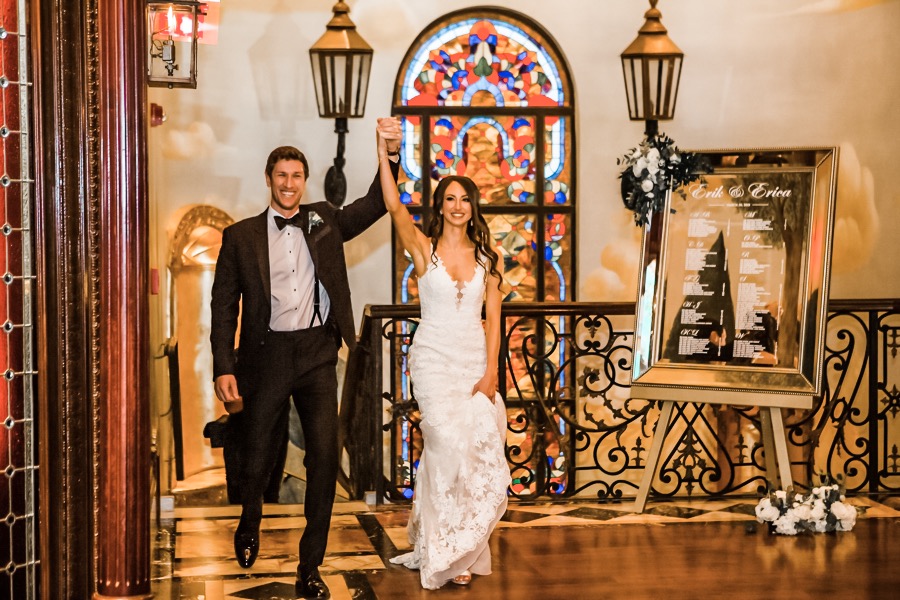
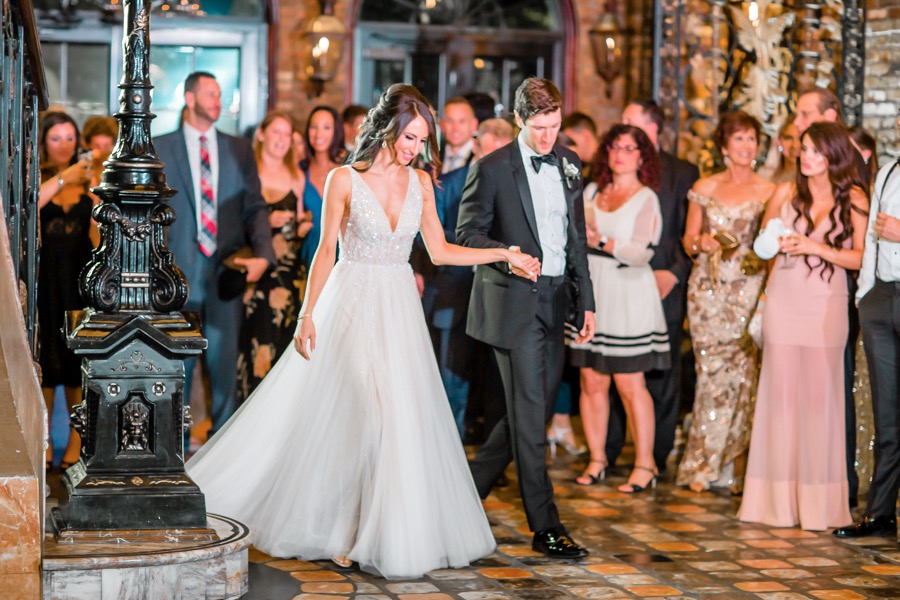
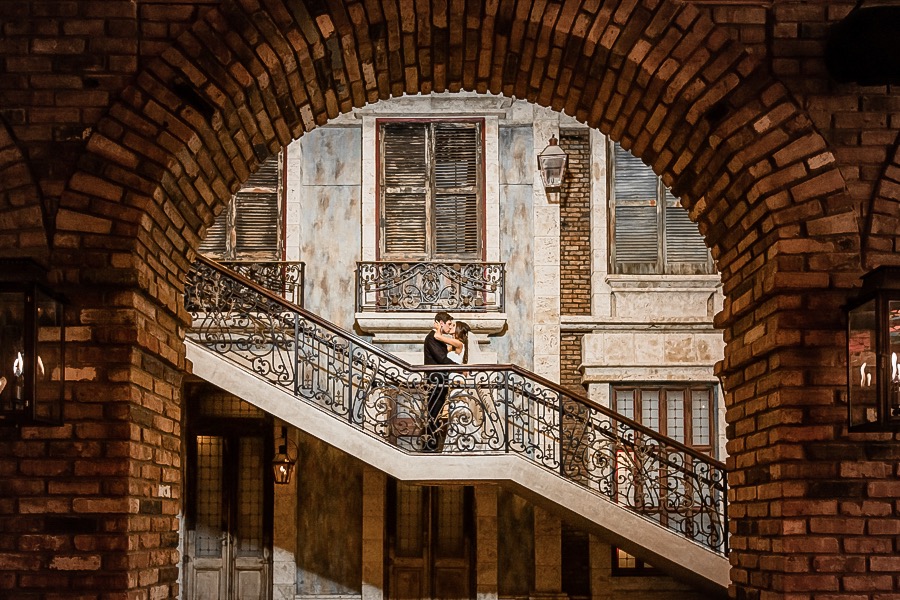
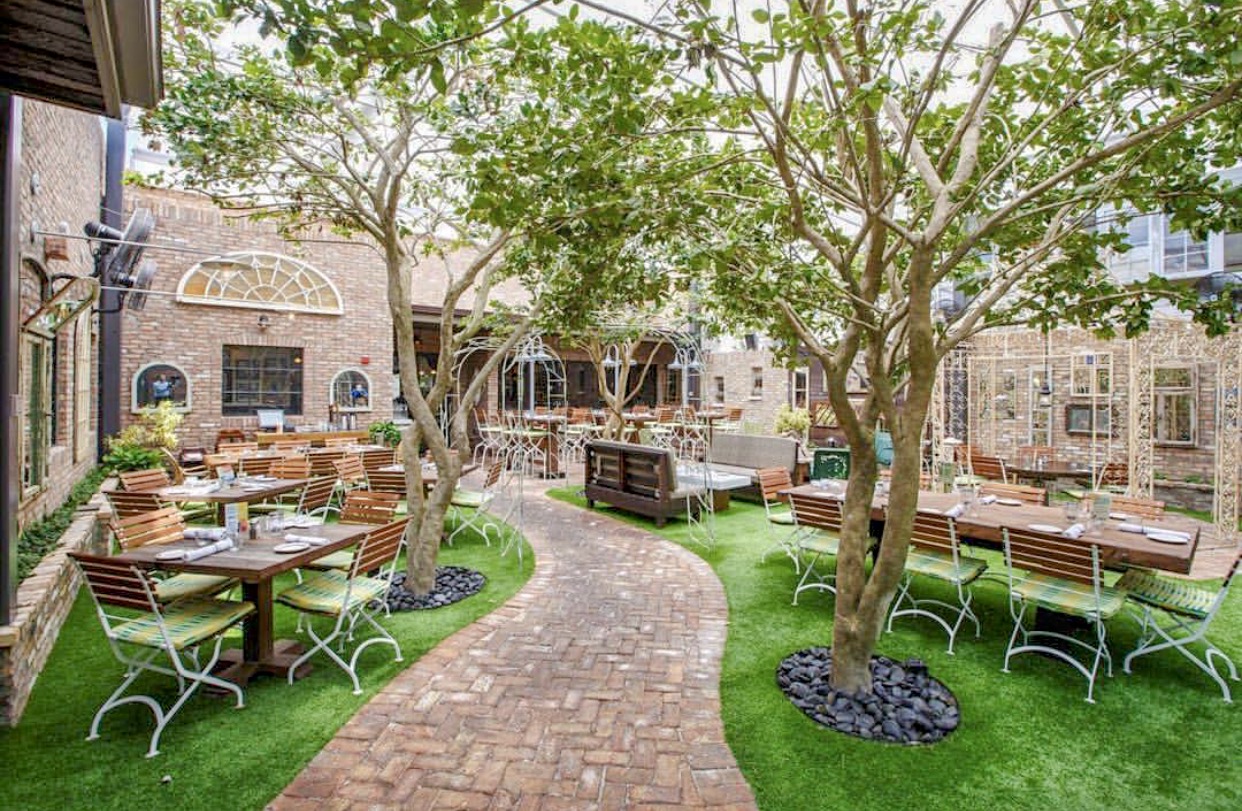
Our Venue: The Cruz Building. This is a 3-story building in Coconut Grove, Miami. We had our ceremony on the first floor, cocktail hour on the third floor with adjacent outdoor terrace, dinner on the second floor, and reception back on the first floor.
Step 3: Choosing Vendors
Like I mentioned previously, this will largely depend on the venue you choose. Some venues (country clubs, hotels, etc.) will include food and alcohol in their total fees. Others, like the one we used, was literally just the rental of the building. This meant that we chose everythinggg else on our own, which means that I can tell you all how we decided on each and every one.
- Photographer: This was one of the first things we knew we had to lock in. If there is a specific photographer you know you want, reach out to as soon as you know your date. We chose our photographer based on price, photos we had seen that they did at our venue and loved, and just how we felt after meeting with them. Make sure you find someone who is willing to work with you on your photography package. We didn’t include an engagement shoot upon booking but ended up adding it (along with rehearsal dinner photography) later on.
- Questions to ask: cost (obviously) and what is included in that cost. How many photographers will be attending? (we knew we wanted two). How long they will be with you on the day of, and how much extra is it for additional time? How long is their usual turn around for you to receive your photos after the wedding?
- Our Vendor: Nat and Bryan
- Videographer: This is something we were originally on the fence about but are thrilled that we ended up doing it. Yes, it’s an additional cost, but we have already watched our wedding video multiple times and can’t get enough of it. Photos are great, but having lifelike memories is even better, so if you can afford it in your total budget, I guarantee you won’t regret it.
- Questions to ask: Similar questions to what we asked the photographers.
- Our Vendor: Senderey Video
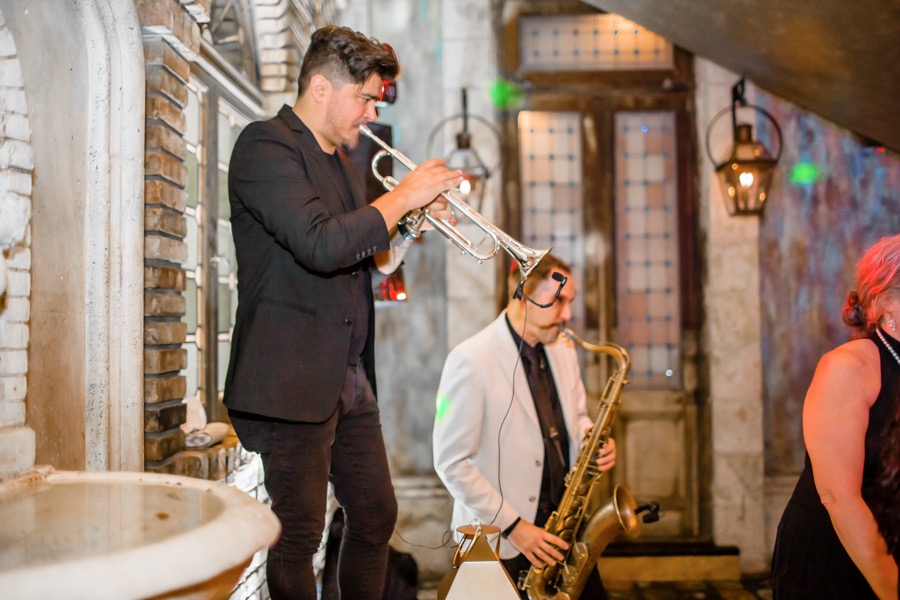
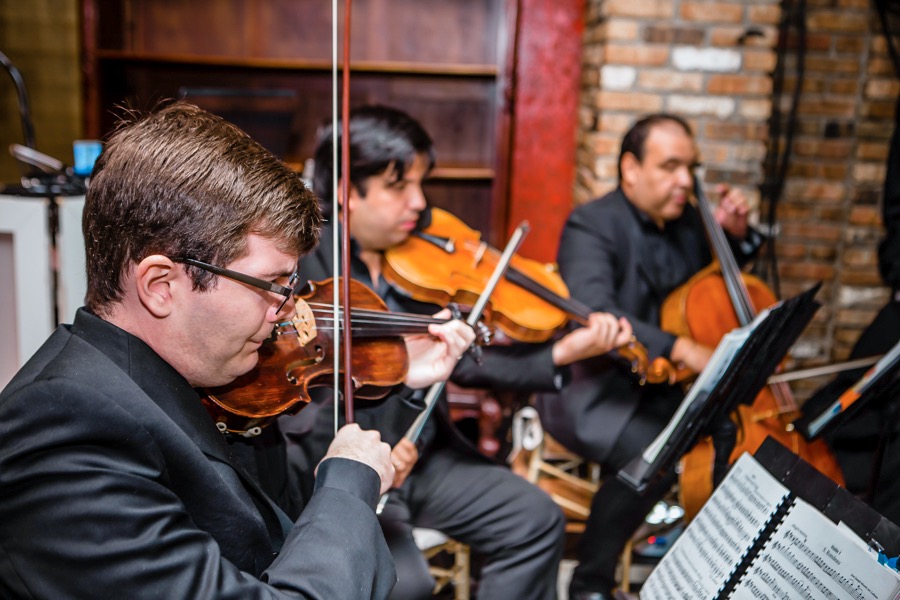
- Music: This is soooo important. After we chose our photographer and videographer (so we had a better idea of our budget) we knew this would be the next thing that really mattered. Erik and I knew we wanted a DJ with live instruments (if you have never seen it, check this out). We met with several DJ companies and got price quotes based on what we were looking for, and we read a thousand reviews online. If you really want, you can even ask them to visit a wedding they will be playing at so you can see them in action before booking them. In addition to the DJ company, we found another company for our ceremony music because we knew we wanted a string trio. This is not 100% necessary, and you can have your DJ play your ceremony music if your budget doesn’t allow for live musicians
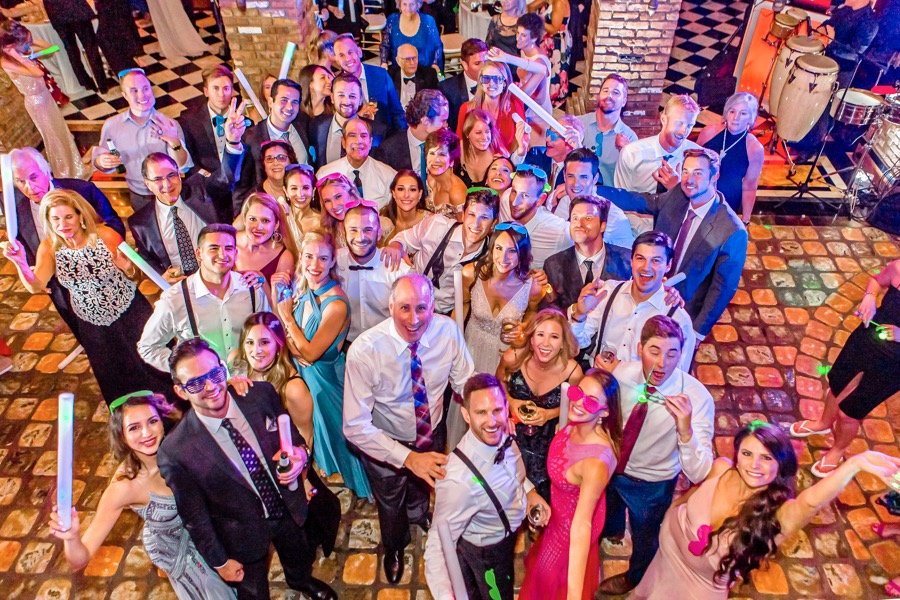
- Questions to ask: How many DJs work with the company? How will they decide which DJ to match you up with? Can you visit an event they will be at beforehand? Will they also be supplying any dance floor or venue lighting? (ours did). Do they offer anything else such as party paraphernalia and/or la hora loca? Will they be able to play any special requests and/or specific cultural music you might have? Will they allow you to create a ‘must play’ and ‘do not play list’?
- Our Vendor: DJ – Vision DJs, Ceremony Music – Master Musicians
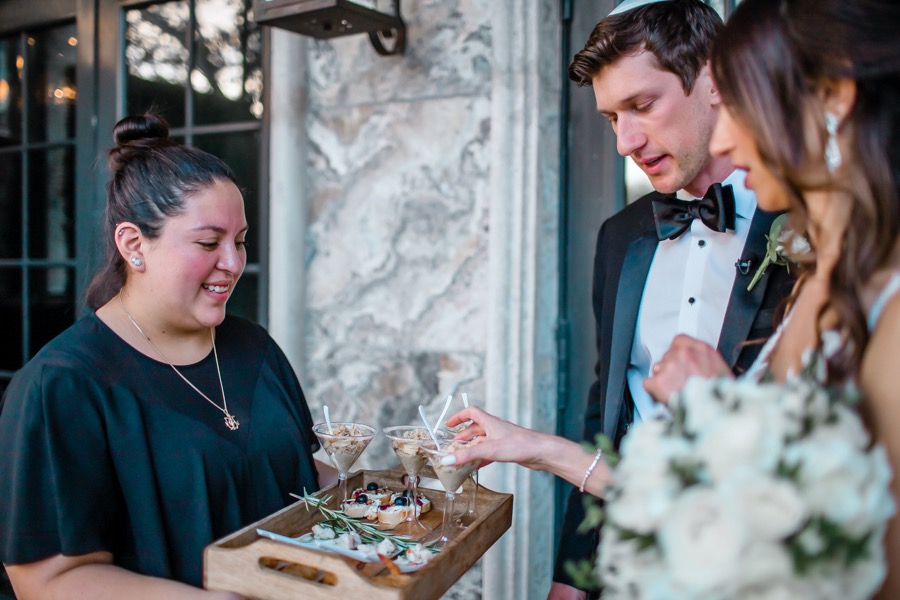
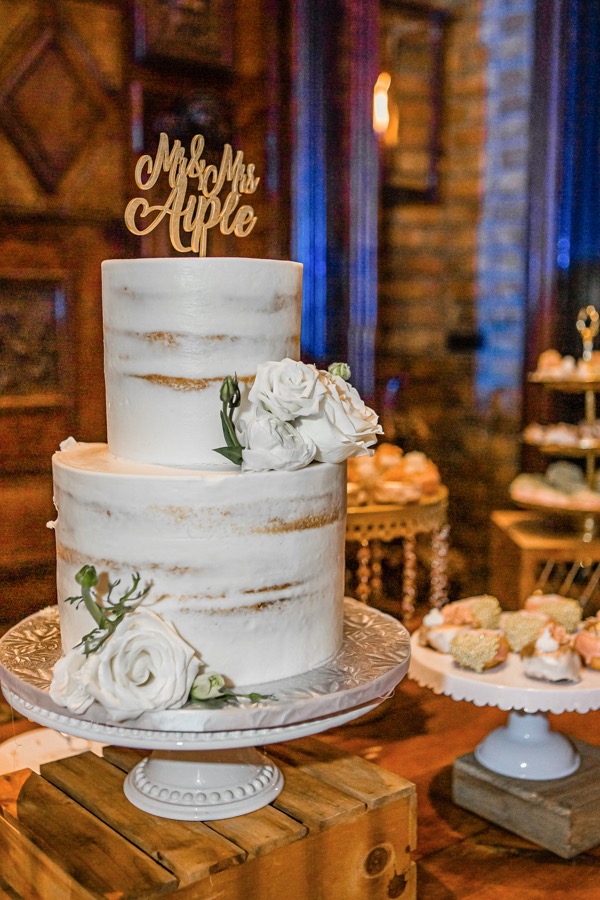
- Food: Because the catering company was not chosen by our venue and we had to pick one on our own, we had our tastings very early on (to make sure we liked the food before fully committing). We decided to do a sit-down plated dinner instead of buffet style for several reasons: 1. Space: the dining section of our venue was a little tight and we didn’t want people wandering around, 2. Style: The Cruz Building is very elegant, and not that we have anything against buffet dinners, we just thought the plated dinner fit more with the theme of our wedding. For dessert we decided to go with a very small cake (just to have something to cut) and a dessert bar, because we love sweets and we like options. We had mini shooter desserts, mini donuts from Mini Donut World, and a Nitrogen ice cream bar that my mom surprised us with!
- Questions to ask: What food is included with your package? Are there up-charges for certain foods? How many hors d’oeuvres are offered per person? Is a cake and/or dessert bar included? Do they offer meals for people with dietary restrictions? Is alcohol included? If you want to buy your own alcohol is there a corking fee? How many bar tenders/servers are offered based on your guest count (we added an extra bar tender to try to diminish the lines).
- Our Vendor: Inspired Events
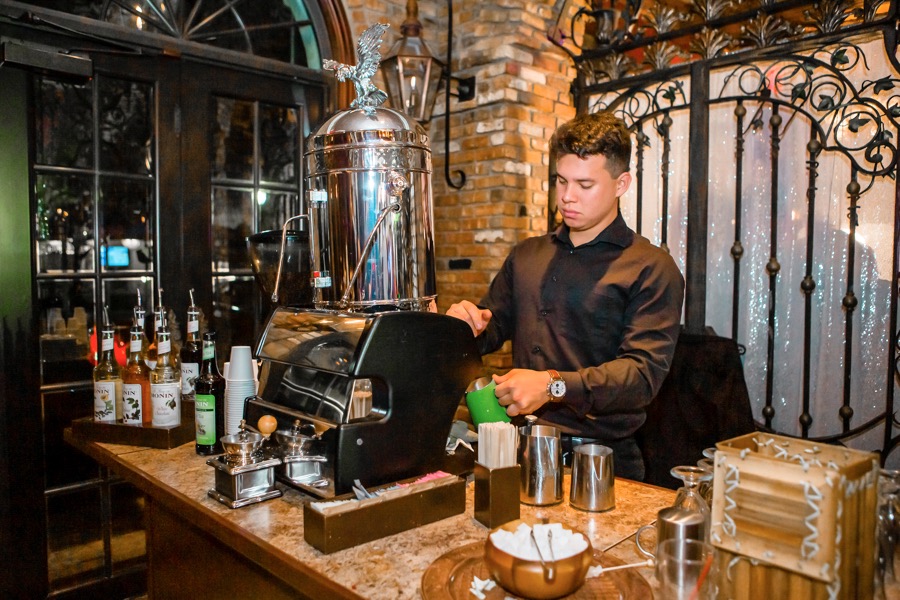
- Beverages: Our catering company gave us the option of using them for the alcohol package or purchasing it on our own without a corking fee. This was huge for us because we read online that you can save a significant amount of money this way. We found a local liquor store that would allow us to purchase whatever alcohol we wanted and return any unopened bottles! They even delivered our alcohol to the venue on the day of and picked up the remainder at the end of the night. I highly recommend doing this if you can. Our catering company also only had a package for regular coffee and we wanted a little more than that so we found a second company to set up a beautiful coffee station during our reception with an assortment of coffee, lattes, cappuccinos, teas, hot chocolate, etc.
- Questions to ask: Will they be able to deliver and/or pick up the alcohol? Are there any fees for this? Can you return unopened bottles? Is there a minimum you need to spend?
- Our Vendors: Big Daddys Liquors, Aroma Espresso
- Florist: I knew I wanted flowers, but I was not expecting them to be so costly. We ended up choosing a florist later in planning process, once we had a better idea of how our budget was doing. We were also very lucky because our venue was extremely decorated as is, so the florals we chose did not have to be super extravagant. Cost will also depend on what theme you are going for, and if there are any specific flowers you want (for example: orchids are pricey). We went with small center pieces on most of the tables, and larger centerpieces on some (to give dimension, and to keep the cost down). The best advice I can give here is to reach out to several companies, tell them what you want, and compare prices you get from each.
- Questions to ask: Can you see photos of their previous events? What specific flowers and/or candles will be included? Do they offer a trial centerpiece prior to the big day? Do they allow adjustments to the invoice should you change your mind about something?
- Our Vendor: Nevot Flower Designs
- Officiant: If you are a member of a synagogue, church, or any other religious institution, this should be easy for you. You can just ask the religious leader at your organization to head your wedding ceremony for you. Unfortunately for us, we are not very religious and only attend temple on the high holidays. Because of this we had to find a Rabbi that fit the type of ceremony we wanted to have. We did this using wedding wire, reading reviews, and meeting with several rabbis until we decided on one.
- Questions to ask: How many times will he/she meet with you before your big day? Do they have any religious restrictions? (ex: we made sure to pick a rabbi who was ok with starting our ceremony before sun-down on the sabbath). What traditions/customs do they include in the ceremony, and are they able to make adjustments should you want something different? How long does the ceremony usually run?
- Our Vendor: Rabbi Robert Silverman
- Planner: Since we were very hands on with our wedding (partially due to my type A personality), I knew we wanted to manage most of it ourselves. I also knew that I didn’t want to deal with the added stress as our wedding came closer, so we hired a planner for the “month of.” This meant that once everything was chosen and all contracts were signed, she would come in an take care of everything else. She put together our day of timeline, scheduled all deliveries and drop off’s at the venue, came to our final walk through and rehearsal walk through, brought and set up all of our extra (welcome sign, seating chart, cake cutter, etc.), passed out the party paraphernalia, and made sure everything ran smoothly on the day of. She was honestly a life saver.
- Questions to ask: Cost and what is included? Will they be able to bring extra items if needed? When will they first meet with you and how often will they meet with you? Will it be just them, or will they have an assistant on your wedding day?
- Our Vendor: Events By Nicky
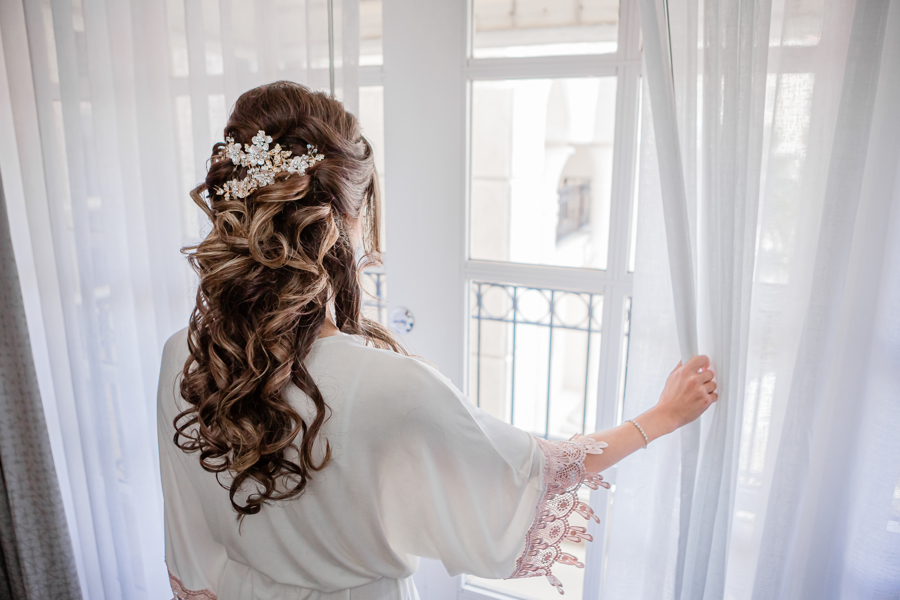
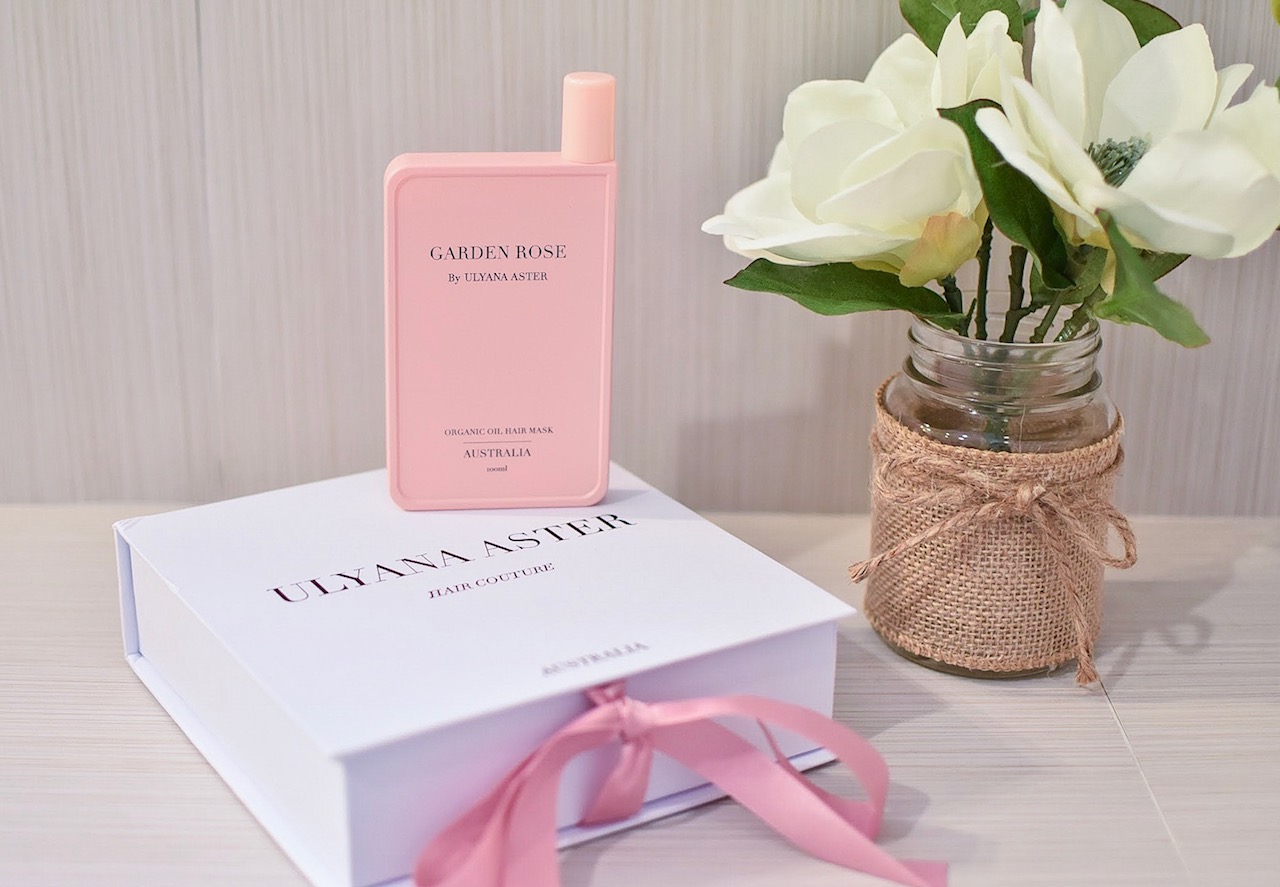
- Hair: My mom is my hairdresser, so I lucked out in this category. But even though I knew who was going to do my hair, I didn’t really know what I wanted to do with my hair. I knew I wanted something a little different than just leaving it down like it always is, but I didn’t really want to put it all in an up-do either. So, what’s left? Half-up Half-down obviously. We decided on that and jazzed it up with some extensions and a beautiful vintage style hair clip from Ulyana Aster that fit perfectly with the theme I was going for. I suggest looking at photos of other hair styles for inspiration but remember that everyone is different and what looks a certain way on one person might not look the same on you.
- Questions to ask: Ask to see photos of work they have done before. What time will they be able to arrive on your wedding day? How many hair trials can you do and is it an additional charge? If you want your bridesmaids hair done as well, will they be able to do it? If so, do they offer group rates?
- Our Vendor: Hair by Siggy

- Makeup: For makeup I used someone who has done my makeup multiple times before for other events. She is a makeup artist for MAC and I love her work. She did a trial run for me the day of my bridal shower and everyone loved how it came out. Bring photos with you when you go for your trial so he/she knows what you want and take photos of your own trial so you remember what you liked/didn’t like.
- Questions to ask: similar to what I asked my hair stylist.
- Our Vendor: Tamara

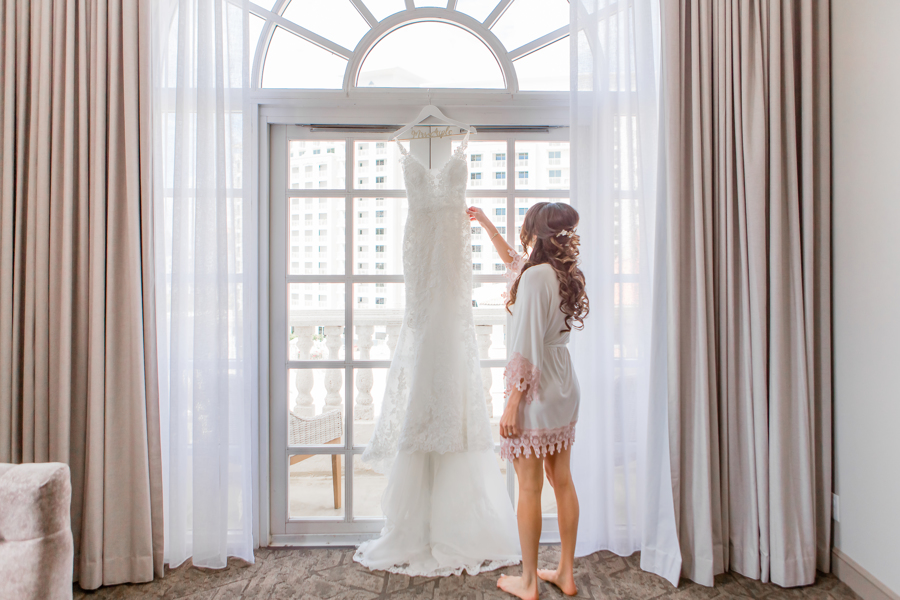
- Hotel: This was easy. Make sure it’s close to your venue (if your venue is a hotel then there you go), make sure its affordable based on your budget, make sure they have a room that you love for your “getting ready” photos.
- Questions to ask: Do they offer block rates if you want to reserve rooms for your guests? If they do offer block rates does it need to be paid for in advance or can your guests pay for them as they sign up? Will they upgrade you to a suite if enough gusts sign up for rooms?
- Our Hotel: Hyatt Regency Coral Gables
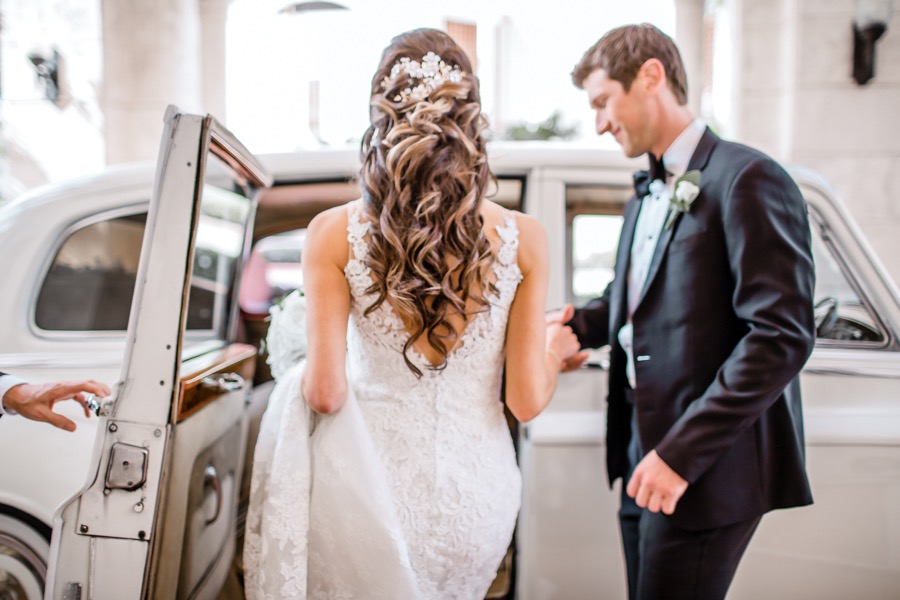
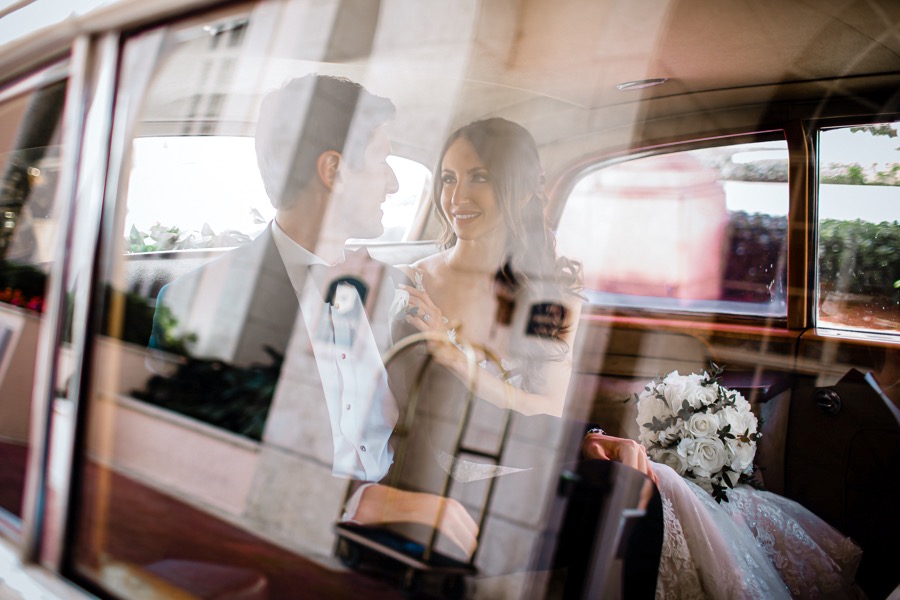
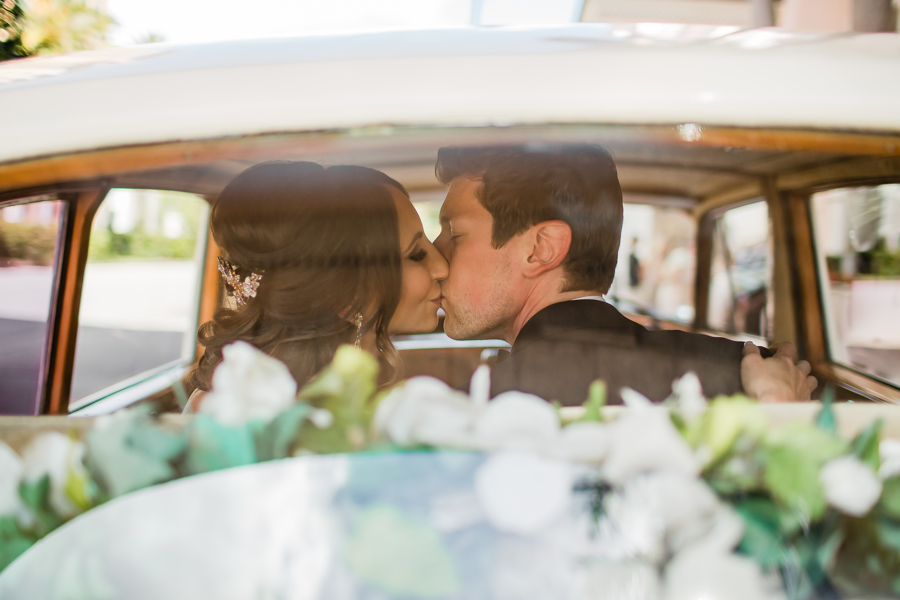
- Transportation: This depends on your venue and where your guests are coming from. Our ceremony, cocktail hour, and reception were all in the same place, and all our guests were staying somewhat nearby, so we did not purchase group transportation but we did pay for valet. That being said, we did have transportation for us from the hotel (where we did our first look) to the venue. This was a gift to us from my brother and the photos we got were truly magical.
- Questions to ask: Cost per hour? What cars do they offer?
- Our Vendor: MPH CLub
- Photo Booth: We went to several weddings that had this and it was so fun, so we added it as well. Like the ceremony music, this is something that is not necessary, but will definitely give your guests a fun little take home to remember your wedding by.
- Questions to ask: Do they offer different back drops? Do they offer different film strips? What props do they usually bring?
- Our Vendor: Vision Photo Booth (same as our DJ company)

- Rentals: Sometimes this will come with your venue, and sometimes it will be extra. For ours, we had to pay for the tables/chairs/etc. A lot of venues will have this included and only charge you if there is something specific you want to upgrade. In addition, there are wedding rental companies who may also offer some things that your venue does not offer (for example, we rented charger plates and sweetheart table chairs from a separate company).
- Questions to ask: What do they offer? Is there a delivery/set up fee? Do they offer bulk discounts?
- Our Vendor: Elements and Accents
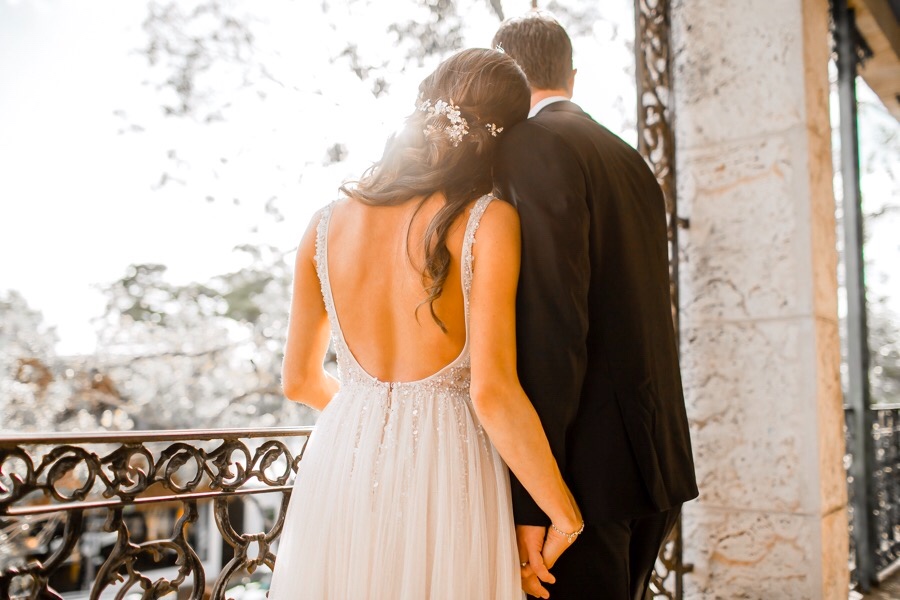
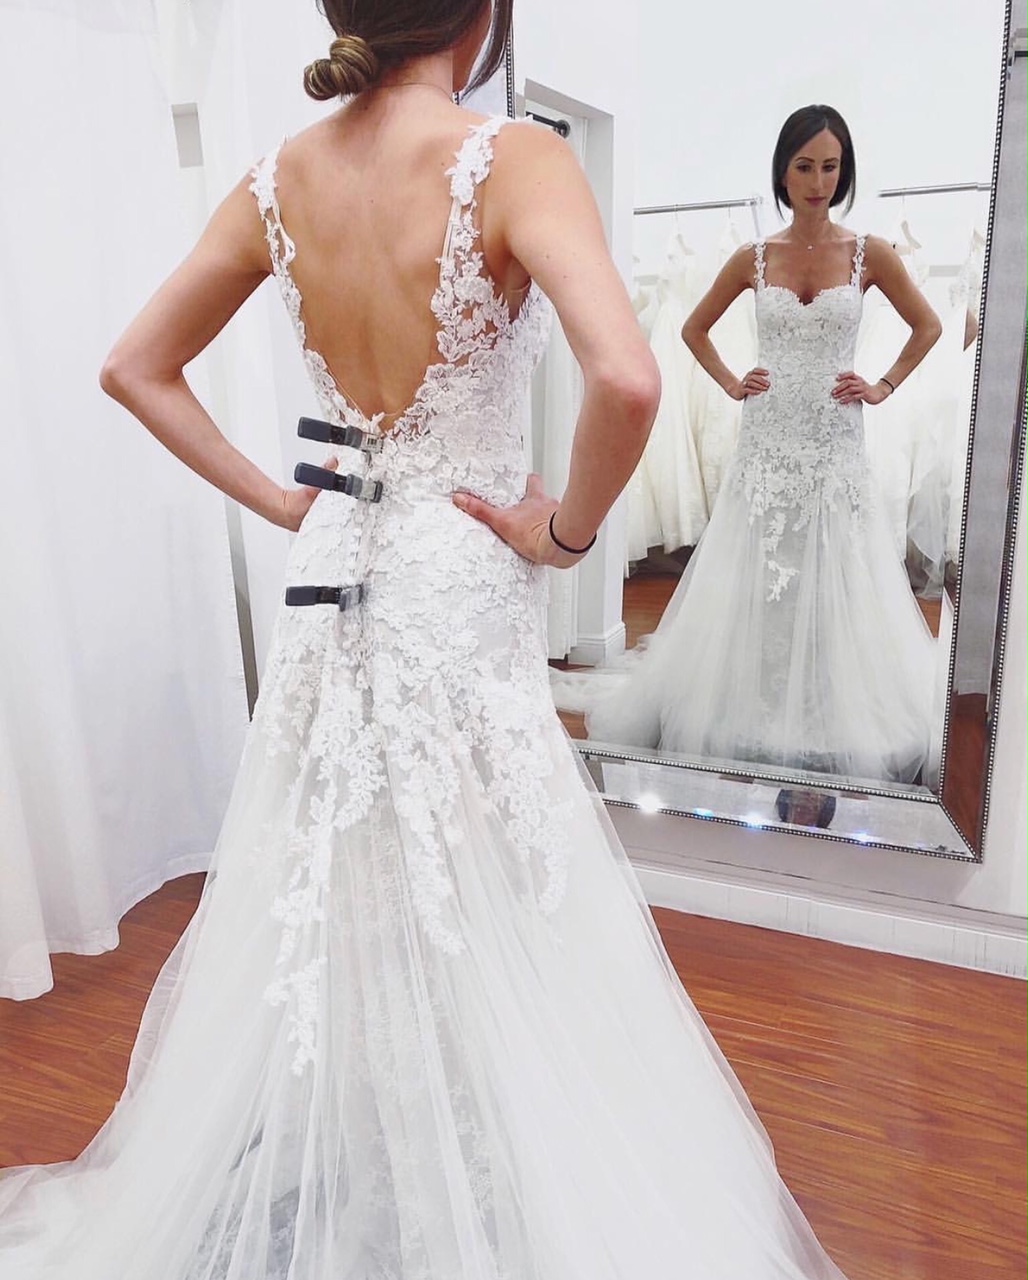
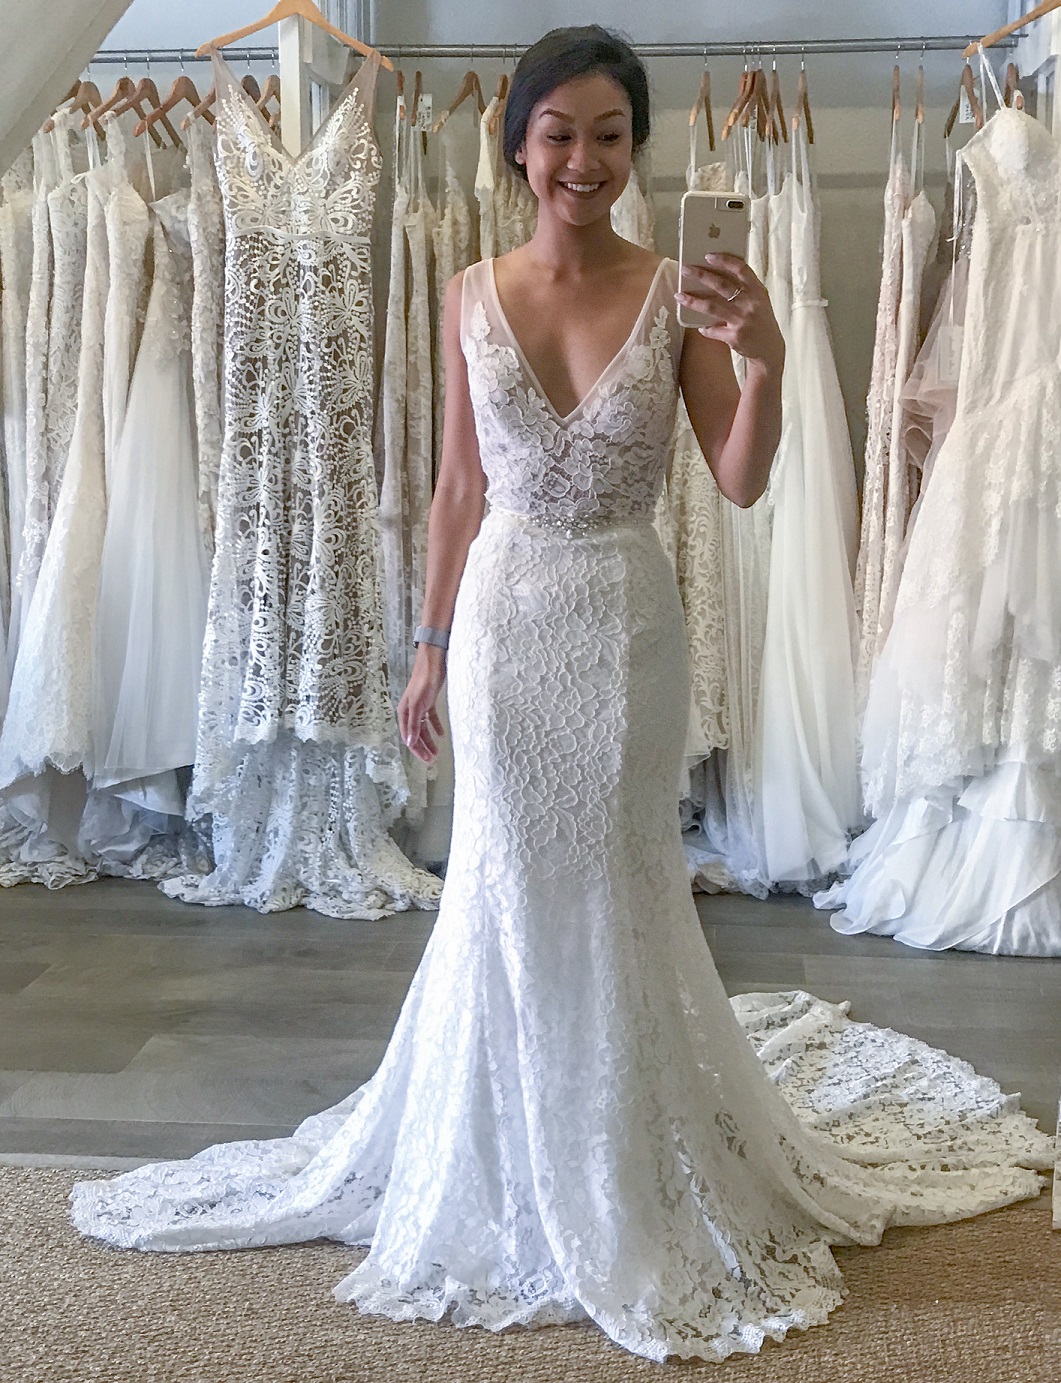
- Dress + Tuxedo: This is something that needs to go into your budget (obviously) but is extremely variable and personal. There are wedding dresses and tuxedo’s anywhere from $500-$500,000. I have a whole blog post on wedding dress shopping which you can read here.
- For me, my ceremony dress was Enzoani, and my reception dress was BHLDN (literally the best ‘one stop shop’ wedding website that exists)
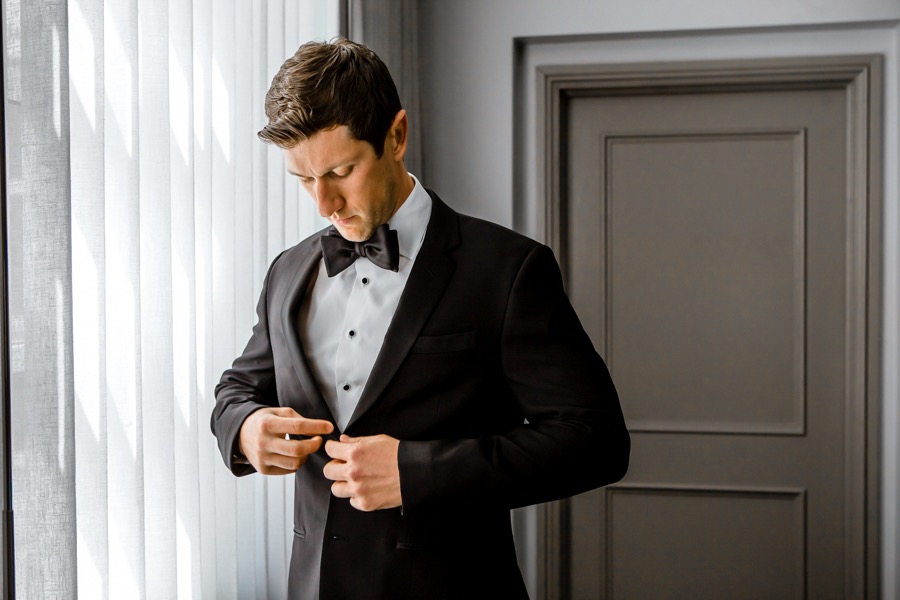
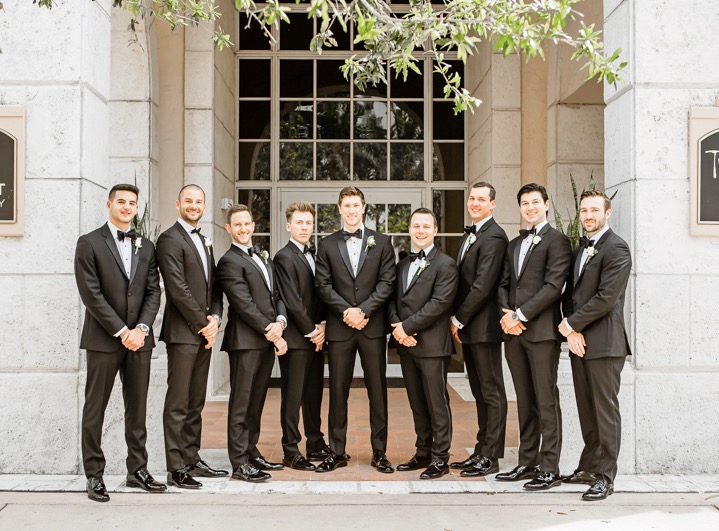
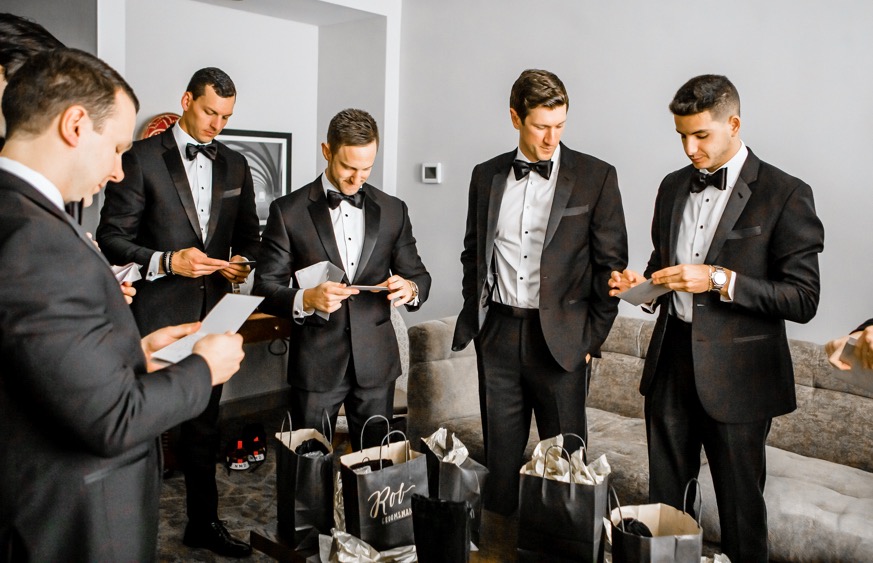
- For Erik and his groomsmen we used The Black Tux for tuxedo rentals (they were amazing to work with).
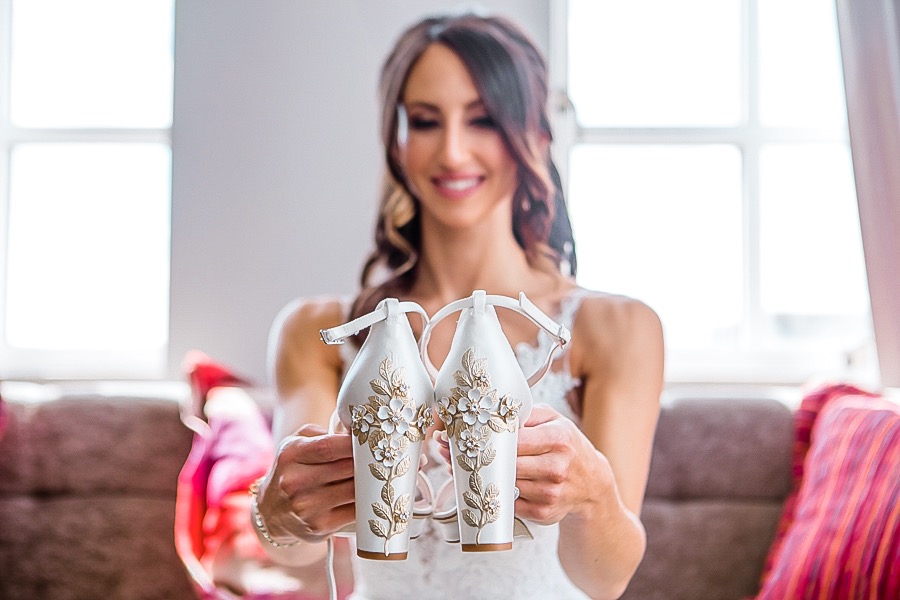
- Accessories: Obviously the dress is what stands out the most, but it’s the accessories that complete the look. My dress had a somewhat vintage feel to it, so my vision was to stick with that look. It took some looking around to find the right shoe, but in the end I ended up finding a company who made me exactly what I wanted.
- Shoes: Custom Harriet Wilde shoes purchased at a trunk show in NYC. I tried on several of their shoes but the Arabella Block Heels were so comfortable and sturdy! And all of their shoes are completely customizable. I added the gold blossom embellishment to somewhat match my hair piece (discussed earlier). I also got these Sam Edelman shoes to change into and wear with my second dress.
- Earrings: Again, I knew I wanted to stick with a somewhat vintage feel so when I found these from BHLDN I knew I had to have them. I also purchased more durable earring backs and lobe supporters so that my ears wouldn’t be bothered at all by heavy earrings.
- Bracelet: You guessed it, also from BHLDN because that website is the absolute best. Just a little something delicate to add to my wrist so it had a little bling.
- Short set + Robe: I wore this short set while getting ready, and this robe when everyone else arrived.

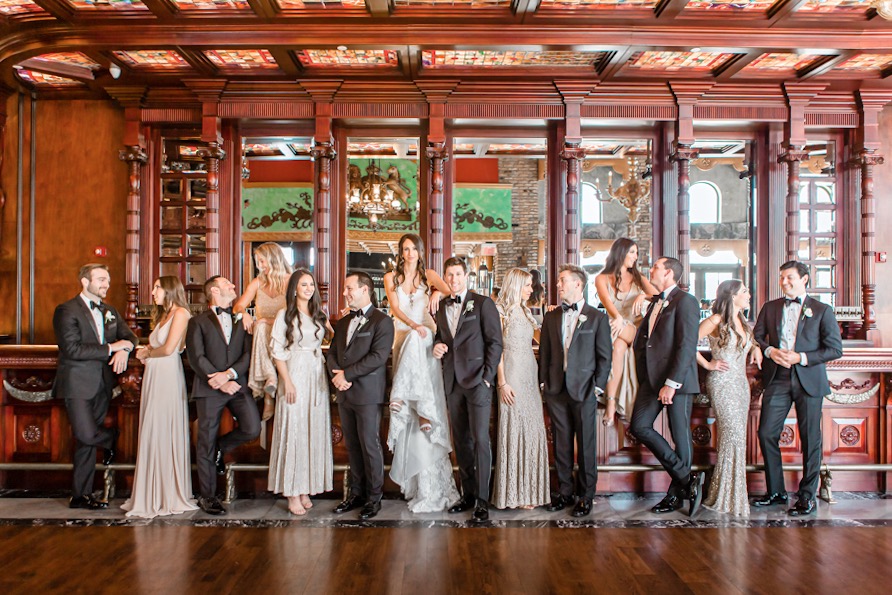
- Bridal Party Attire:
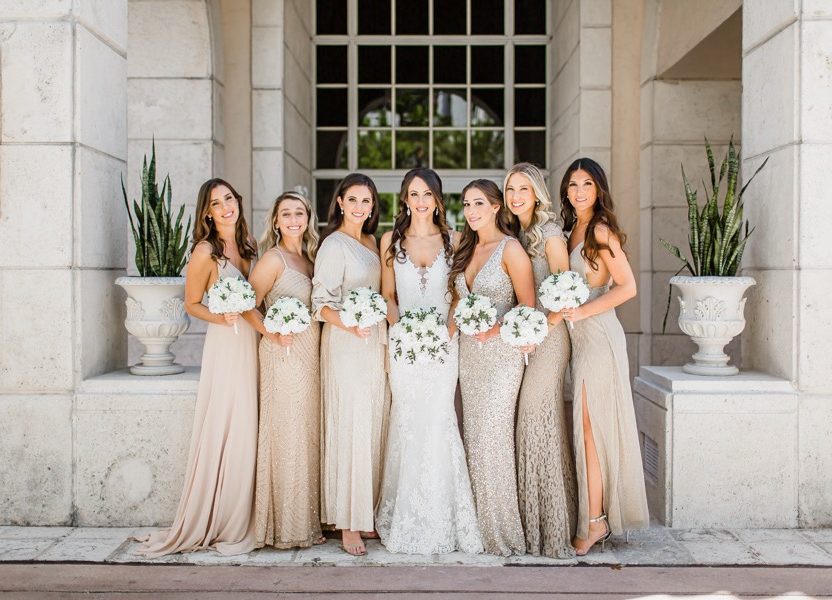
- Dresses: I had my girls pick out their own dresses. My only request was that they were floor length, and in the light gold / champagne color scheme, AND since I’m OCD, that they send me a photo of it prior to purchasing. I think they all did an amazing job.
- Tuxedos: We used The Black Tux for Erik’s tuxedo rental in addition to all of the groomsmen. They really are amazing to work with and easy to use and all of their options are super stylish. Also, I happen to have a discount code for you to use should you want $15 off your rental (code; ERICA15).
Step 4: Deciding on DIY Projects
If there is something you saw on Pinterest that looks like it could be fairly easy to accomplish, go for it! I thought it was fun that we were able to contribute to our own wedding. But be careful not to start a project that is over-ambitious, it will only add unnecessary stress.
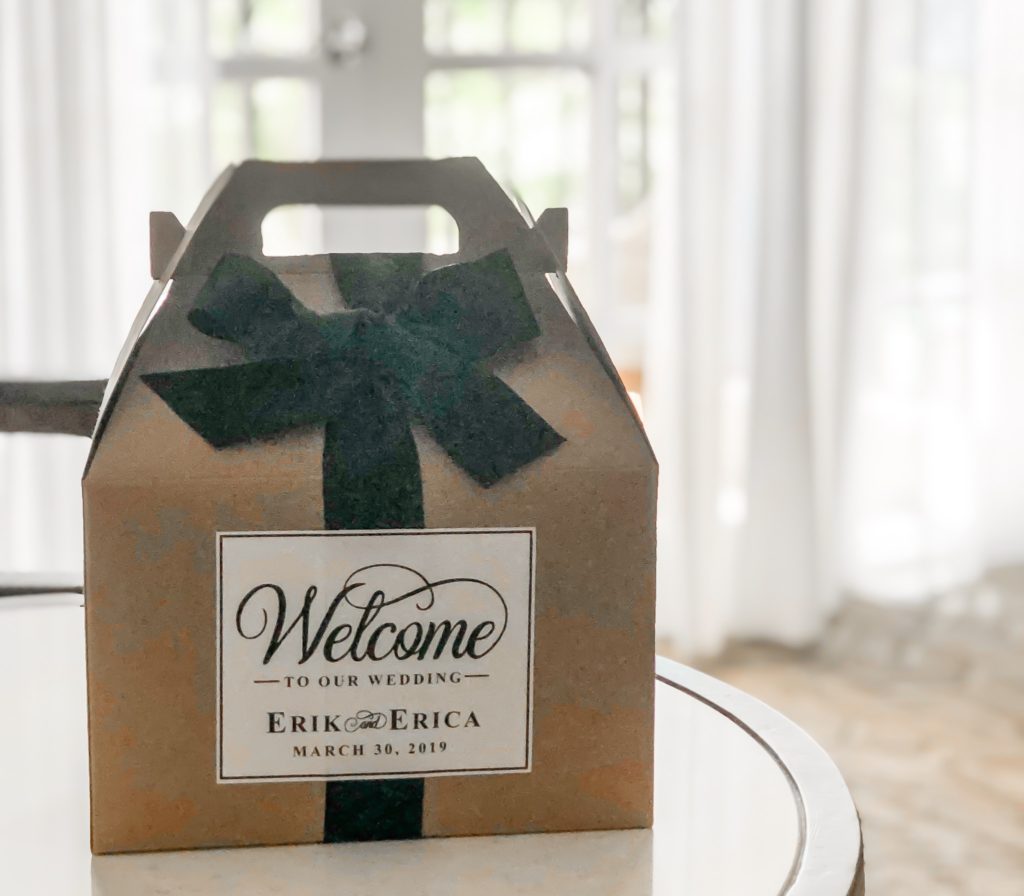
- Welcome Bags: This was fun and fairly simple for us to do. We bought the actual boxes here (which we customized) and the template for the welcome card here (which we printed and cut out ourselves using this). We then purchased the items we wanted to include online – snacks from boxed, and some other bulk items from Costco. We bought this adorable “first aid bag” here (which we filled with gum, Emergen-C, Band-Aids, and Tylenol), and lastly, we bought shredded paper to line the bottom. The easy part was putting them all together, and the hardest part was tying the bows at the end and making sure they all looked good!
- Party Paraphernalia: Since this was not supplied for by our DJ, we simply purchased it ourselves off amazon. We bought light up foam sticks, colored glasses, light up rings, and glow sticks. We gave this to our planner beforehand and she handed them out half way through the reception.
- Seating Chart: Before we even got engaged I knew I wanted a mirrored seating chart, but I had no idea how to make it happen. Finally I found a lovely store Love Storey Weddings on Etsy that printed vinyl seating charts! All we had to do was find a mirror we liked, and my dad built us an easel to hold it up! Once we got the seating chart we just had to space it out on the mirror and apply it ourselves and voila! It came out absolutely perfect.
- Wedding Favors: This is the only DIY project I ended up regretting. We knew we wanted to give out something meaningful, and I loveee to bake. One of my friend’s favorite things that I make is puppy chow, so I thought filling 150 mason jars with it would be a piece of cake! Wrong. Not only did I buy labels for the mason jar lids, but I also hand cut and tied little thank you cards around each mason jar. Lastly, the week of the wedding Erik and I made 14 batches of puppy chow and it took us about 6 hours to do. We brought the boxes of mason jars and this stand to our planner to set up at the reception, and while it turned out to be a hit, it definitely caused us more stress than necessary.

- Extras (Décor, Sandals, Sparklers): Some of the extra things we added on our own were:
- Table numbers: I bought these (unpainted) from Etsy and spray painted them myself
- Welcome Sign: also from Etsy, printed and framed on our own to display as guests entered.
- Menus: you guessed it, we got these off Etsy as well and customized, printed, and cut them out ourselves (this helped)
- Sandals: You can buy super affordable sandals from old navy, and these cute little tags from Etsy to give your guests something more comfortable to change into while dancing. We also got this to place over the crates holding the sandals.
- Sparklers: I loved the Idea of a sparkler exit and am so happy we did it! We purchased the sparklers here. Advice: buy the extra long ones (36″) so you have plenty of time for photos as they burn.
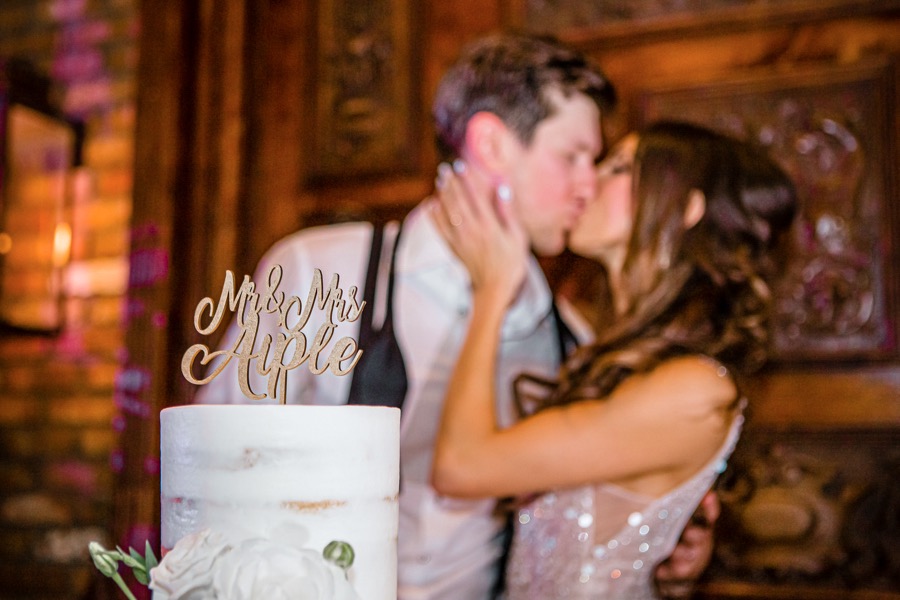
- Cake Cutter + Topper: Cake cutter by Kate Spade, and cake topper from Etsy.
- Gifts for the Bridal Party:
- For the girls: I ended up using my favorite wedding website, (which you know by now is BHLDN) to purchase a really beautiful pair of earrings for each of them. I also got them all a robe from Plum Pretty Sugar (to kind of match the one I got for myself). And these gift bags from Etsy.
- For the boys: Erik got them all a really awesome decanters, with their initials engraved on them and their role in the wedding. And these gift bags from Etsy.

- Gifts for Family:
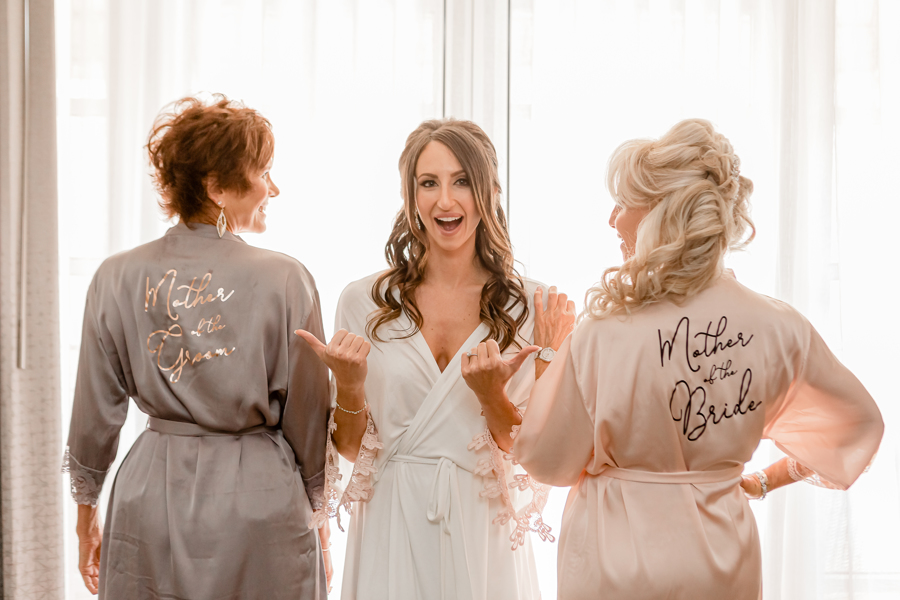
- Mother of the bride: I got my mom a bracelet from Lat and Lo with the coordinates of the hospital I was born at, and this robe. Erik got her this adorable canvas with mine and my brother’s birthday on it, and the date of our wedding with his name on the bottom.
- Father of the bride: I got my dad these cuff links, and this tie clip. Erik got him a decanter to match the groomsmen’s (except it said Father of the Bride), in addition to a bottle of his favorite whisky.
- Mother of the Groom: I got my MIL this adorable necklace, and this robe. Erik got her this really sweet picture frame.
- Gifts for Each Other:
- My Gift to Erik: gifting something for each other obviously isn’t necessary, but I thought it would be really nice to get each other something that we could look back on. I was trying to think outside of the box, so I got him something I knew he had been wanting for a very long time – flying lessons! I reached out to a local flight school and got him a gift certificate for an intro course and some extra lessons. To go with it I got him a metal airplane engraved with our names and date of our wedding.
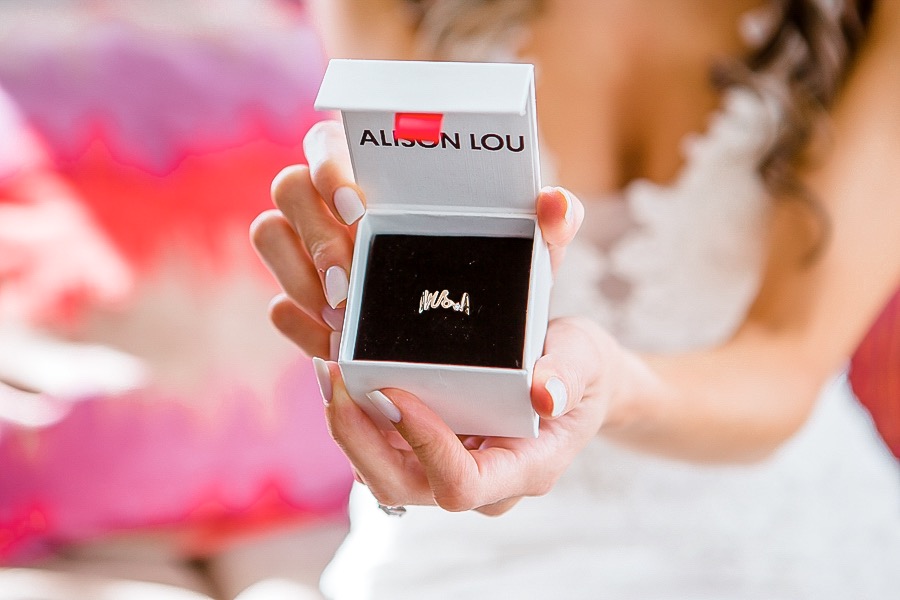
- Erik’s Gift to Me: One of the bests and sweetest gifts I have ever received, and definitely something I will always remember our wedding by, was this beautiful “Mrs. A” ring Erik got for me. It’s something I will always cherish, and can hopefully one day pass down to future Aiple generations.

Step 5: Selecting and Sending out Invitations
Invitations. This is such a broad category. You can get simple printed invitations from websites such as minted, or you can go all out and get engraved invitations with all the bells and whistles. Whatever your preference might be, ours was somewhere in the middle. We wanted something that people would appreciate, but also something that didn’t cost a fortune (knowing they would all just end up in the garbage at some point anyway).
We went to 3 different local invitation places to see what they offered and compare prices. We ended up going with one that two of my best friends had used as well called PS Invitations. They were able to create what we had envisioned and figured out a way to do it at a reasonable price.
The best advice I can give you here is to choose a design that goes with the theme of your wedding, and don’t be afraid to customize it to your liking! We changed the fonts multiple times until it looked right, added gold foil to give it that little extra touch we were looking for, and added a pocket on the back of the invitation to hold the RSVP card, and welcome dinner/farewell brunch cards.
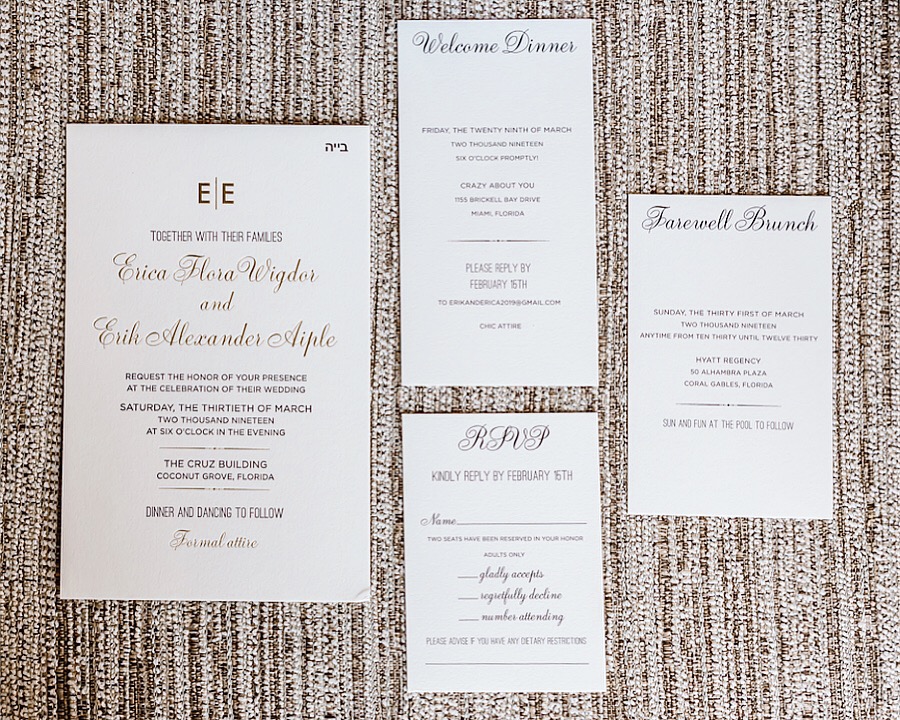
The next part is figuring out when you want to mail out invites and what you want your return date to be for RSVP cards. To me, this depends on how many people you are inviting, where they are traveling from, what your deadline is with your venue for a final head count, and whether or not you sent out a save the date. We decided to do our save the dates with Paperless Post to save money, so we ended up sending our actual invites out about 10 weeks in advance (slightly earlier than what most recommend).
Lastly, don’t forget about stamps. This is something that you will also need to factor into your budget. We put stamps on all of the invitations going out, and on all of the return envelopes as well. You can go crazy and design your own personal stamps here, or you can do what we did and just buy these really cute love stamps. MAKE SURE you take your final invitation to the post office before you go ahead and purchase stamps so you know how much it weighs and what price postage you will need.

Step 6: Planning your Honeymoon
There are sooo many questions to consider here. Do you want to leave for your honeymoon right away or do you want to leave some time after the wedding? Do you want a relaxing destination or something more adventurous? How much time can you take off from work and how much money can you afford to spend on traveling?
All I can tell you is to choose somewhere that will check off all the boxes you want for a first trip as husband and wife. Erik and I wanted somewhere with good food, good wine, some relaxation and some adventure, and a reasonable price. This is why we chose South Africa, Zimbabwe, and Botswana.
I will be working on a honeymoon blog post for you all as well with full details of our trip, so if you have any questions in the meantime feel free to reach out to me directly. But remember that no matter where you go, it will be a memorable destination.

Step 7: Misc + Extras
Just a few extra things that are important to think about for your big day.
- Something old, something new, something borrowed, and something blue – There are sooo many options for what you can do here, so I am simply going to tell you what I did for mine in hopes of giving you some inspiration.
- Something old: I wore my very first set of ruby earrings (my birthstone) from when I got my ears pieced as a baby in my second earring hole. Another option is to use / wear a family heirloom (if you have one).
- Something New: If you managed to get away with not buying one new item for your wedding, I am absolutely speechless.
- Something Borrowed: there are many things you can borrow for your wedding. A lipstick, some jewelry, for mine I borrowed a friend’s veil. Not only did this save me money but it had some meaning to it as well.
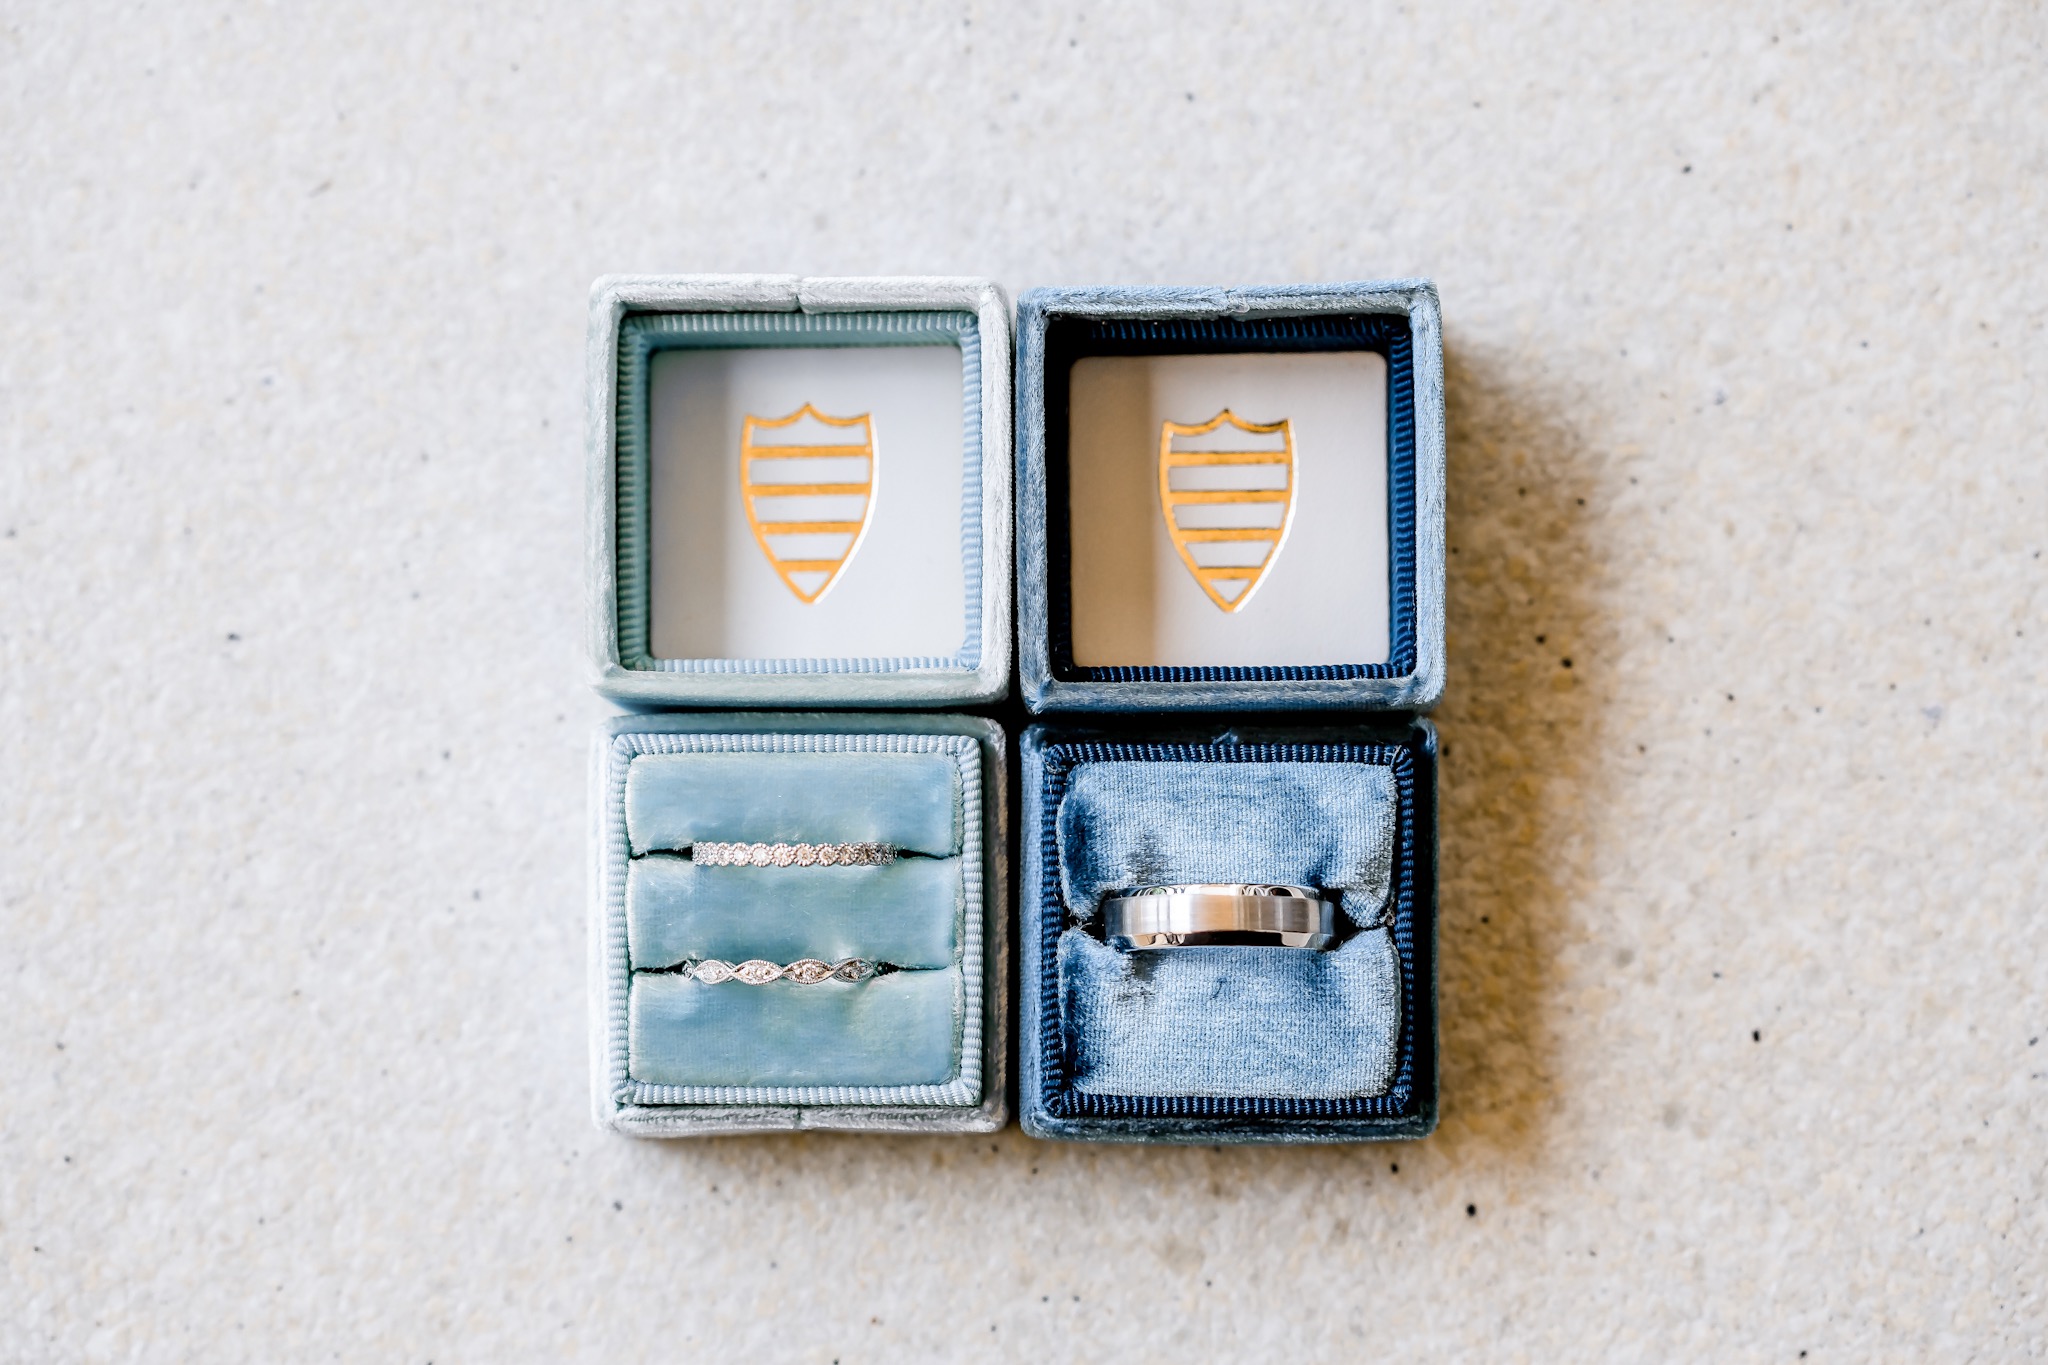
- Something Blue: again, there are so many things you could potentially do here, and I almosttt went with these Harriet Wilde shoes over the ones I got from them. But in the end, we went with blue ring boxes from The Mrs. Box. We got a lighter shade for mine and a darker shade for Erik and now that the wedding is over, we use them every day.
- Picking songs – this can be done at any point during the planning process, but in my opinion the sooner you choose one the better. This way you can familiarize yourself with it, and even take some dance lessons if you want (we took one!). For our first dance song we knew we wanted something different that wasn’t over played, something that had meaningful lyrics, and something that we both really liked.
- Our first dance song: ‘How Long Will I Love You,’ by Ellie Goulding.
- Father Daughter Dance: ‘My Little Girl,’ Tim McGraw
- Mother Son Dance: ‘If I Could,’ Barbara Streisand
- Bridal Party Down the Aisle: Strings – ‘Can’t Help Falling in Love With You,’ Elvis Presley
- Bride Down the Aisle: Strings – ‘A Thousand Years,’ Christina Perri
- Recessional (Exit) Song: Strings – ‘You are the Best Thing,’ Ray LaMontagne

- Save photos – I had so. many. screenshots. (of other people’s photos that I liked). And yes, we ran out of time to take all the photos I wanted, but having an album of photos I liked made it easier to remember them. Luckily for us, our amazing photographers Nat & Bryan were open to doing a post wedding session with us and we were able to get some of the photos we missed!
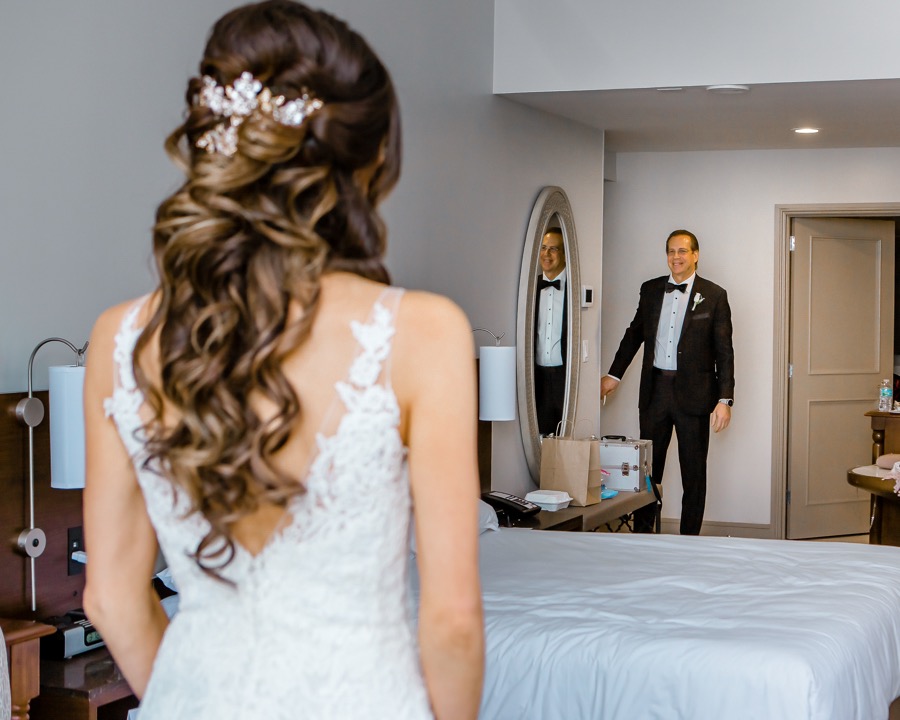
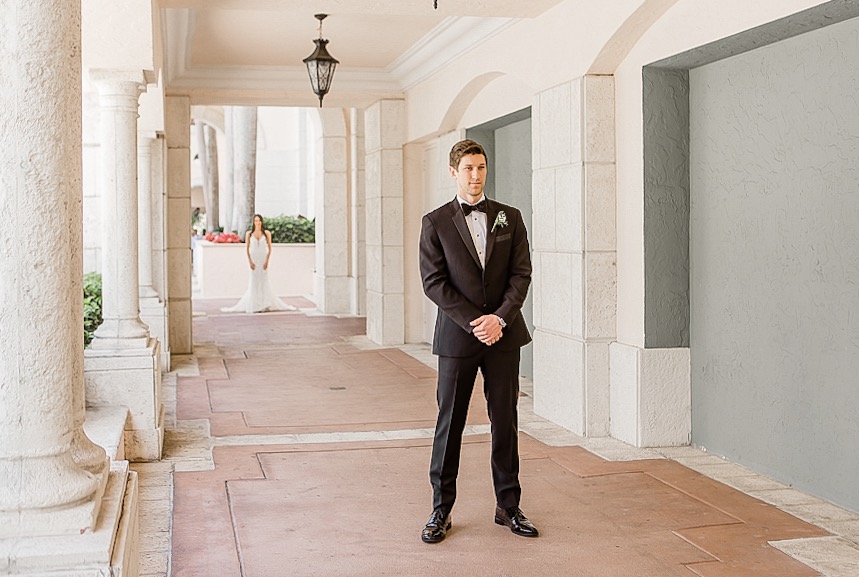
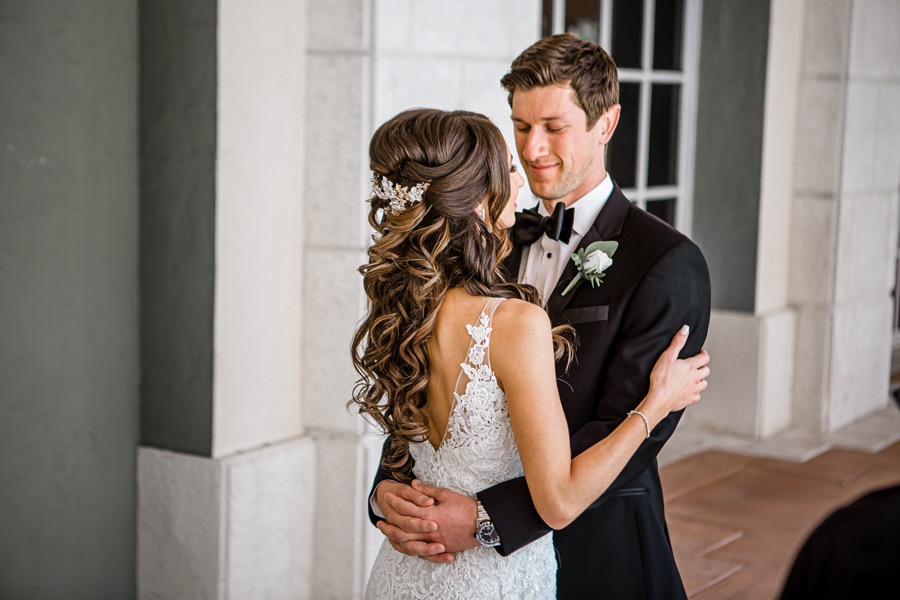
- First Look – Some people do one, some people don’t. In the Jewish religion, signing the Ketubah (traditional marriage license) is usually done before the ceremony and is then presented under the chuppah (wedding canopy) during the ceremony. Because this meant we would see each other beforehand anyways, we decided to do a first look + take our family photos before the ceremony (so we would have more time to be with our guests afterwards).
Step 8: Packing for your Wedding Weekend
I started making a ‘Wedding Checklist’ about 6 months before our wedding weekend, and every time I thought of something I needed to bring, I would add it to the list. This helped ease my stress when it finally came time to pack for the weekend. I also packed things in outfit format – what I needed for the rehearsal dinner, my clothes for getting ready in the hotel room, my dresses and all of the accessories, and my outfit for the farewell Sunday brunch.
Obviously, everyone’s packing list will be different, but there are a few “emergency kit” things I think you should definitely bring with you regardless of where you are going, and how long you are going for. These include: sewing kit, fashion tape, extra earring backs, lobe supporters, bobby pins, safety pins, super glue, hot glue gun (honestly you never know), first aid kit, chap stick, OTC pain meds, emergency snacks, floss, breath freshener, portable phone charger, lint roller, tide pen, extra black socks and bow tie, and a case of water bottles for your hotel room.
Step 9: The Big Day!
This is easier said than done but DON’T STRESS. Wake up with some time to just have to yourself to shower, have your coffee, lay out your dress and accessories; do whatever it is that you need to do before the rush of the day begins. The best advice I can give here is make sure you have some “extra time” in your schedule in case something runs over the time you allotted for it. This will minimize running late for something else.
The next most important advice I can give you is to appreciate every second, take in every detail, and spend as much time with your significant other as you can. You will both be running around doing a million things, and will sometimes be doing your own thing and/or dancing with your own friends, so when you are together, value those moments.
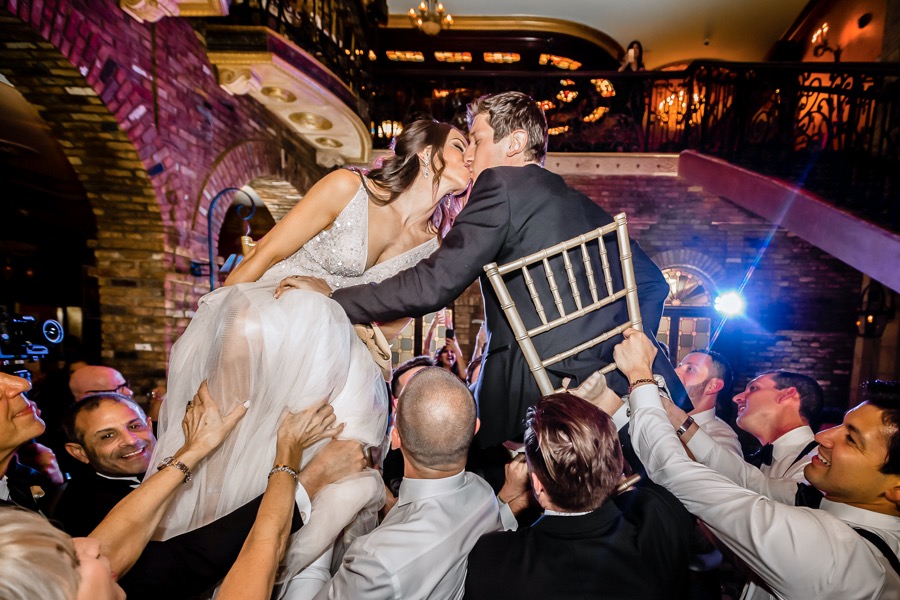
Lastly, have fun! Dance ‘til your feet hurt, sing your heart out, take more pictures than you thought possible, smear cake on each other’s faces, and be cheesily and crazily in love.
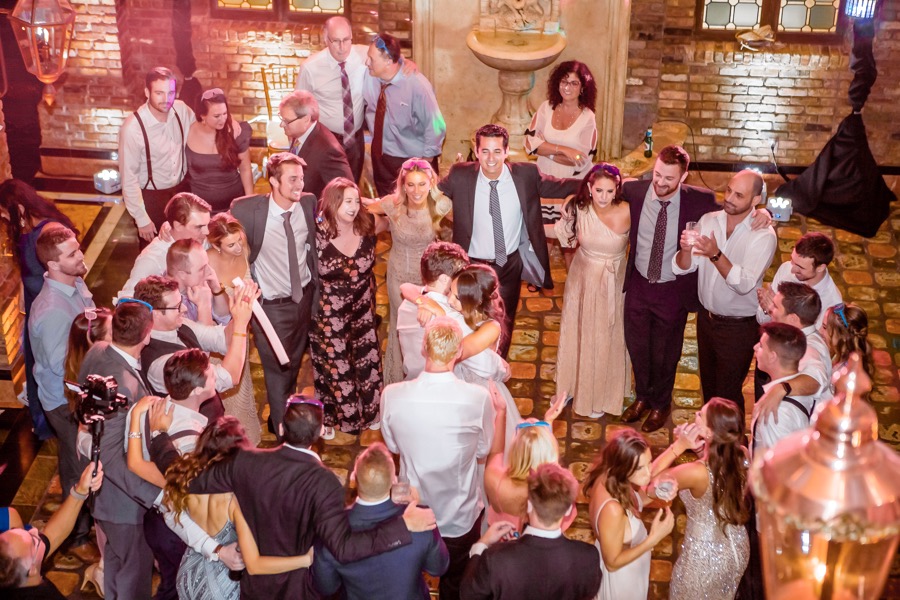
Step 10: The Aftermath
Let me tell you something, post wedding blues are a real thing. We were ecstatic at how wonderful it all turned out, but after being on such a high the whole weekend I guess it’s only normal to feel a little low when it ended and all our guests had left. If this happens to you just know that it’s normal (check this out), and it’s ok, and it will pass (rather quickly actually).
And don’t worry, there are still wedding things left to do! Like prepare for your honeymoon, and write thank you cards (these are the ones we used), and watch your wedding video, AND wait to get your photos so you can look through them a million times.
I hope this very thorough (and ridiculously long) blog post has helped you in one way or another. (If you are still reading I am extremely impressed). It was definitely nice for me to relive everything by sharing it all with you.
As always, if you have any questions for me, you can comment on this article, send me a DM on Instagram, or send me an Email (erica@doctordiariesblog.com), and I would be beyond happy to answer them for you.

Happy Wedding Planning!!
XoXo
-Erica
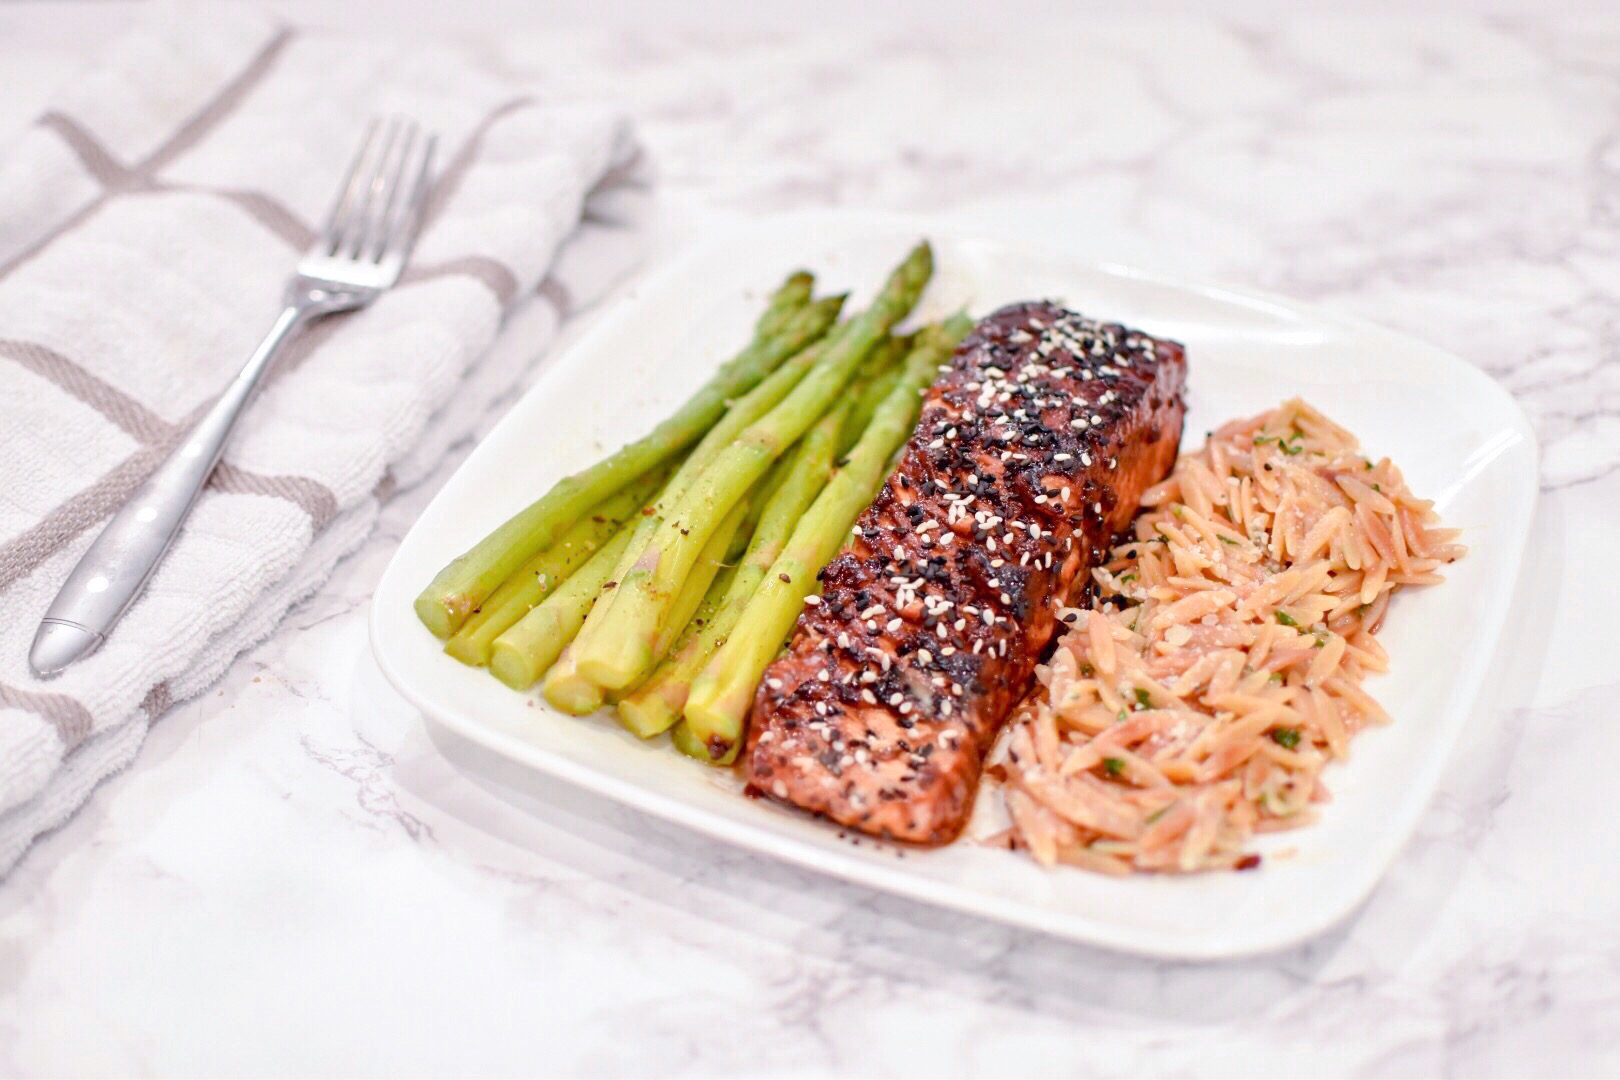
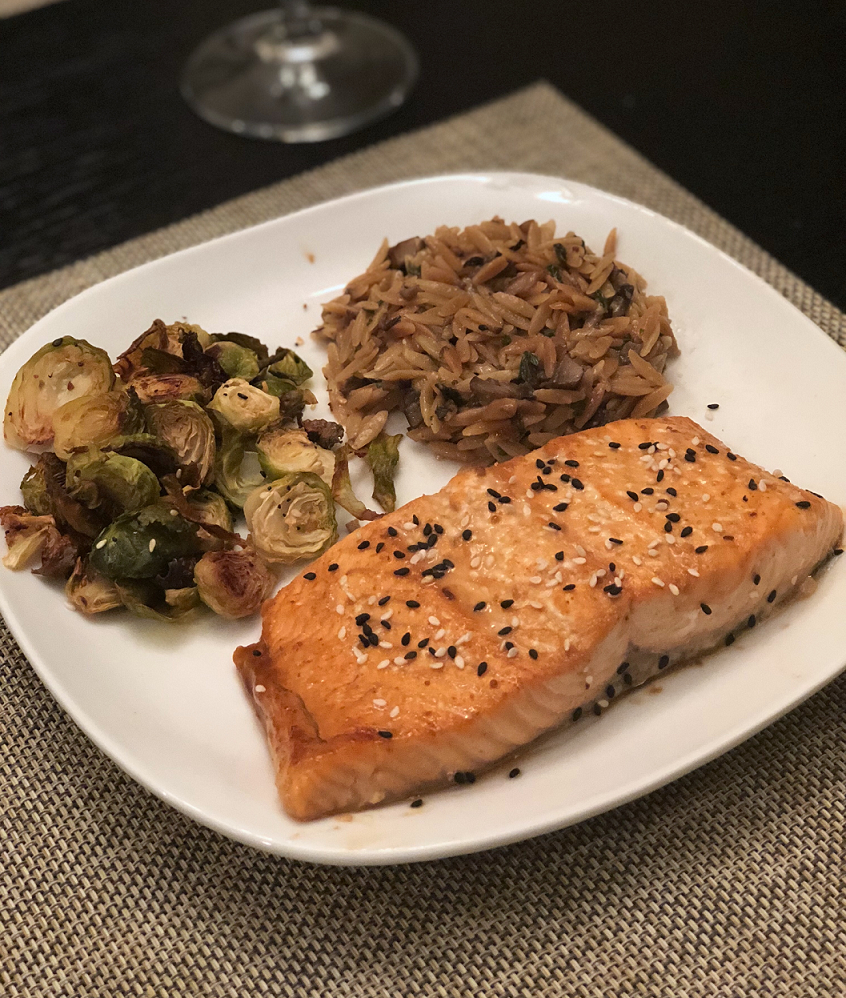
 That brings me to this recipe. It’s super simple to make, considerably healthy, takes about 30 minutes to cook everything, and comes out tasting absolutely delicious. It’s a perfect quick dinner for two at the end of a long work day (or for one with leftovers the following day).
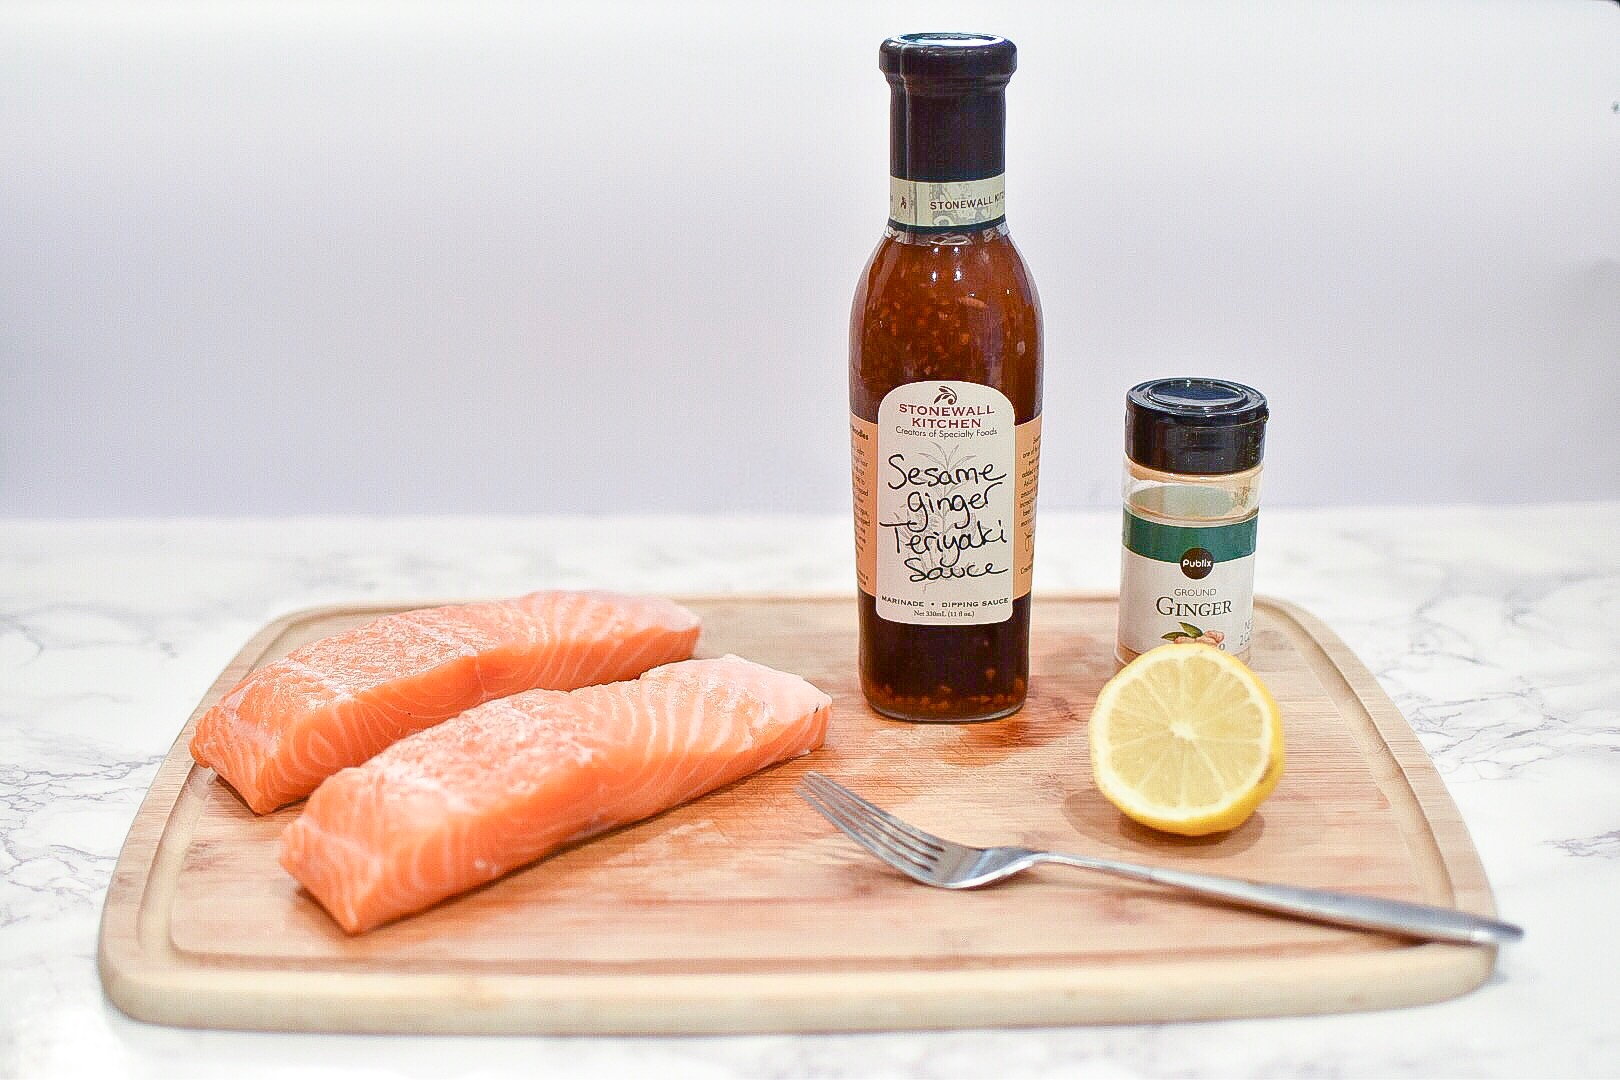 For the Salmon, I usually get two 8 oz pieces of Atlantic Salmon from Whole Foods with the skin on (I know wild caught is better for you but my budget will usually only allow for the farm raised version). The marinade I use is
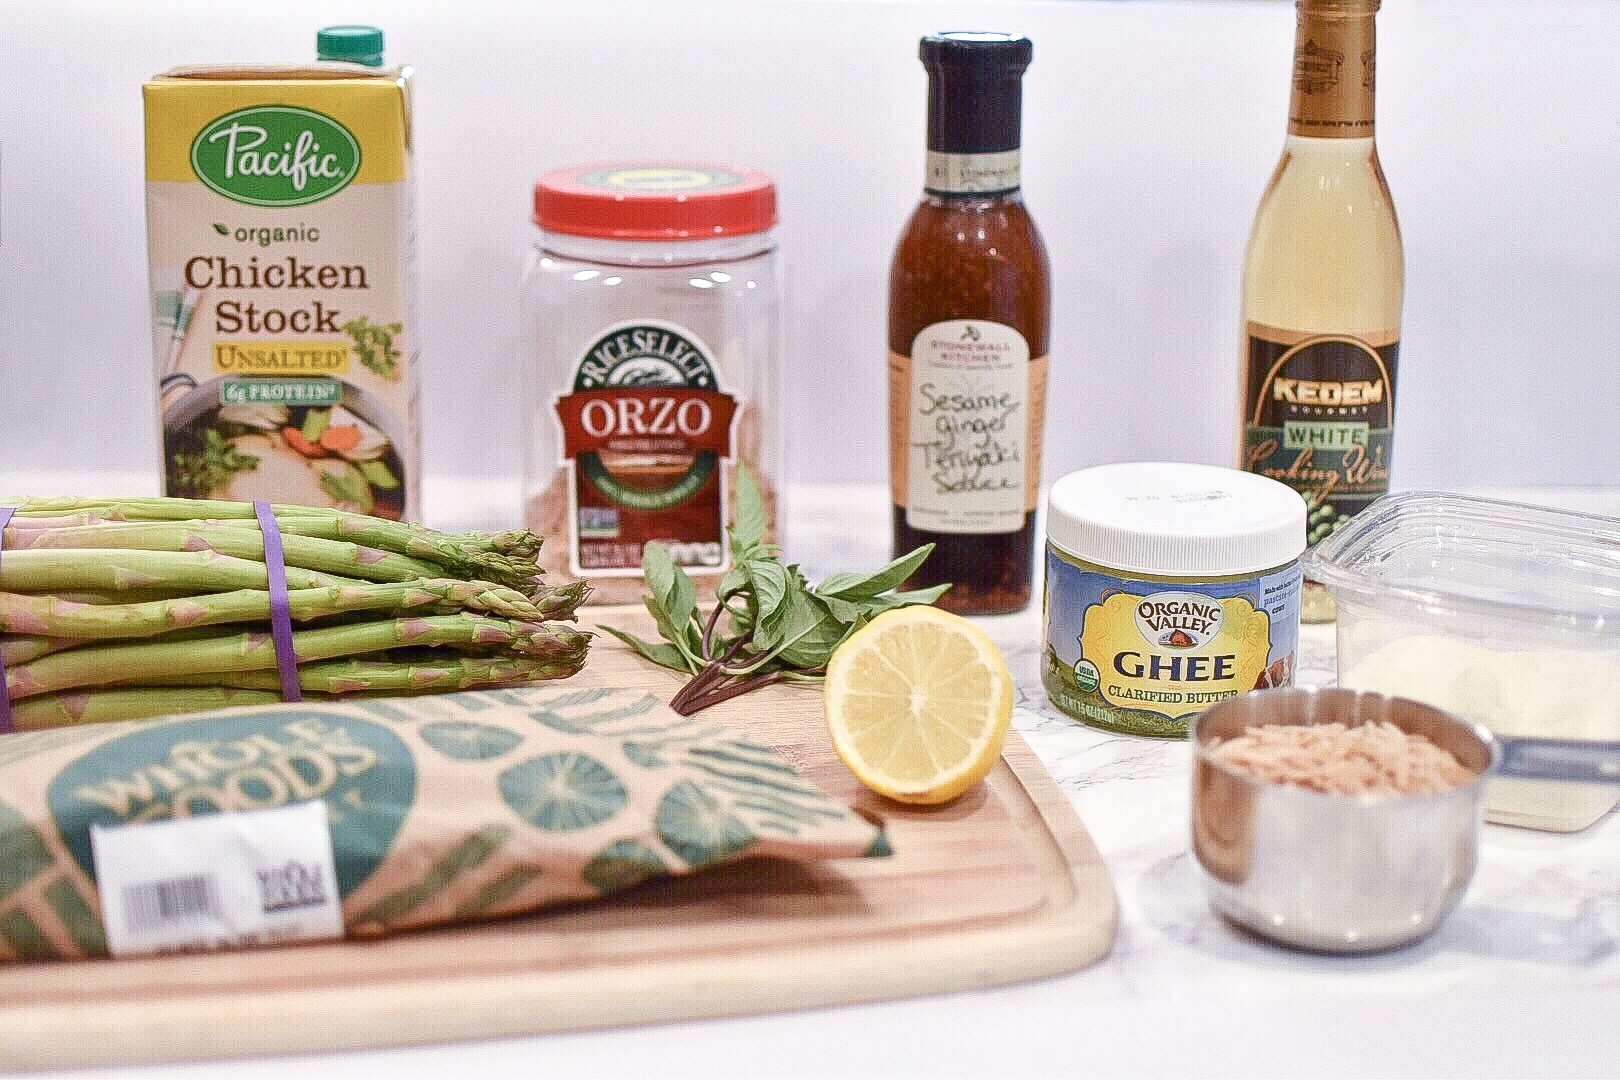
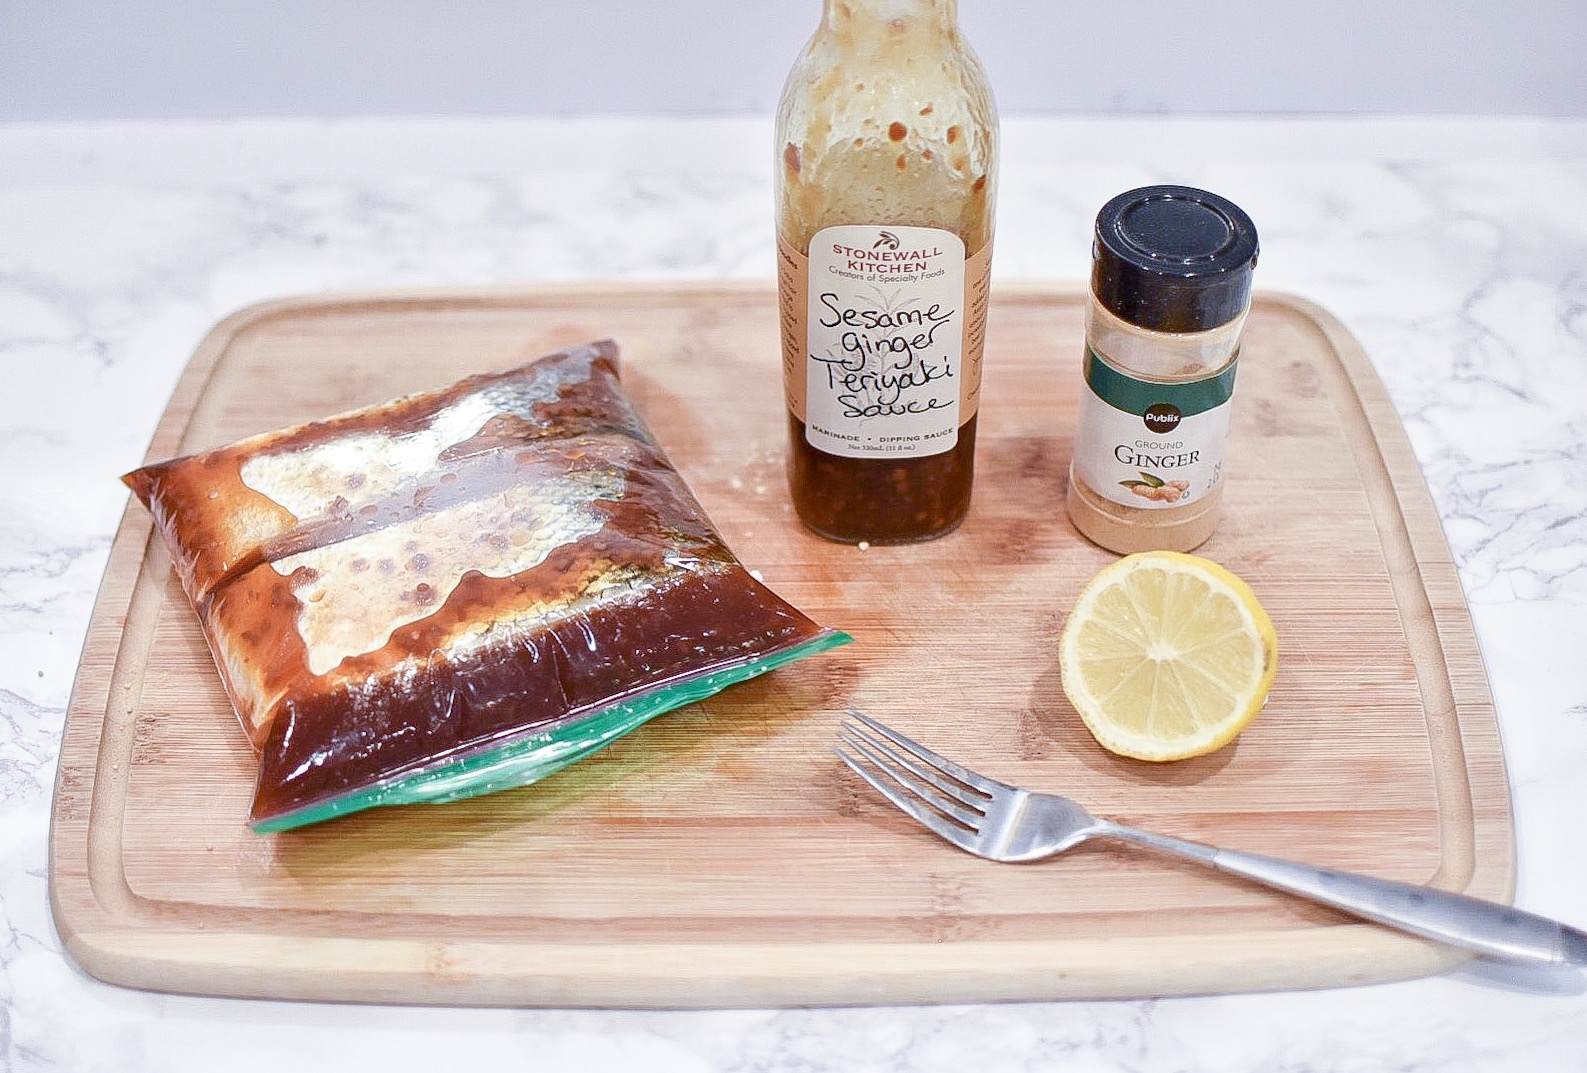
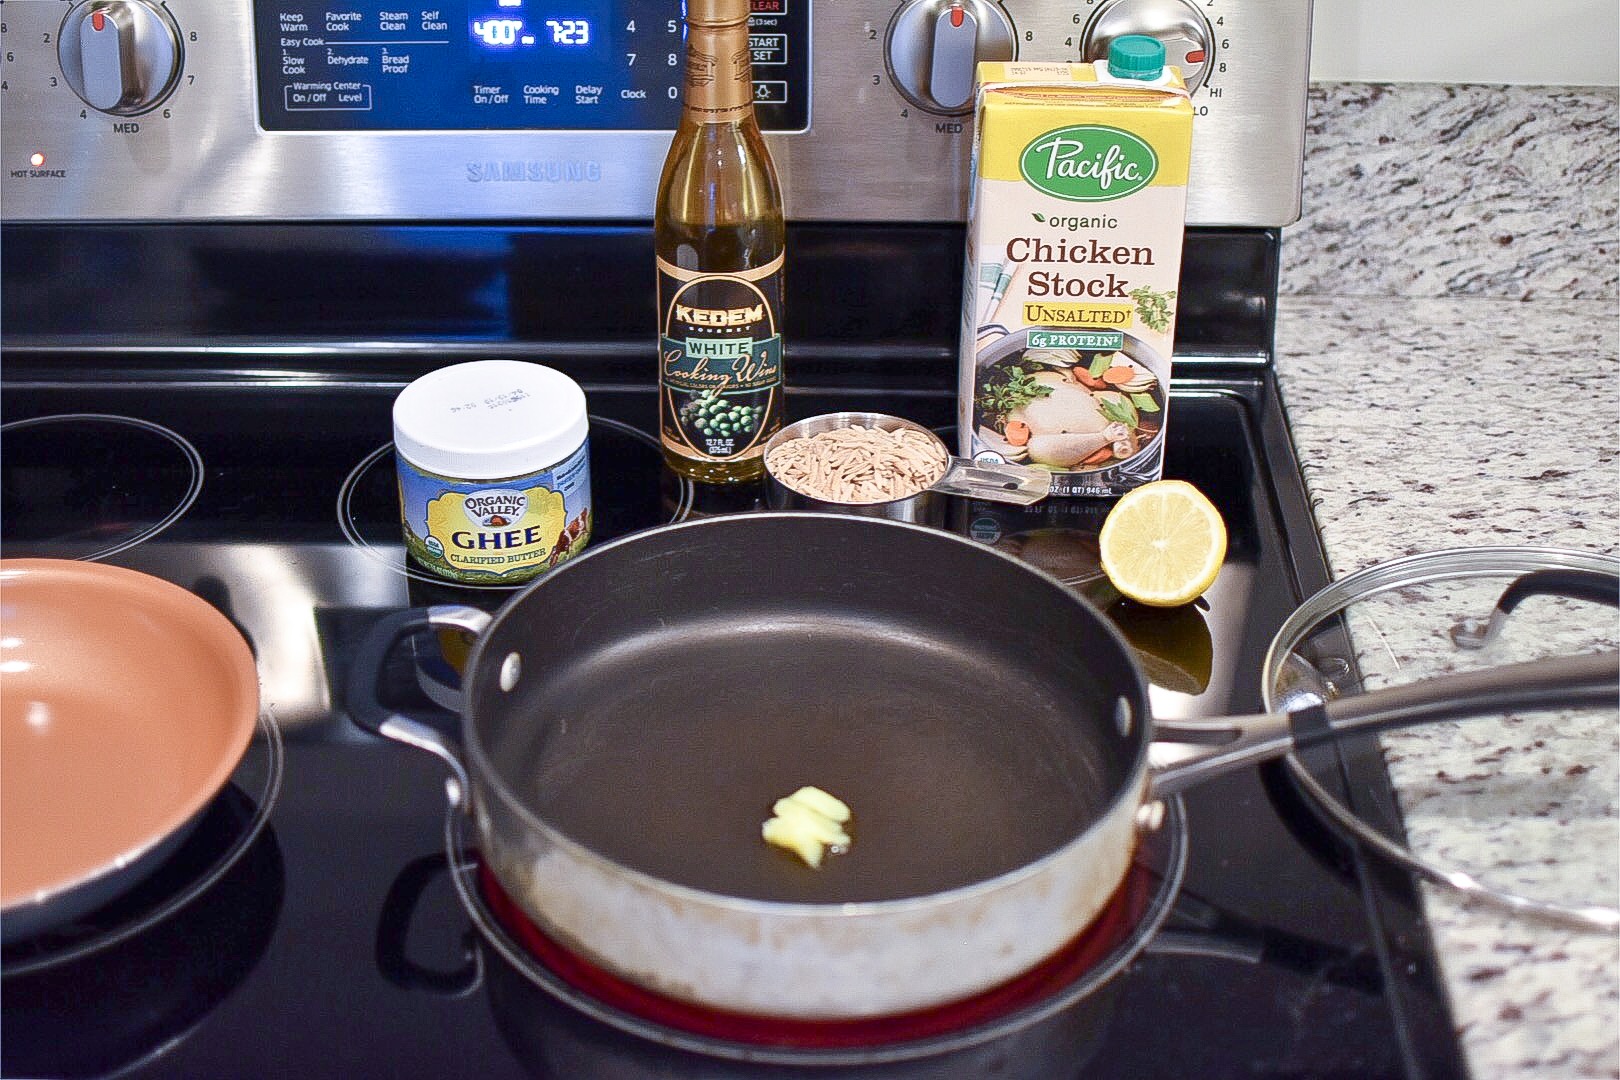 Just before I am ready to cook the Salmon, I start making the Orzo. You’re going to melt 1 tbsp of
 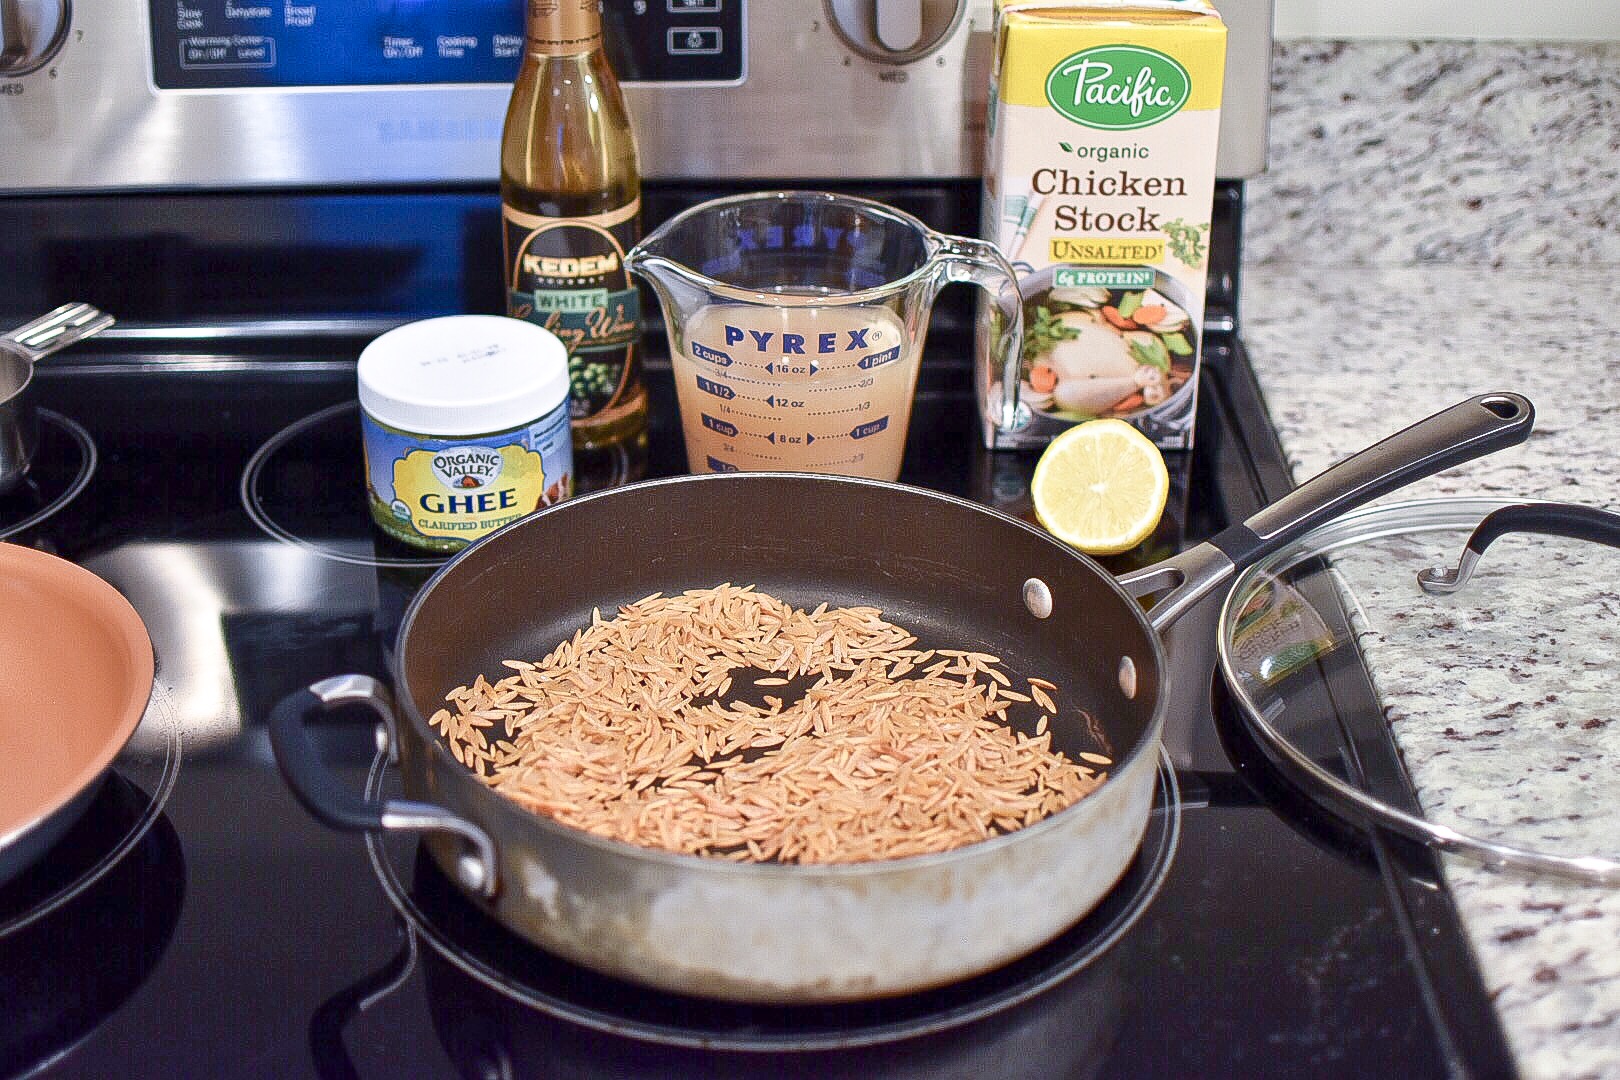 Next, you’re going to pour in 14 oz of chicken stock. I personally use low sodium broth and just add a small amount of salt to taste later on, to avoid exceeding my sodium limit for the day. You can also use vegetable broth if you are vegan or vegetarian. Once the broth is added, reduce the heat to low and cover with a lid. Set your timer for 18-20 minutes.
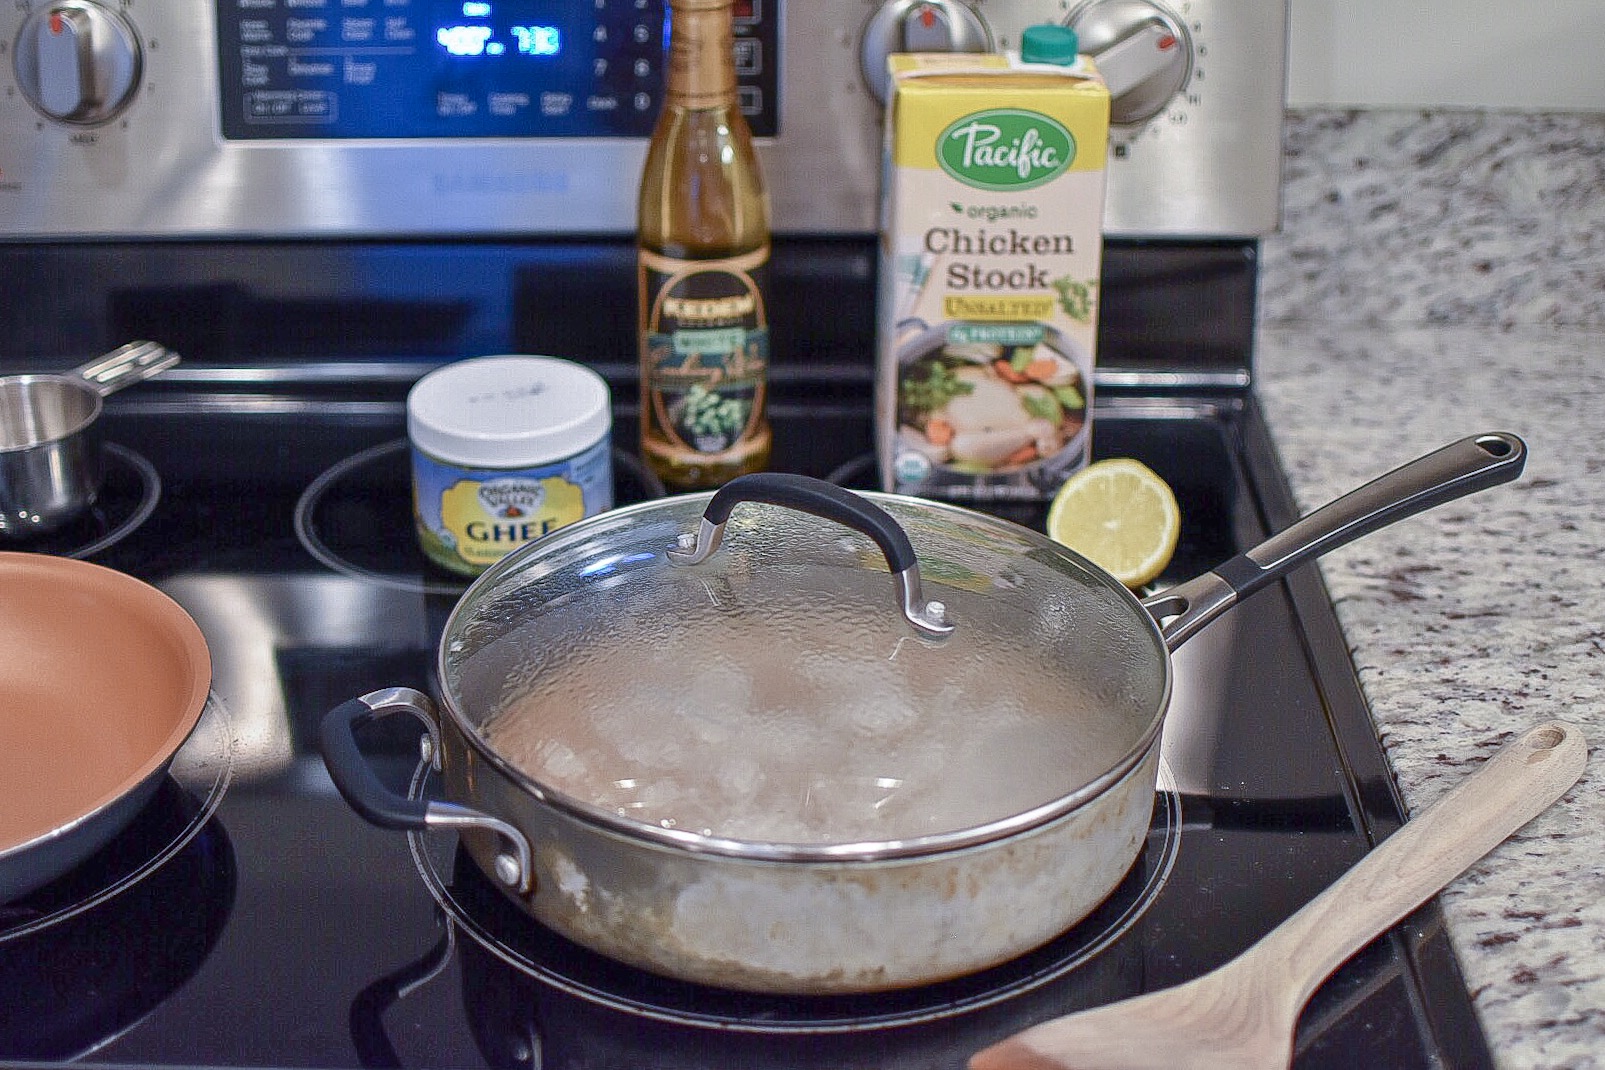 Now that the orzo is doing its thing, we can turn our attention back to the Salmon. Set your oven to 400 degrees Fahrenheit, and take out a medium size (preferably non-stick) pan. Heat the pan over low-medium heat, and melt another tbsp of ghee in the pan. Again, you can use regular butter however I personally use ghee because it’s
 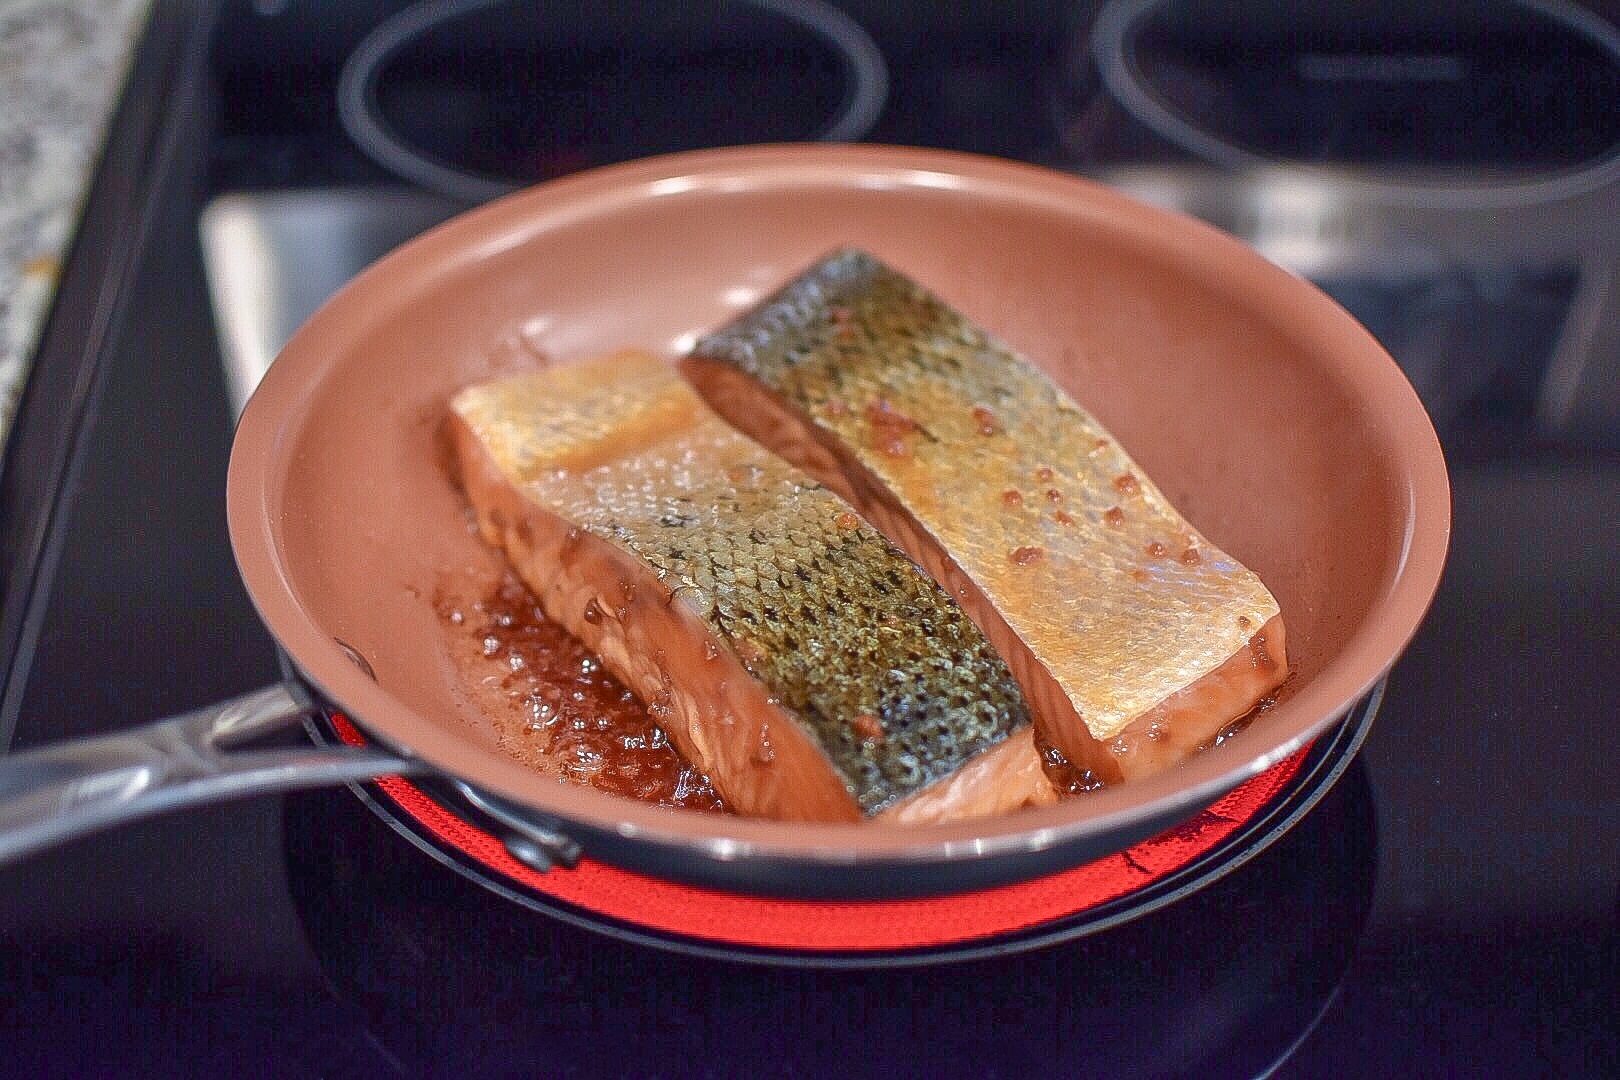 Next, remove the salmon from the zip lock bag and place it face down on the pan. You may want to use tongs to do this so that if any of the ghee or marinade splash up (which it frequently does), it will not burn your hand. DO NOT throw away the contents of the zip lock bag. Cook the salmon face down for about 5 minutes, swirling the pan occasionally to make sure the salmon is not sticking to the bottom.
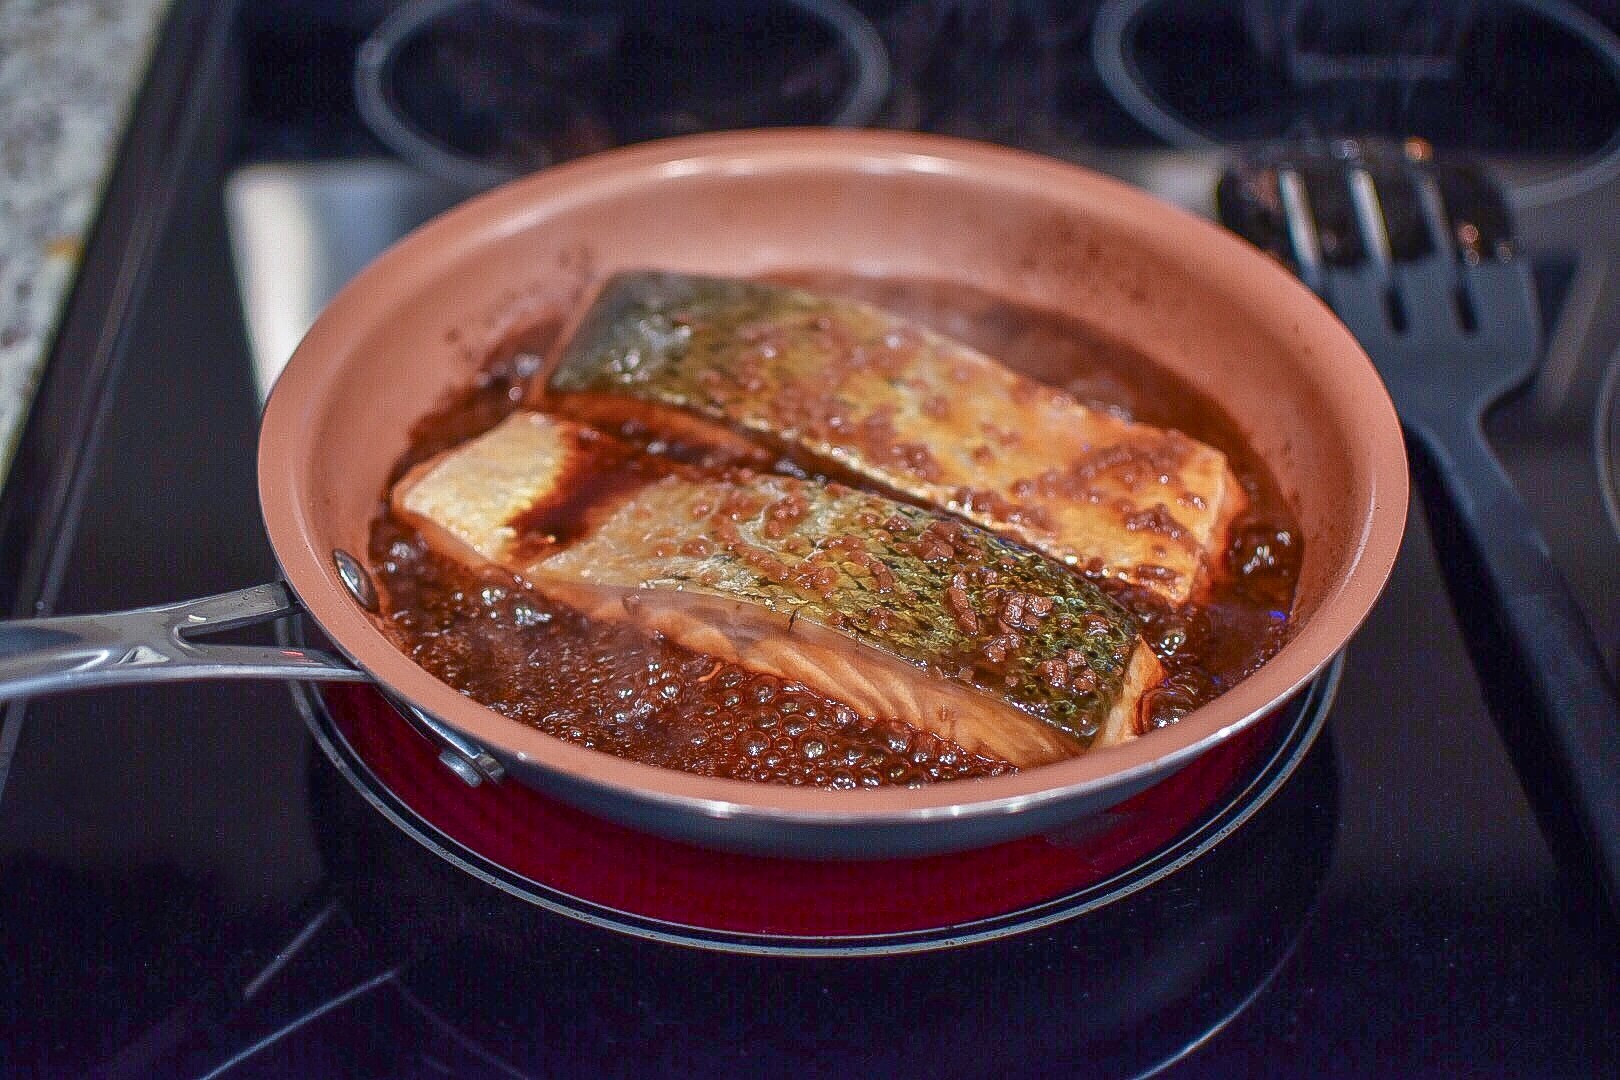 Once 5 minutes have passed, empty the remainder of the marinade from the zip lock bag into the pan with the salmon. Place the whole thing in the oven. That’s right, the whole thing; I promise your pan won’t disintegrate. Leave it in there for about 10 minutes, or until the salmon is cooked to your desired doneness.
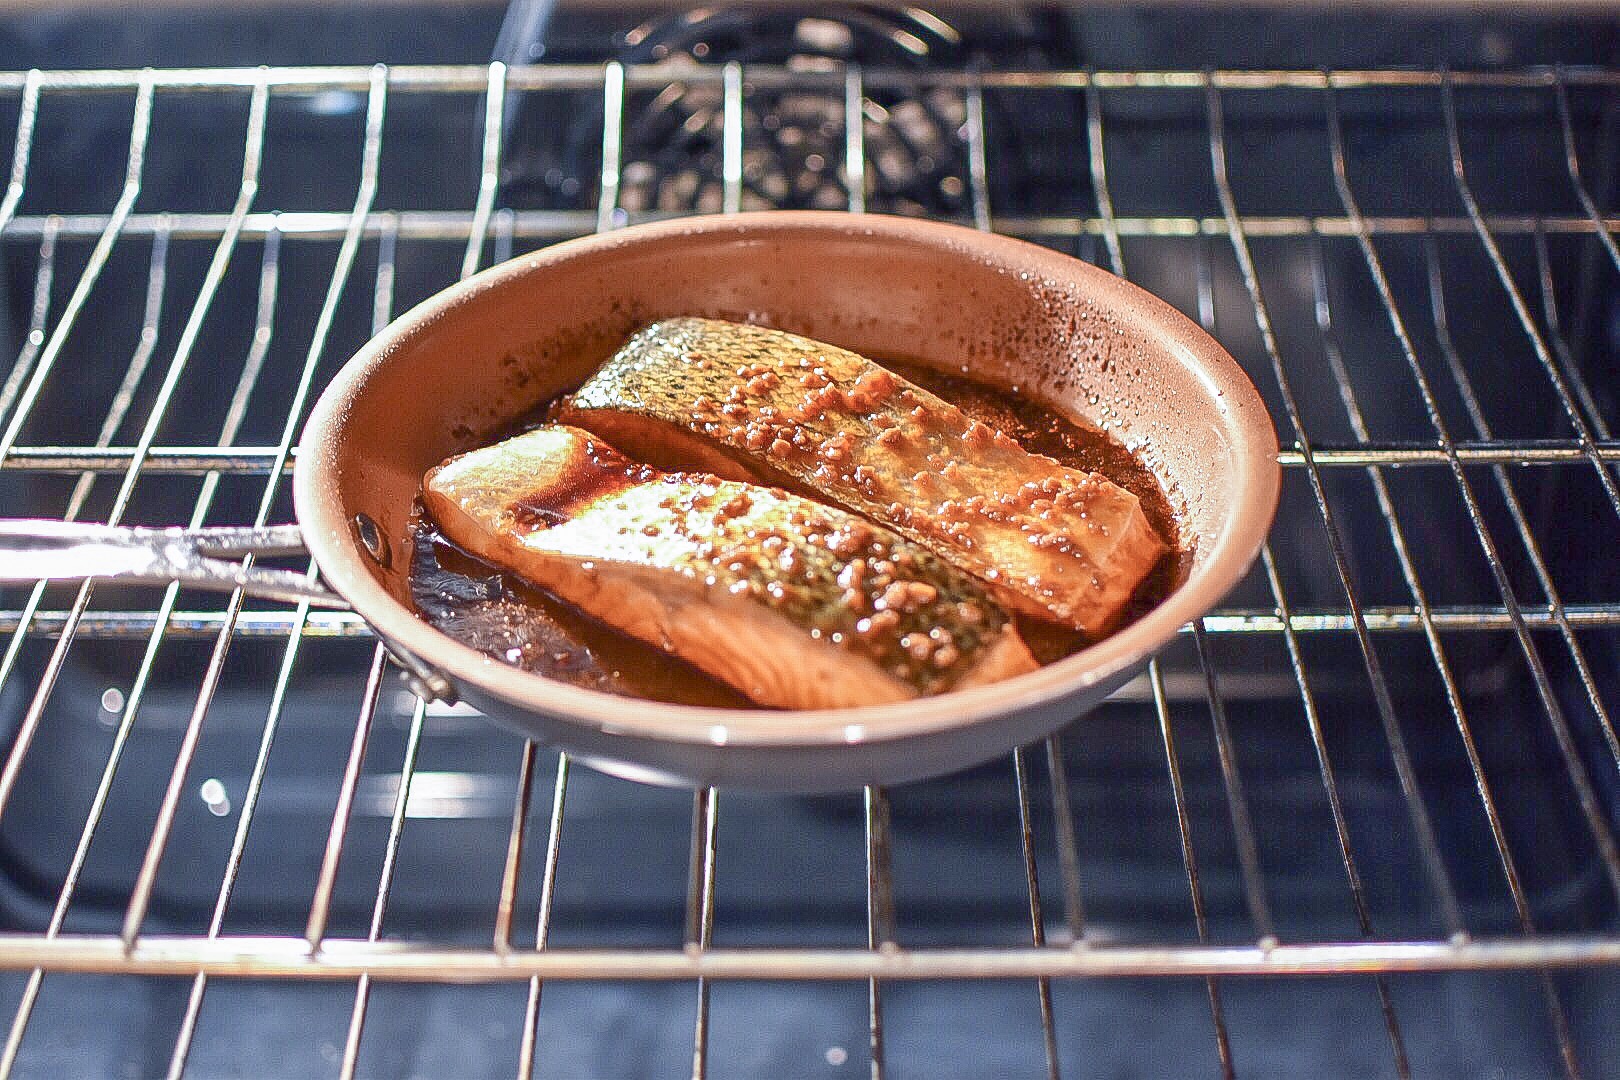 You can now throw your veggies in a pan with a
 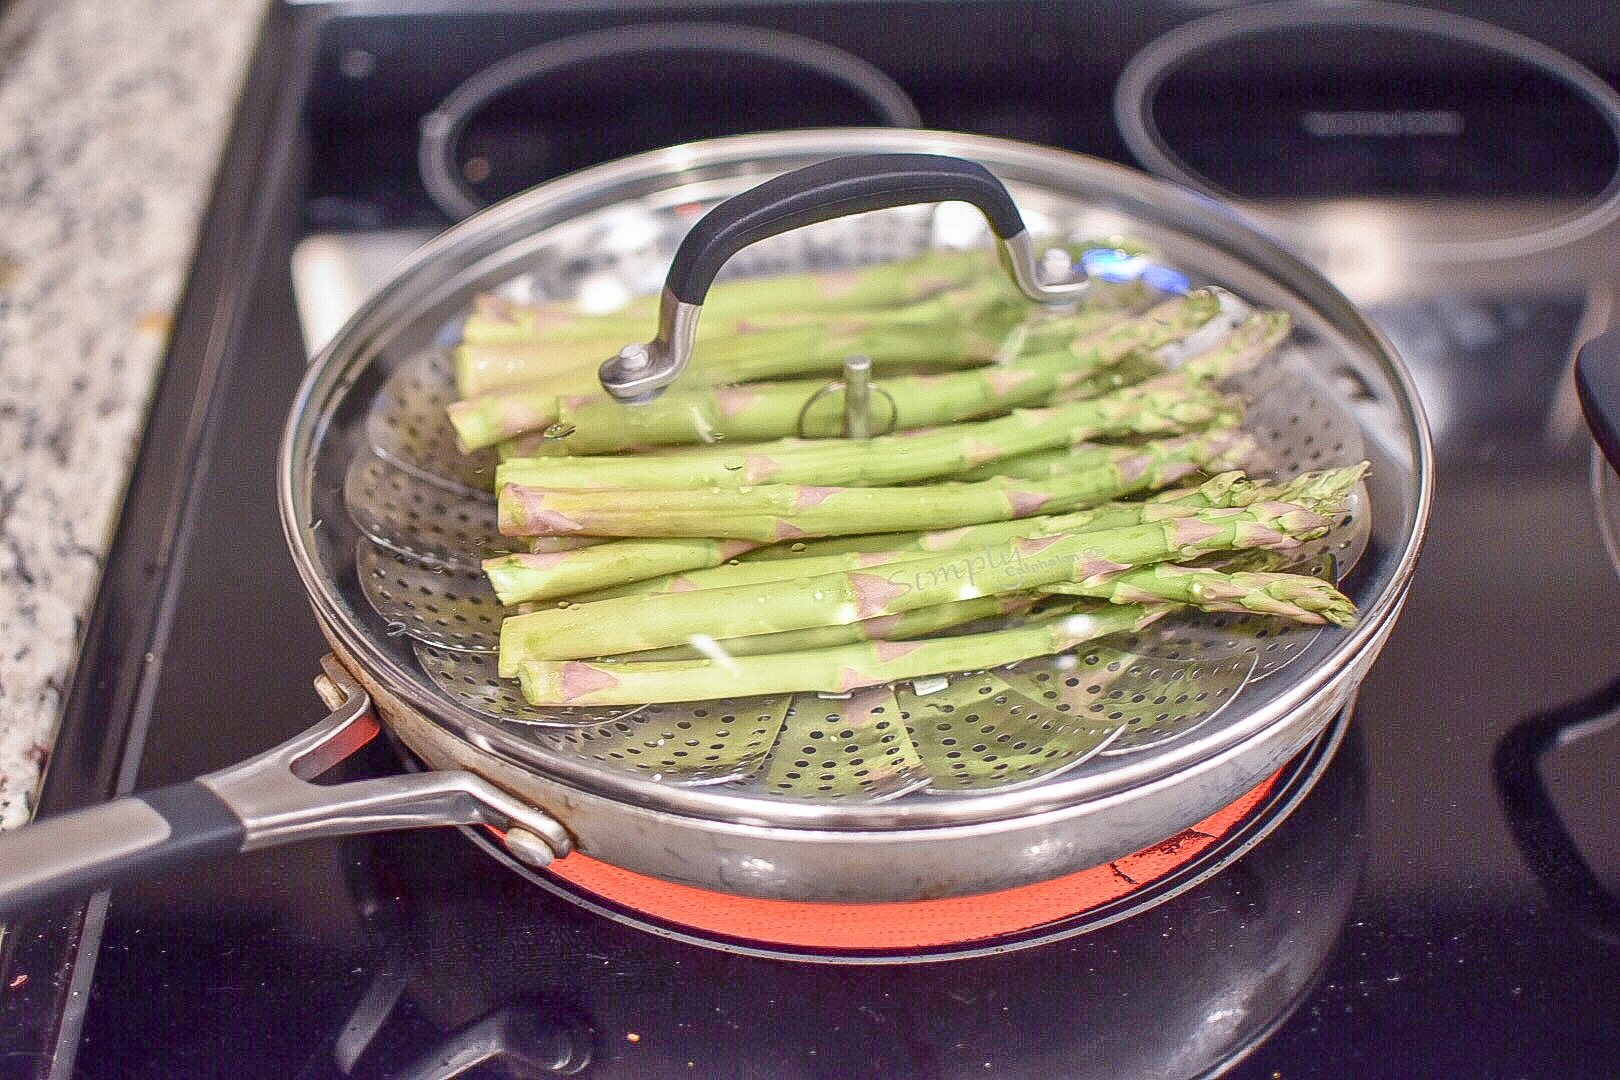 At this point, your orzo should be almost done. Check it to make sure all of the water is absorbed. If not, give it a few more minutes, and if it is, mix in your basil, ¼ cup of white cooking wine, and ¼ cup grated parmesan cheese. Add salt and pepper to your desired taste and mix well.
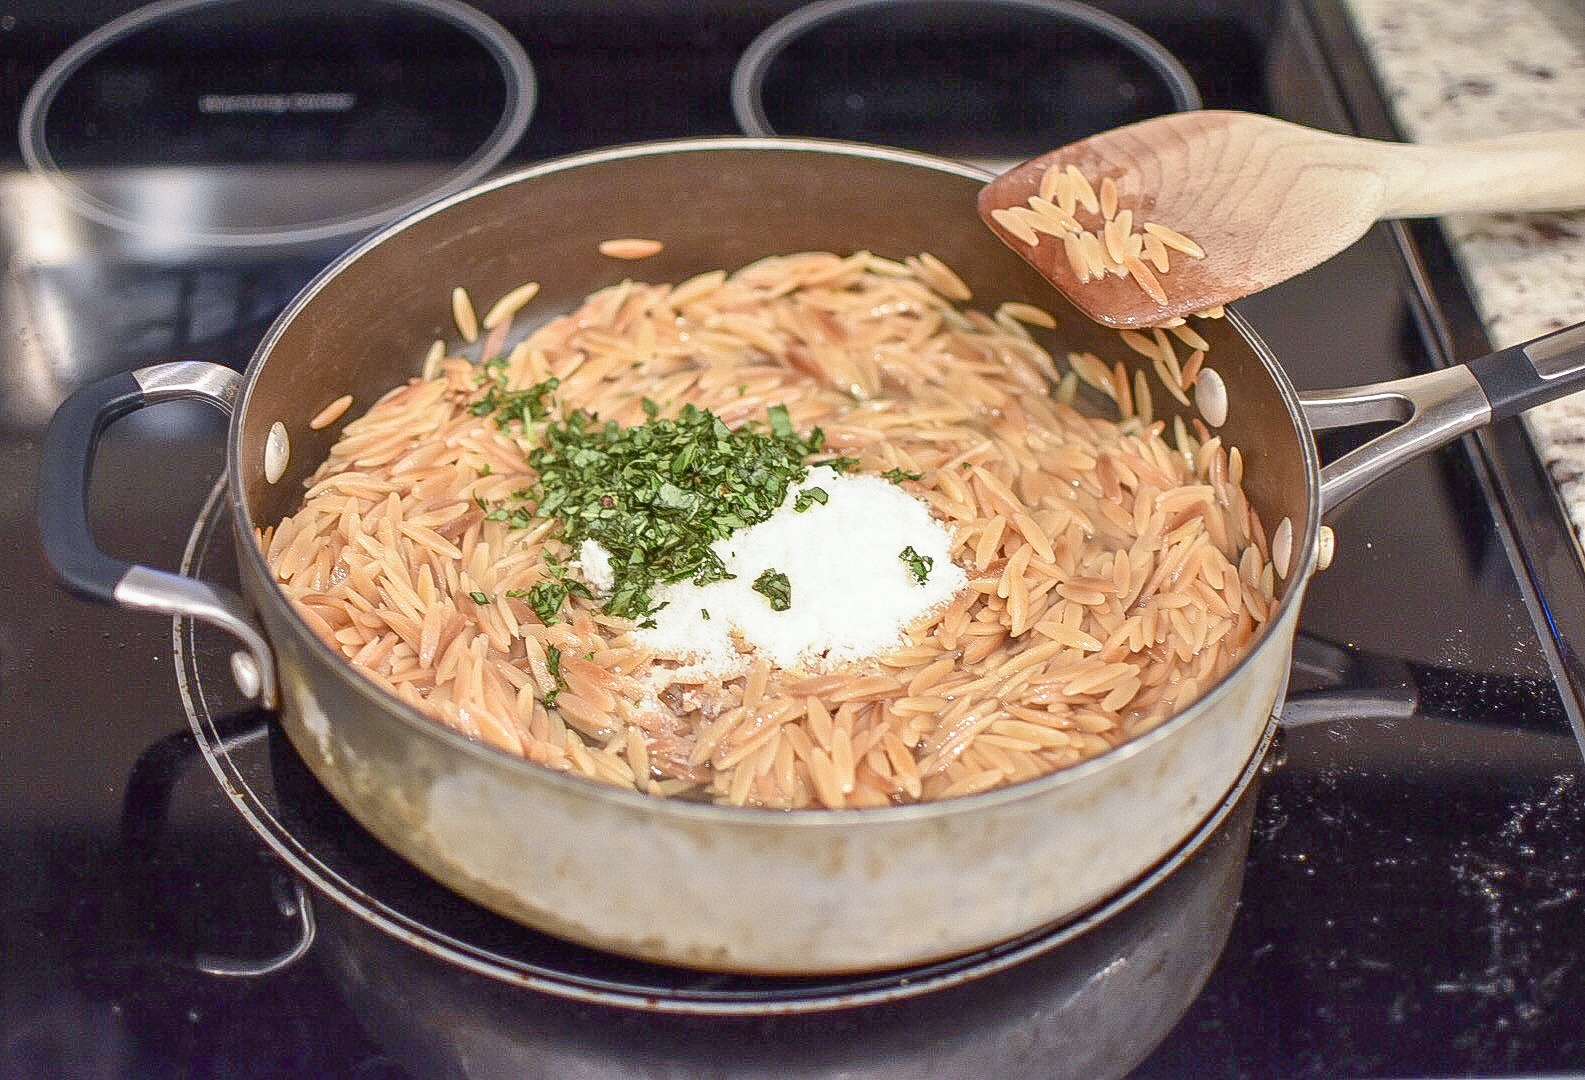 The salmon, orzo, and veggies should all (theoretically) be done. Plate as desired and sprinkle some sesame seeds on your salmon to give it a little extra crunch. Season your vegetables, and sprinkle some more parmesan on top of your orzo. Voila – an amazing meal in 30-ish minutes. Enjoy!


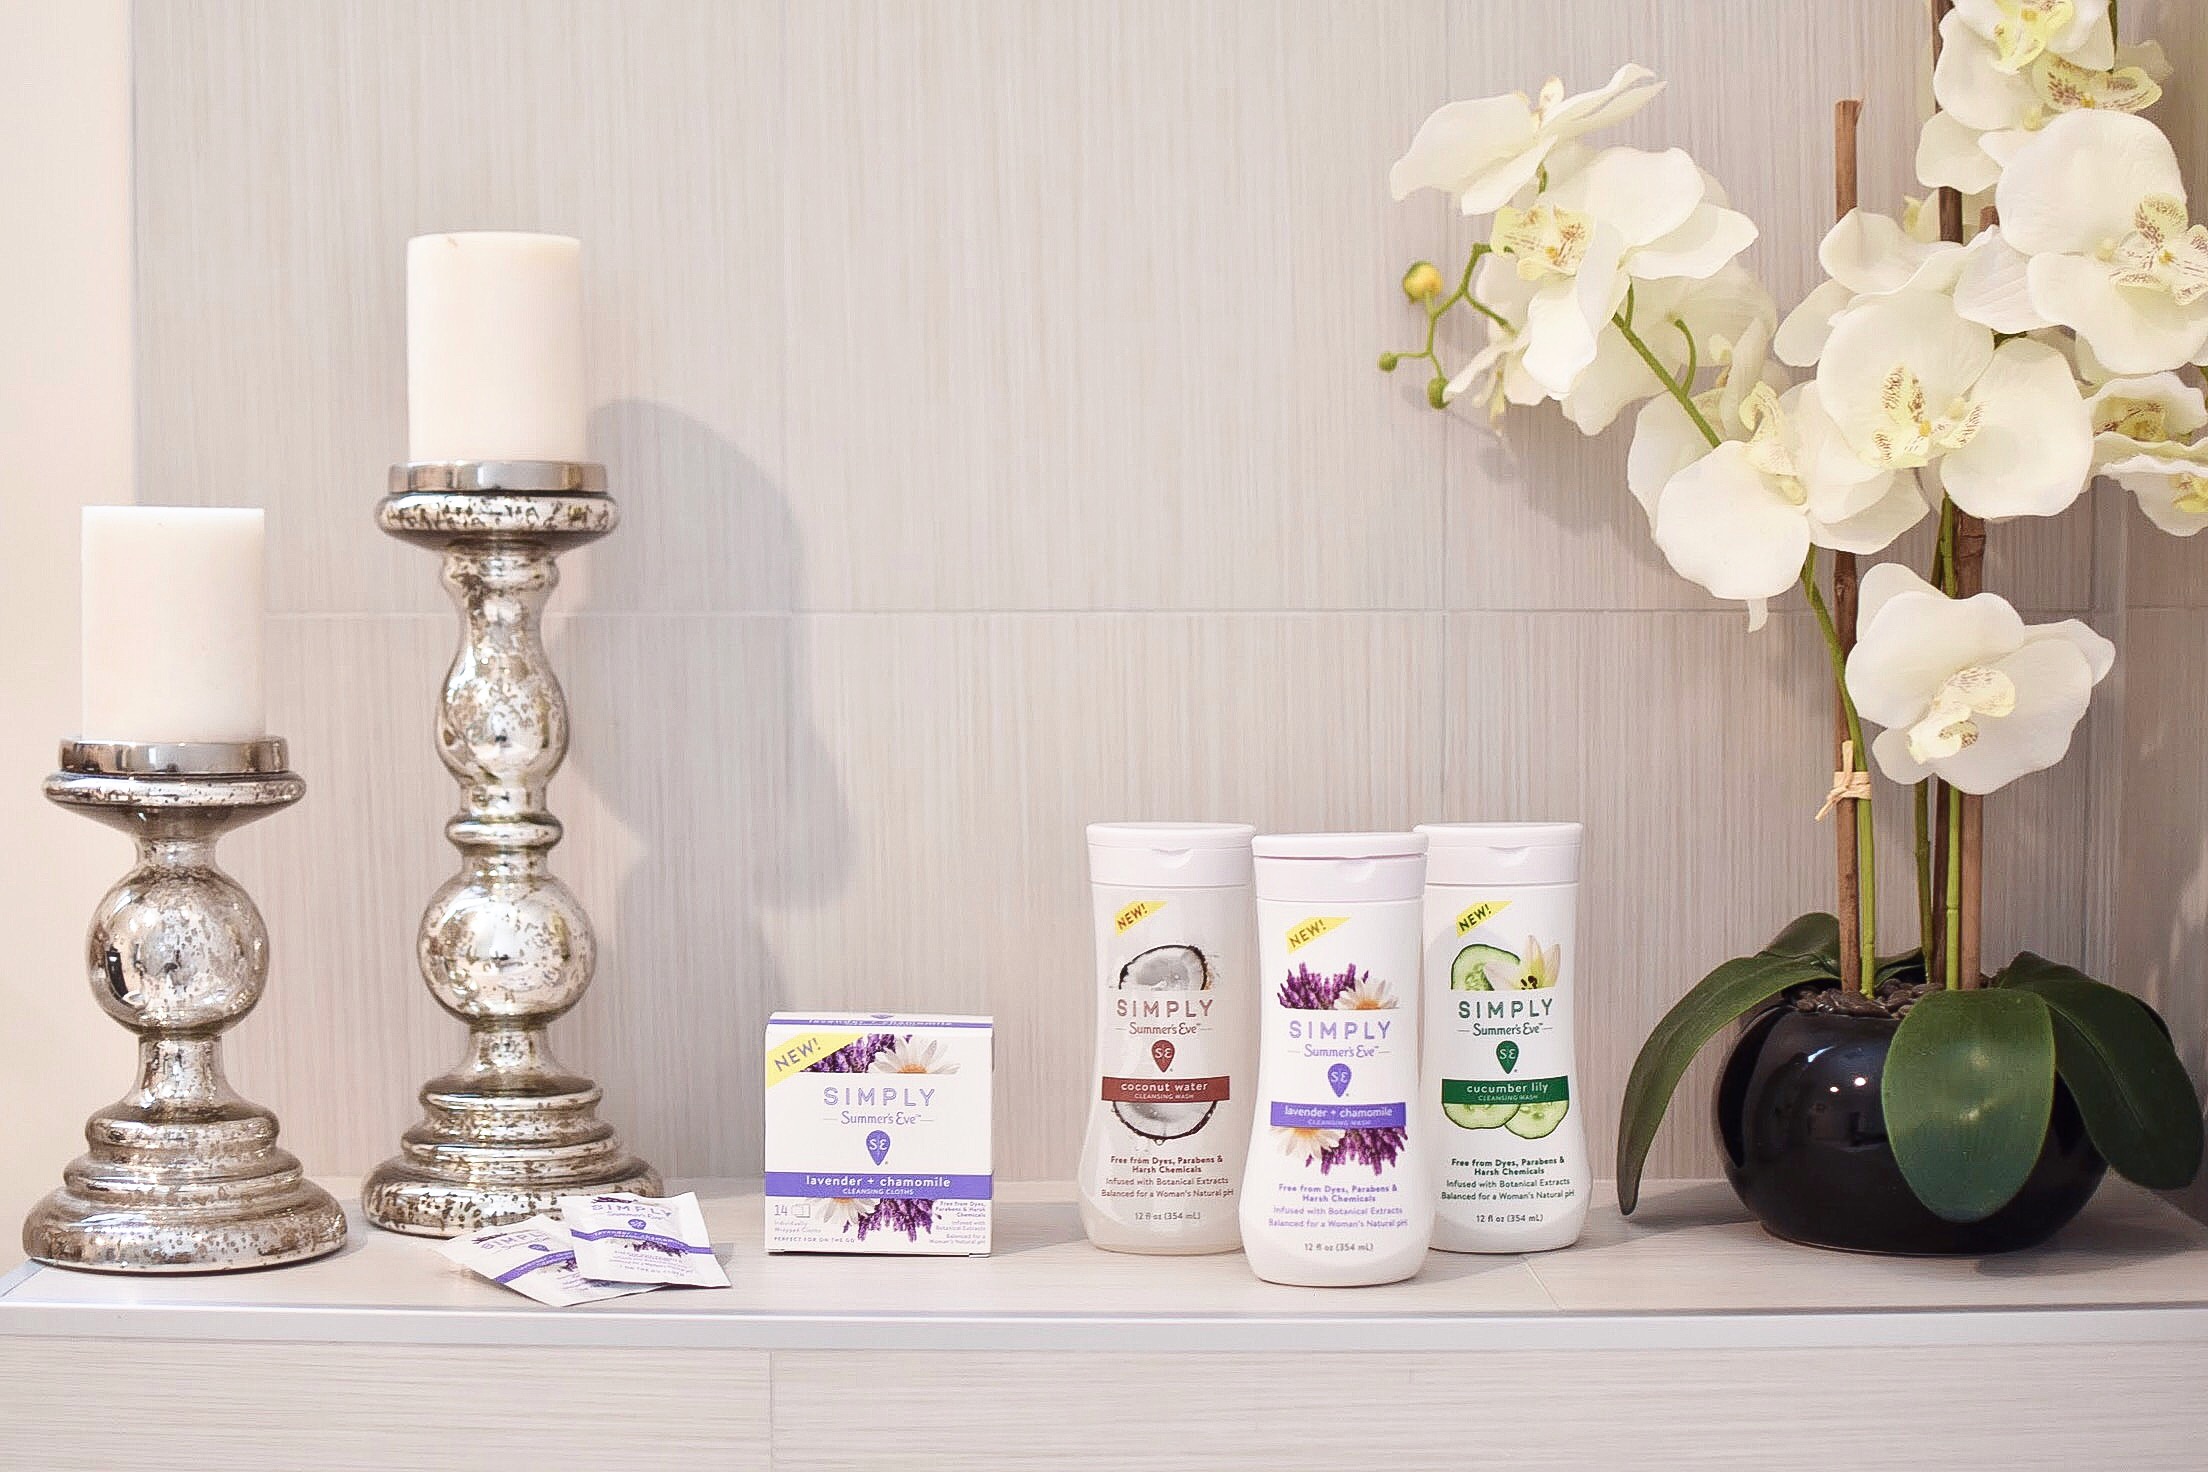
 One of my favorite products they make is the
 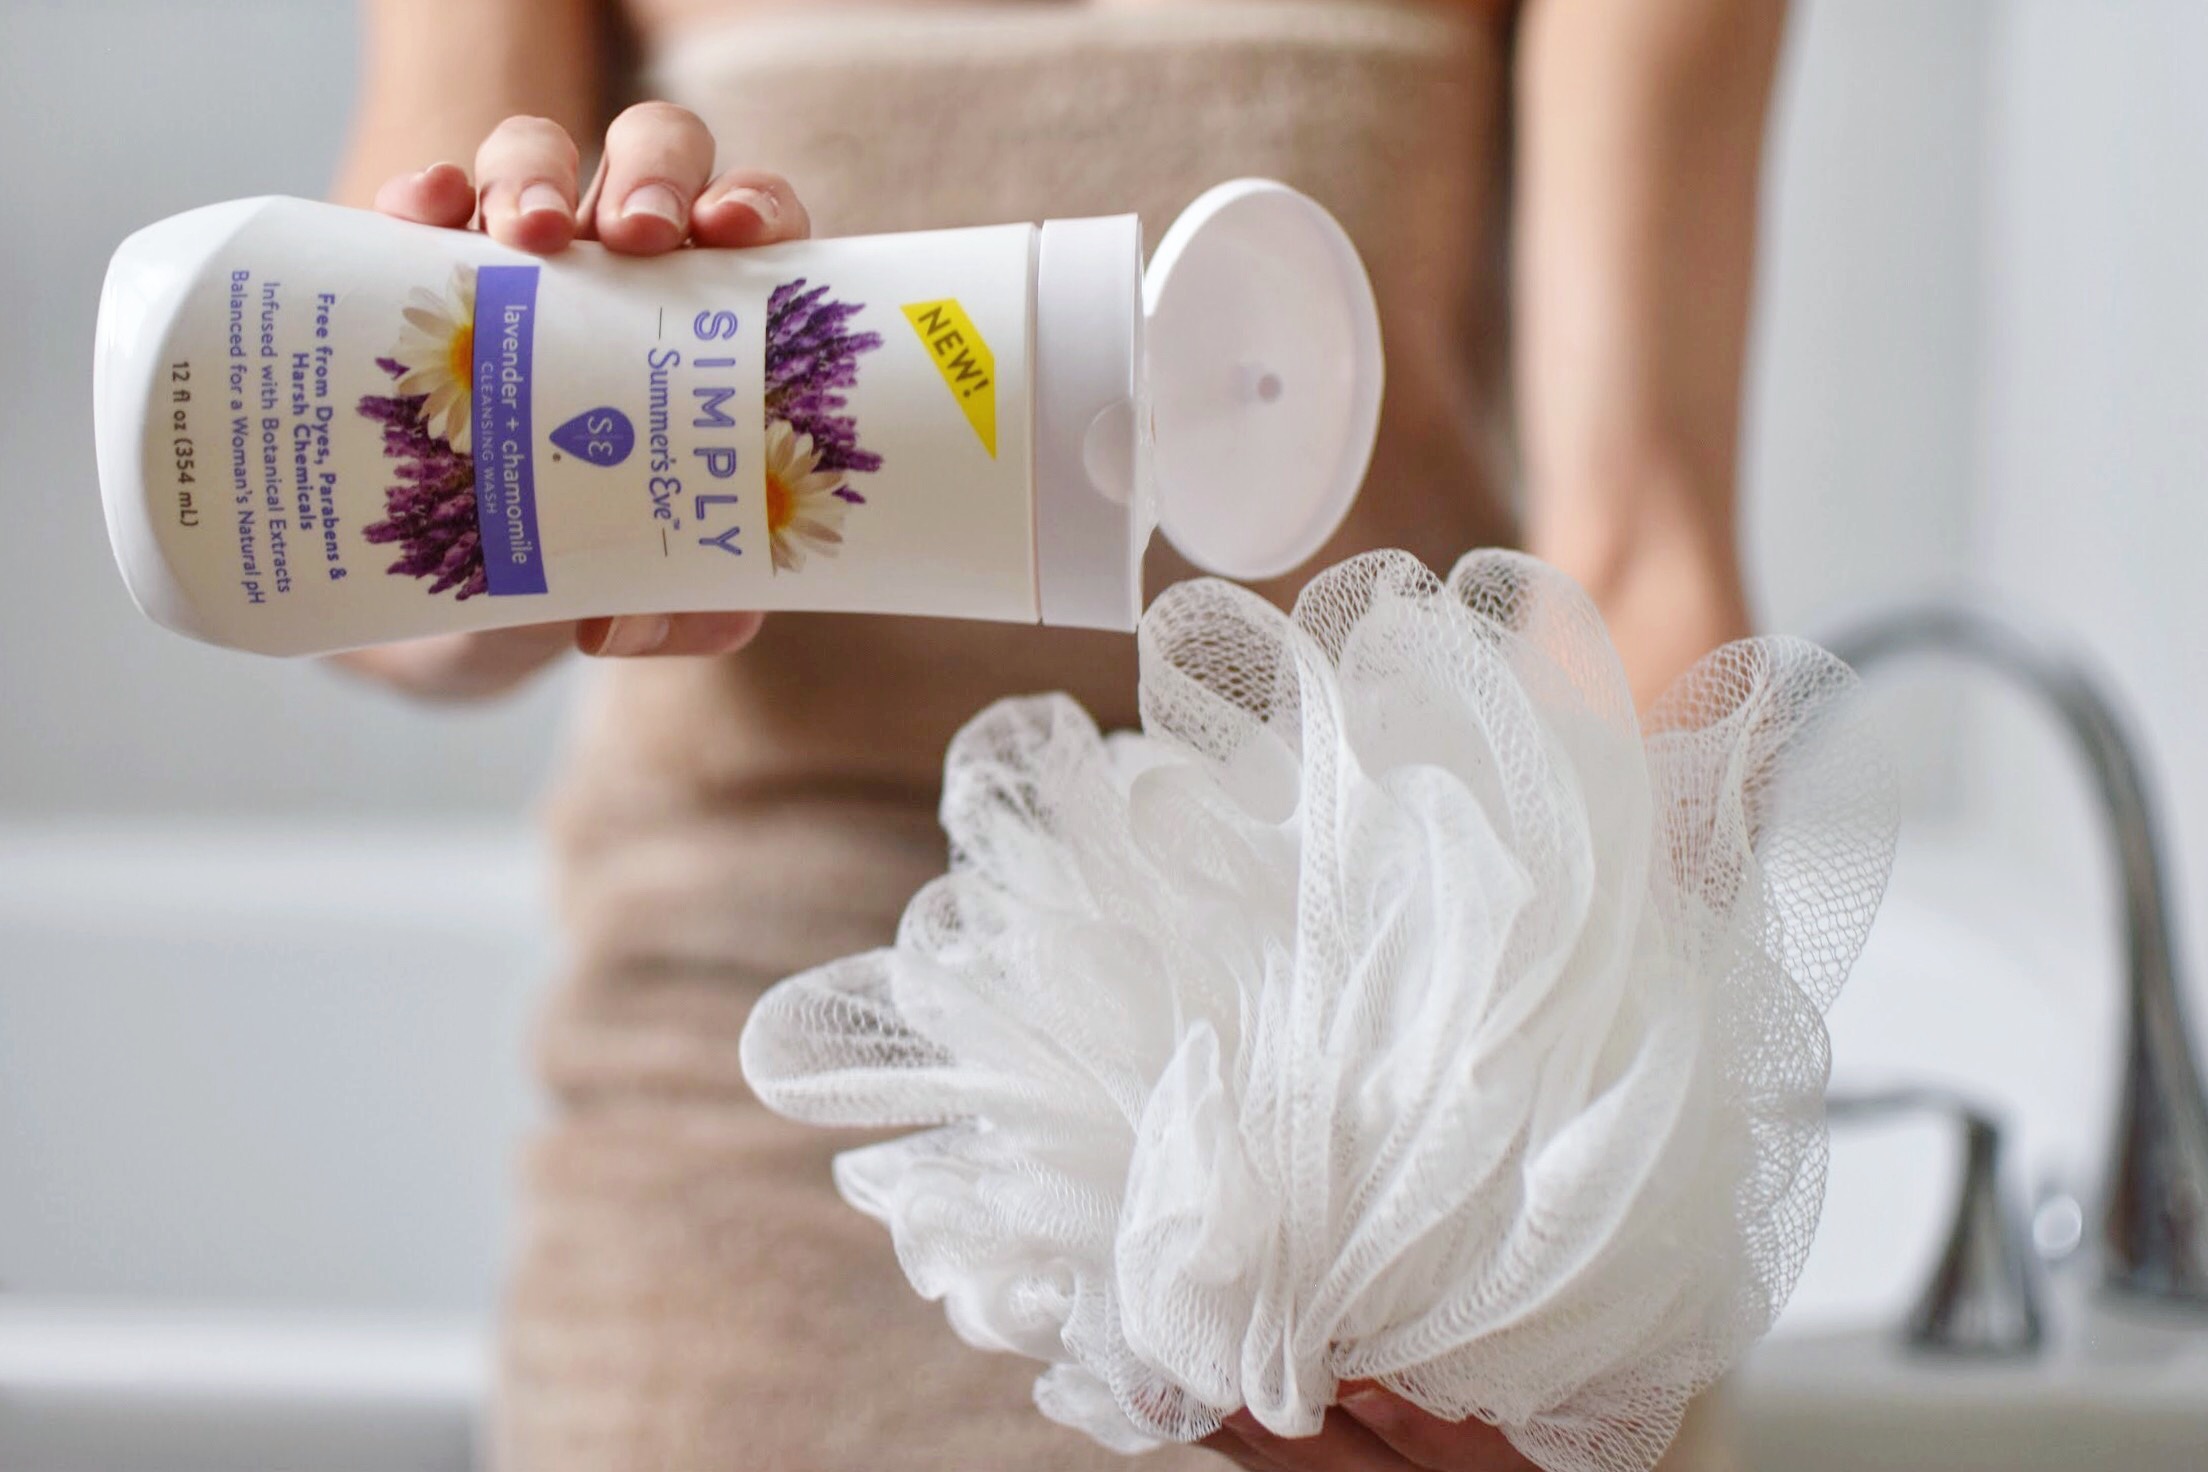 Want to know my favorite part about these Cleansing Washes for us women? They remove odor causing bacteria and are balanced to our natural pH. For cleansing our lady parts, they are formulated for mildly acidic pH. This helps cleanse without causing any irritation. Their products are all specifically made for those with sensitive skin.
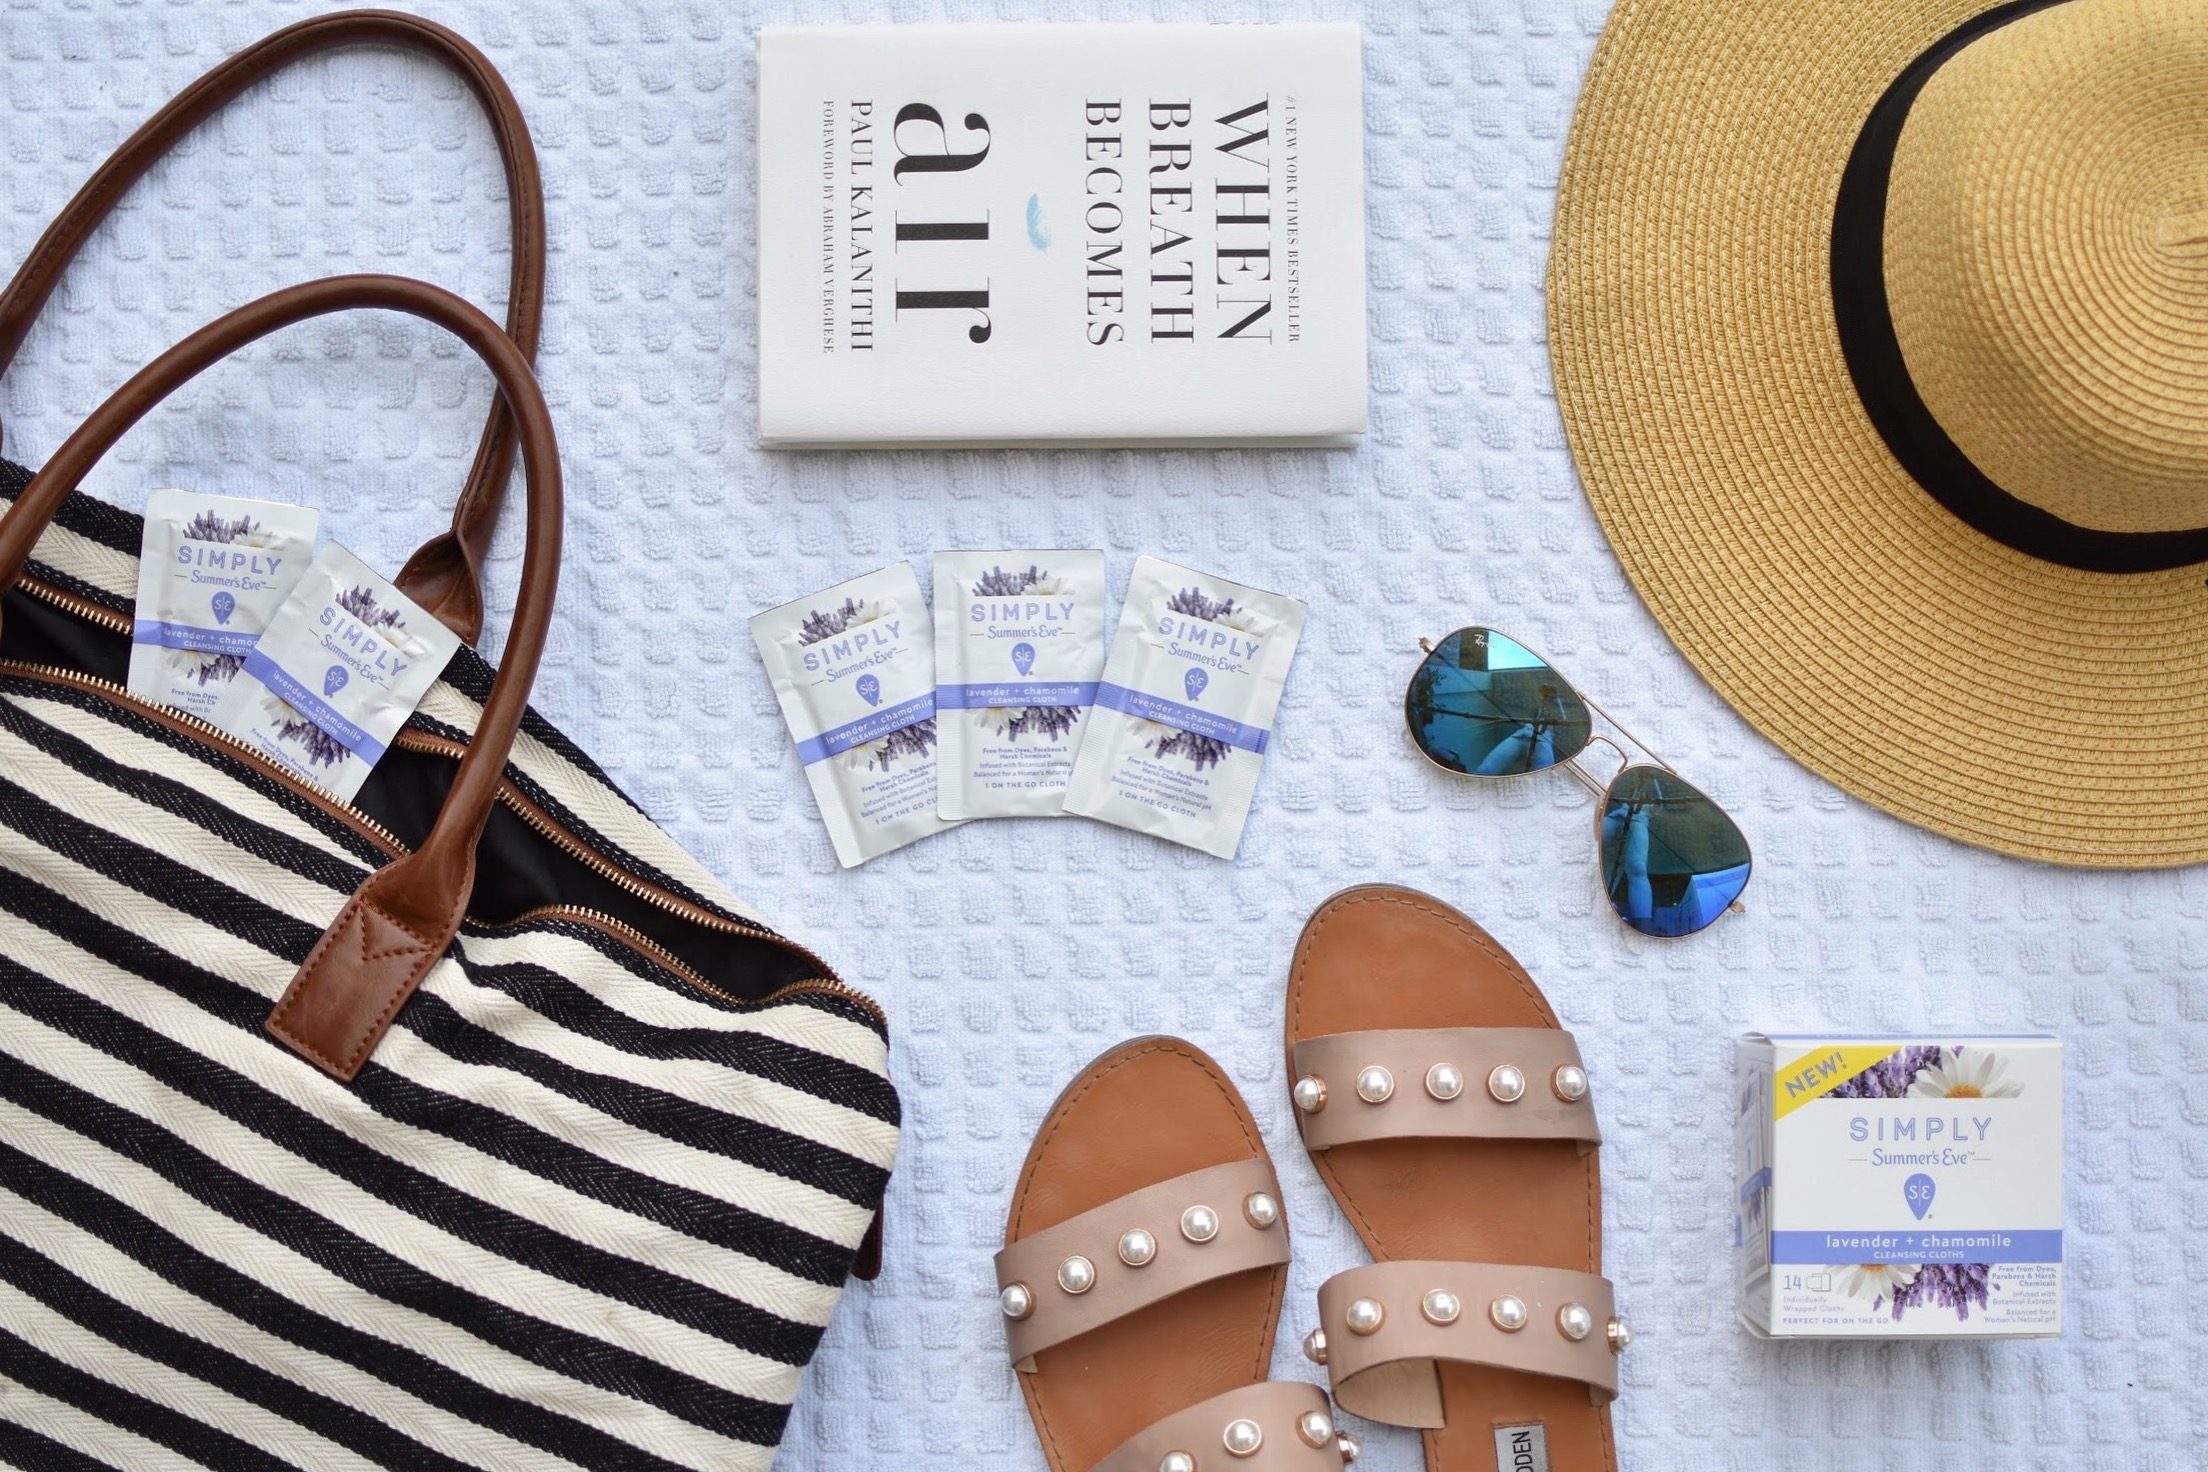 Another product they make which I love as well are the Simply Summer’s Eve
  As the trusted leader in feminine care (and I can totally see why) Summer’s Eve ® is known for creating personal care products that are gynecologist and dermatologist tested for safety. Small bonus? They never test on animals, and some of their packaging is even recyclable. I know from experience living in south Florida, that it takes minimal effort to get sweaty when you would really prefer not to be; These products definitely make it a bit easier to feel clean and confident throughout the day.
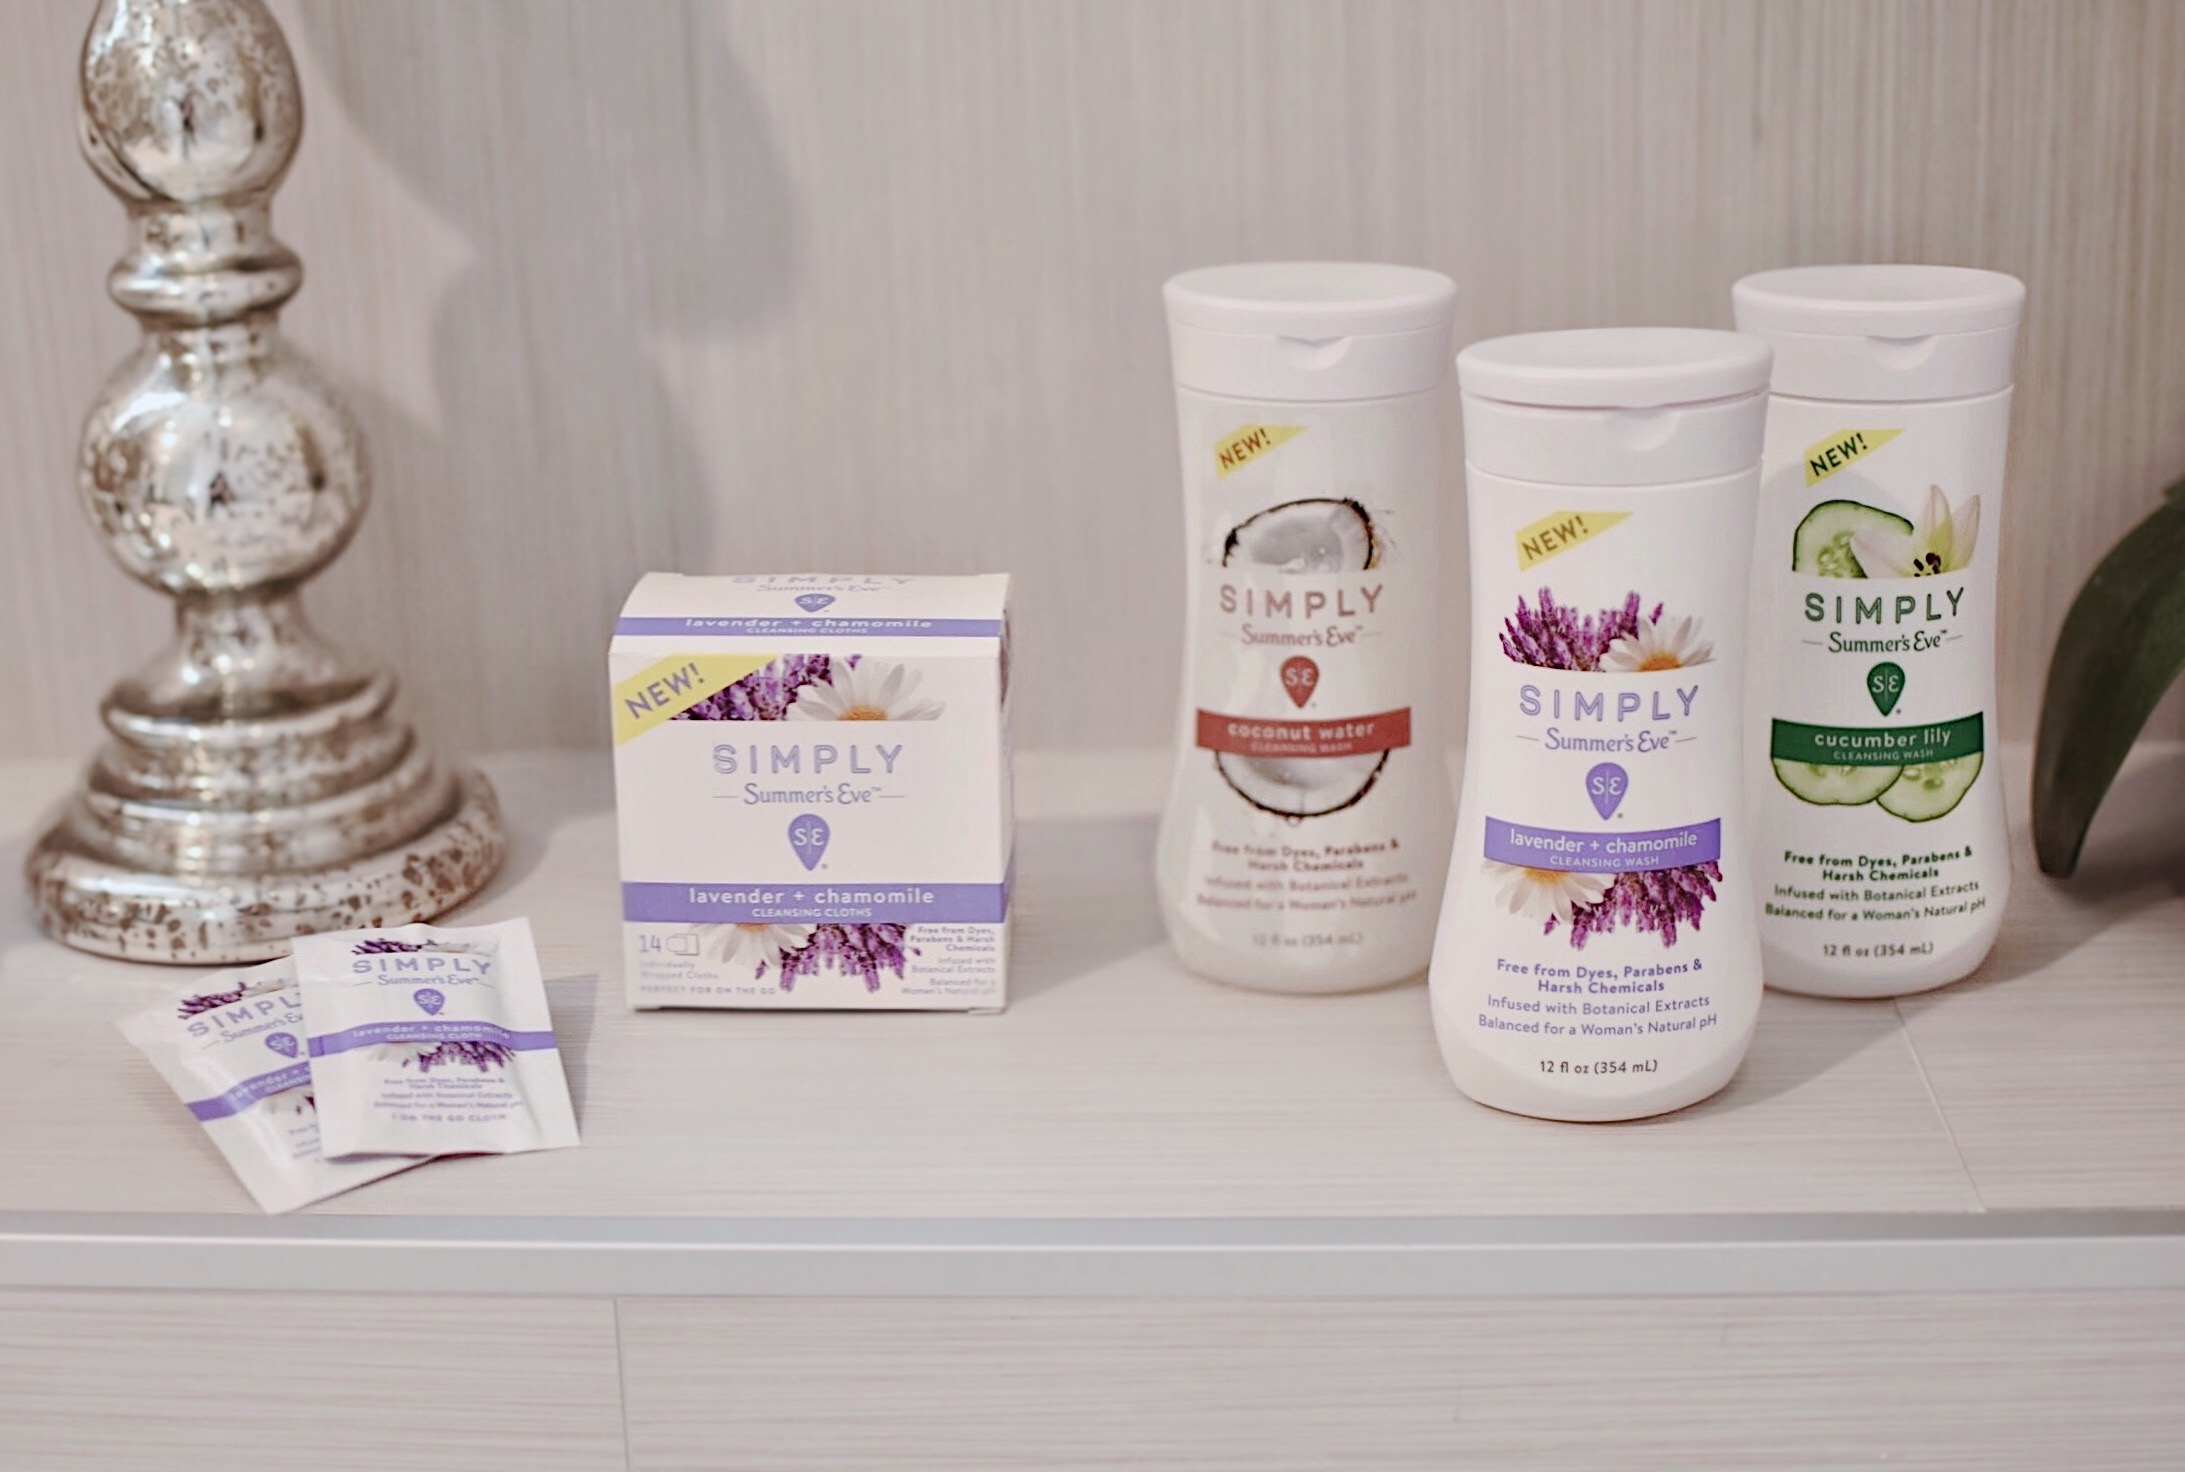


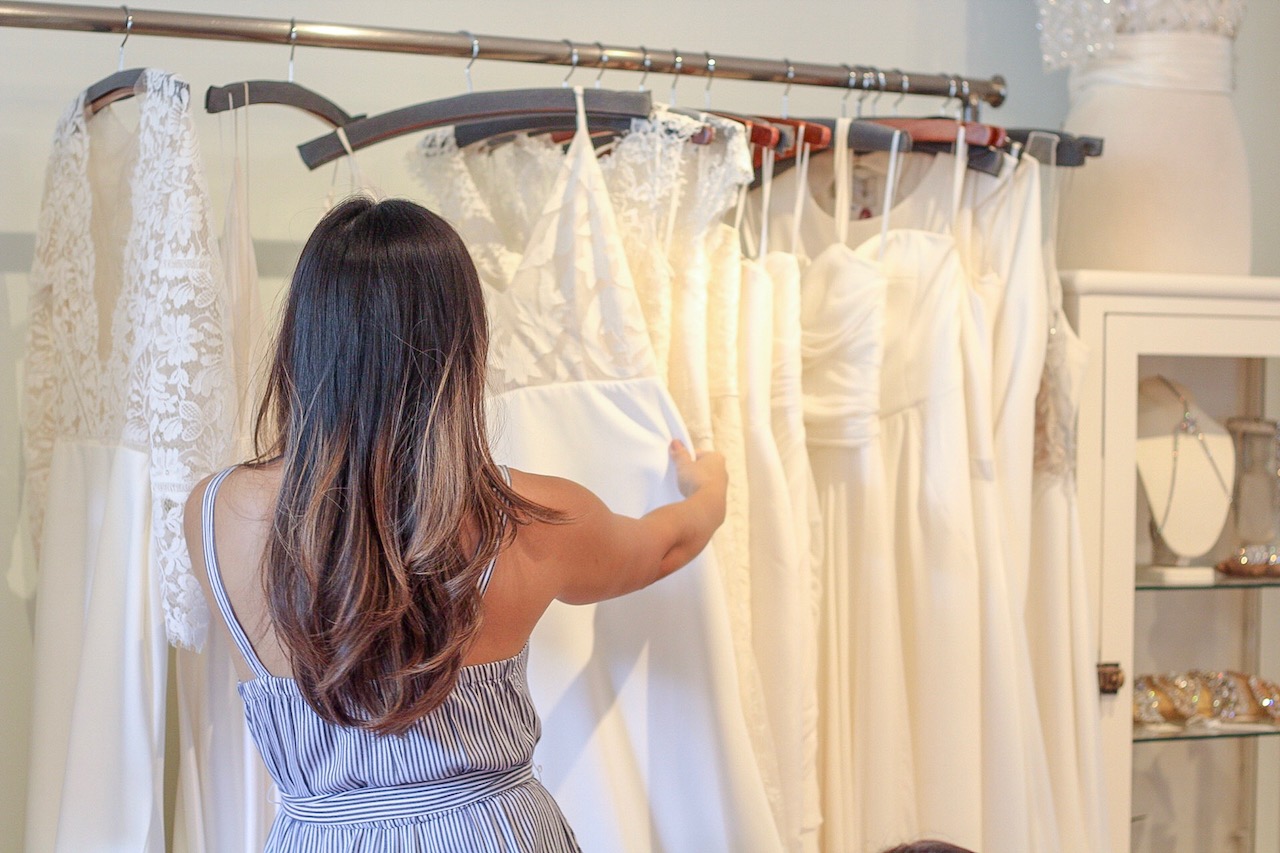
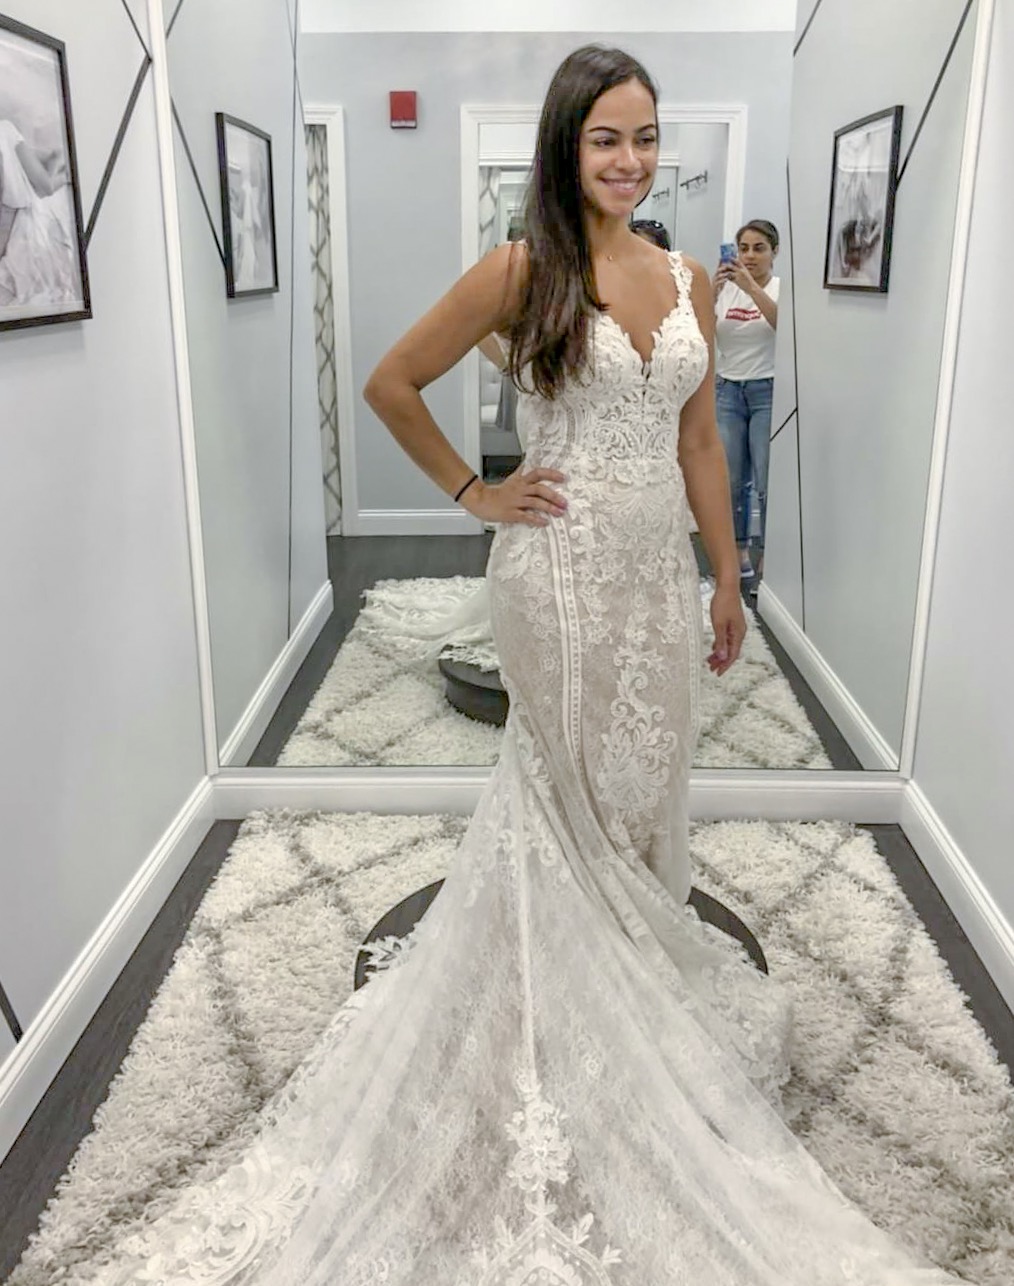

 I sincerely hope this post helps you in your dream dress hunt, and that my tips make your dress shopping experience a little more enjoyable. If you have questions or want to know more about the dress I chose or why I chose it, feel free to send me a message!
 1.
1.  2.
2.  3.
3.  4.
4. 
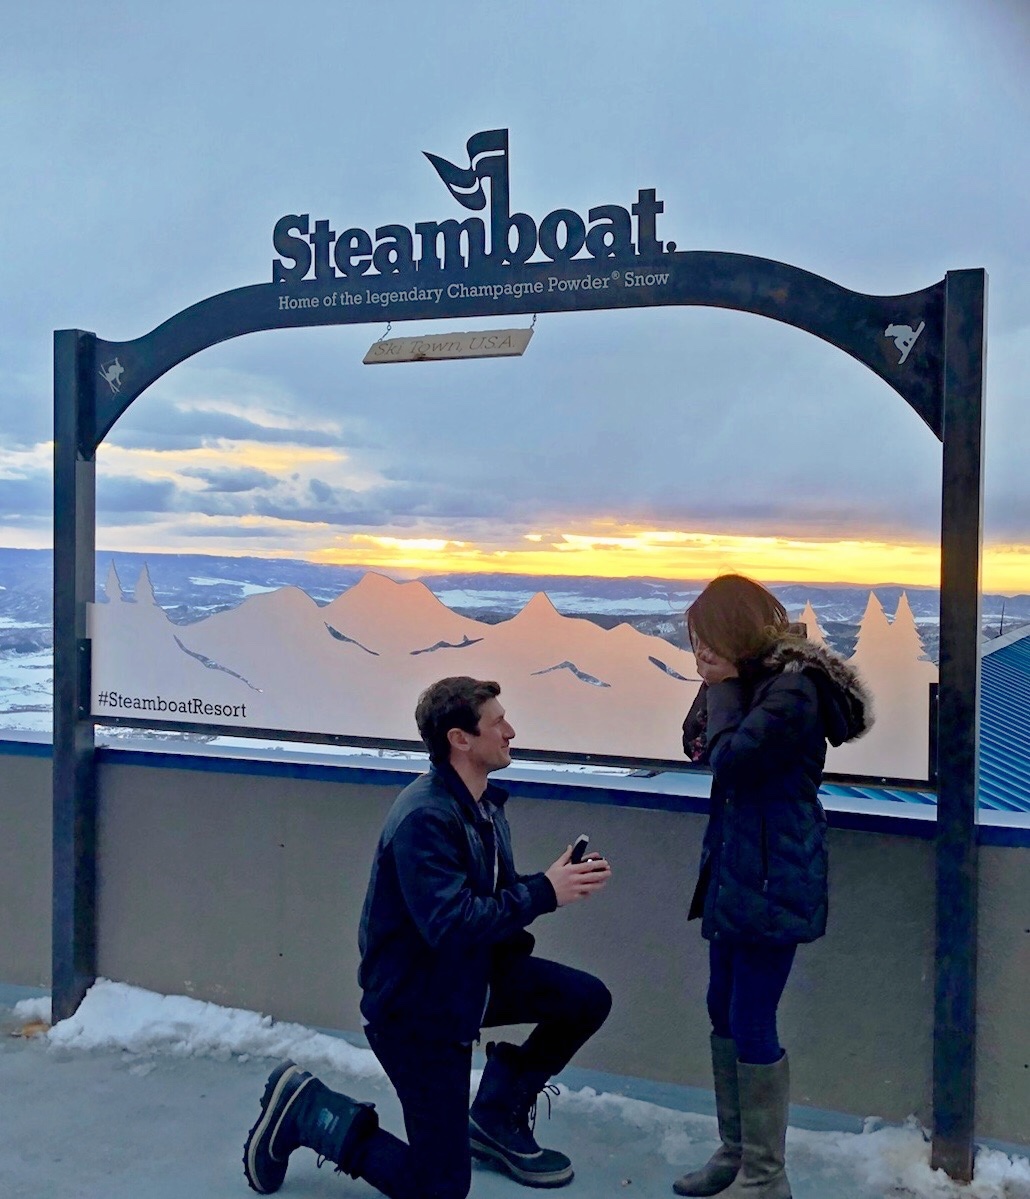

 After a full day of skiing on Friday, we went back to the house to get ready for happy hour. Erik is in the travel industry and frequently gets things comped for us, so when he told me he got us 4 free tickets and a bottle of champagne, I didn’t ask any questions. I did however try to recruit the rest of the group to join us, but sadly only got “No’s” in response (one person was napping, the other had “altitude sickness,” and the rest had “other plans”).
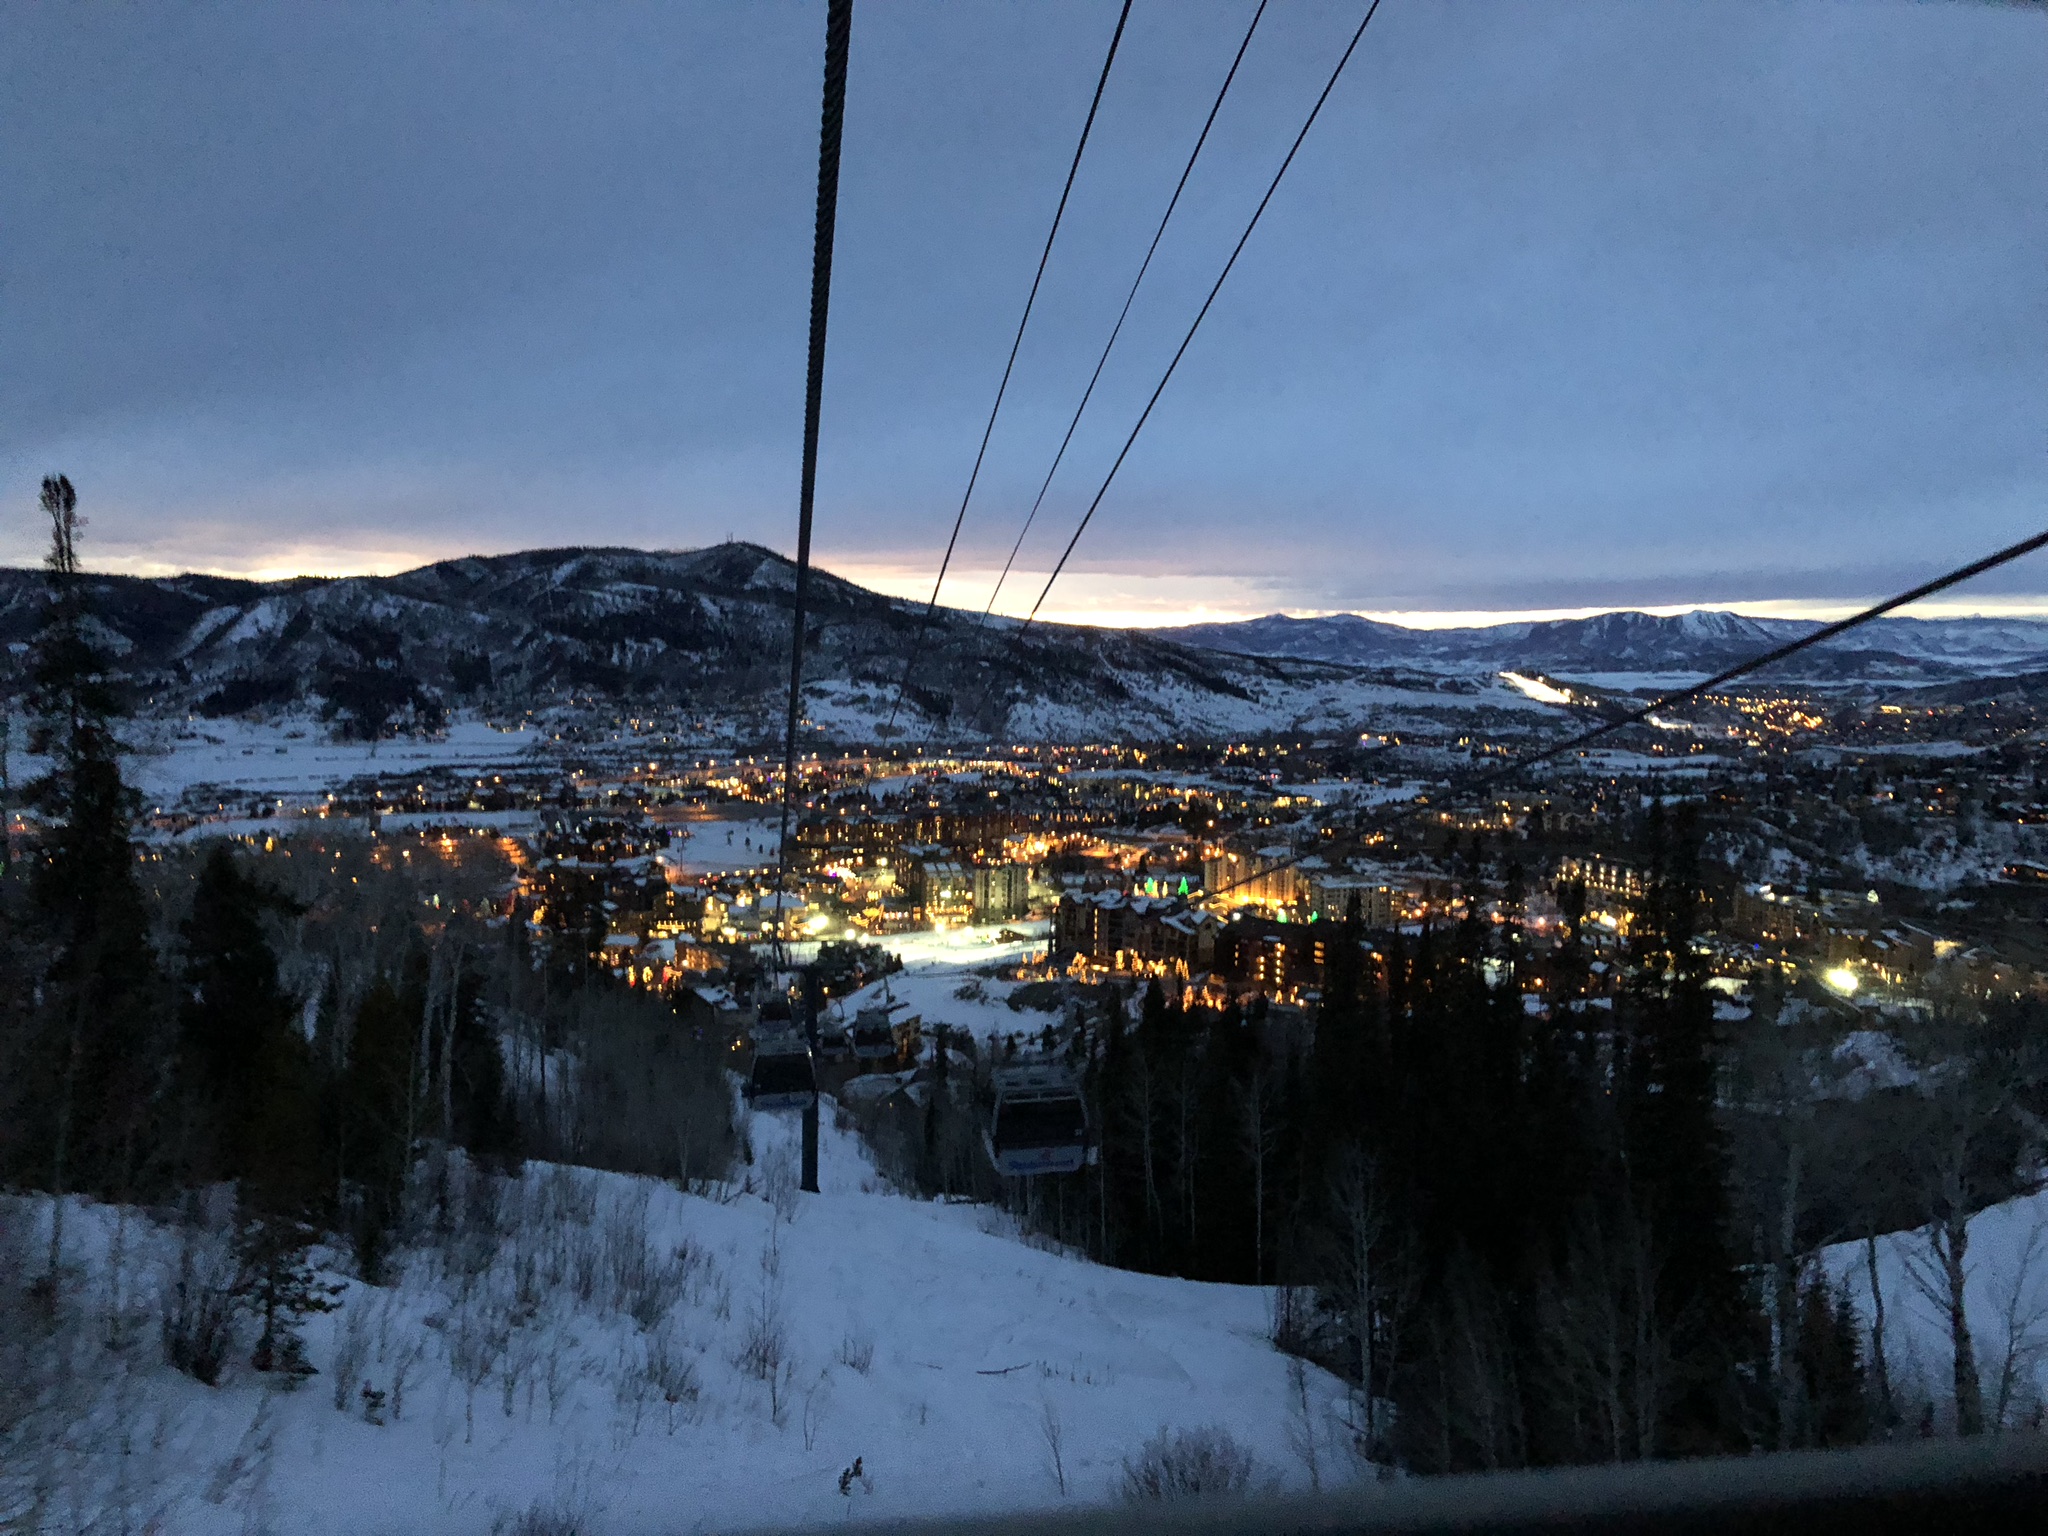 We made our way to the gondola (me, Erik, and both of our old roommates), and up to the top of the mountain. Once at the top, the restaurant was completely empty and I asked Erik at least 3 times if we were in the right place. The lights were on but the chairs were stacked, there were no bar tenders or servers anywhere, and it just felt wrong. After much hesitation from my end, we found a small table in the back with a bottle of champagne and 4 glasses (and me, still clueless).
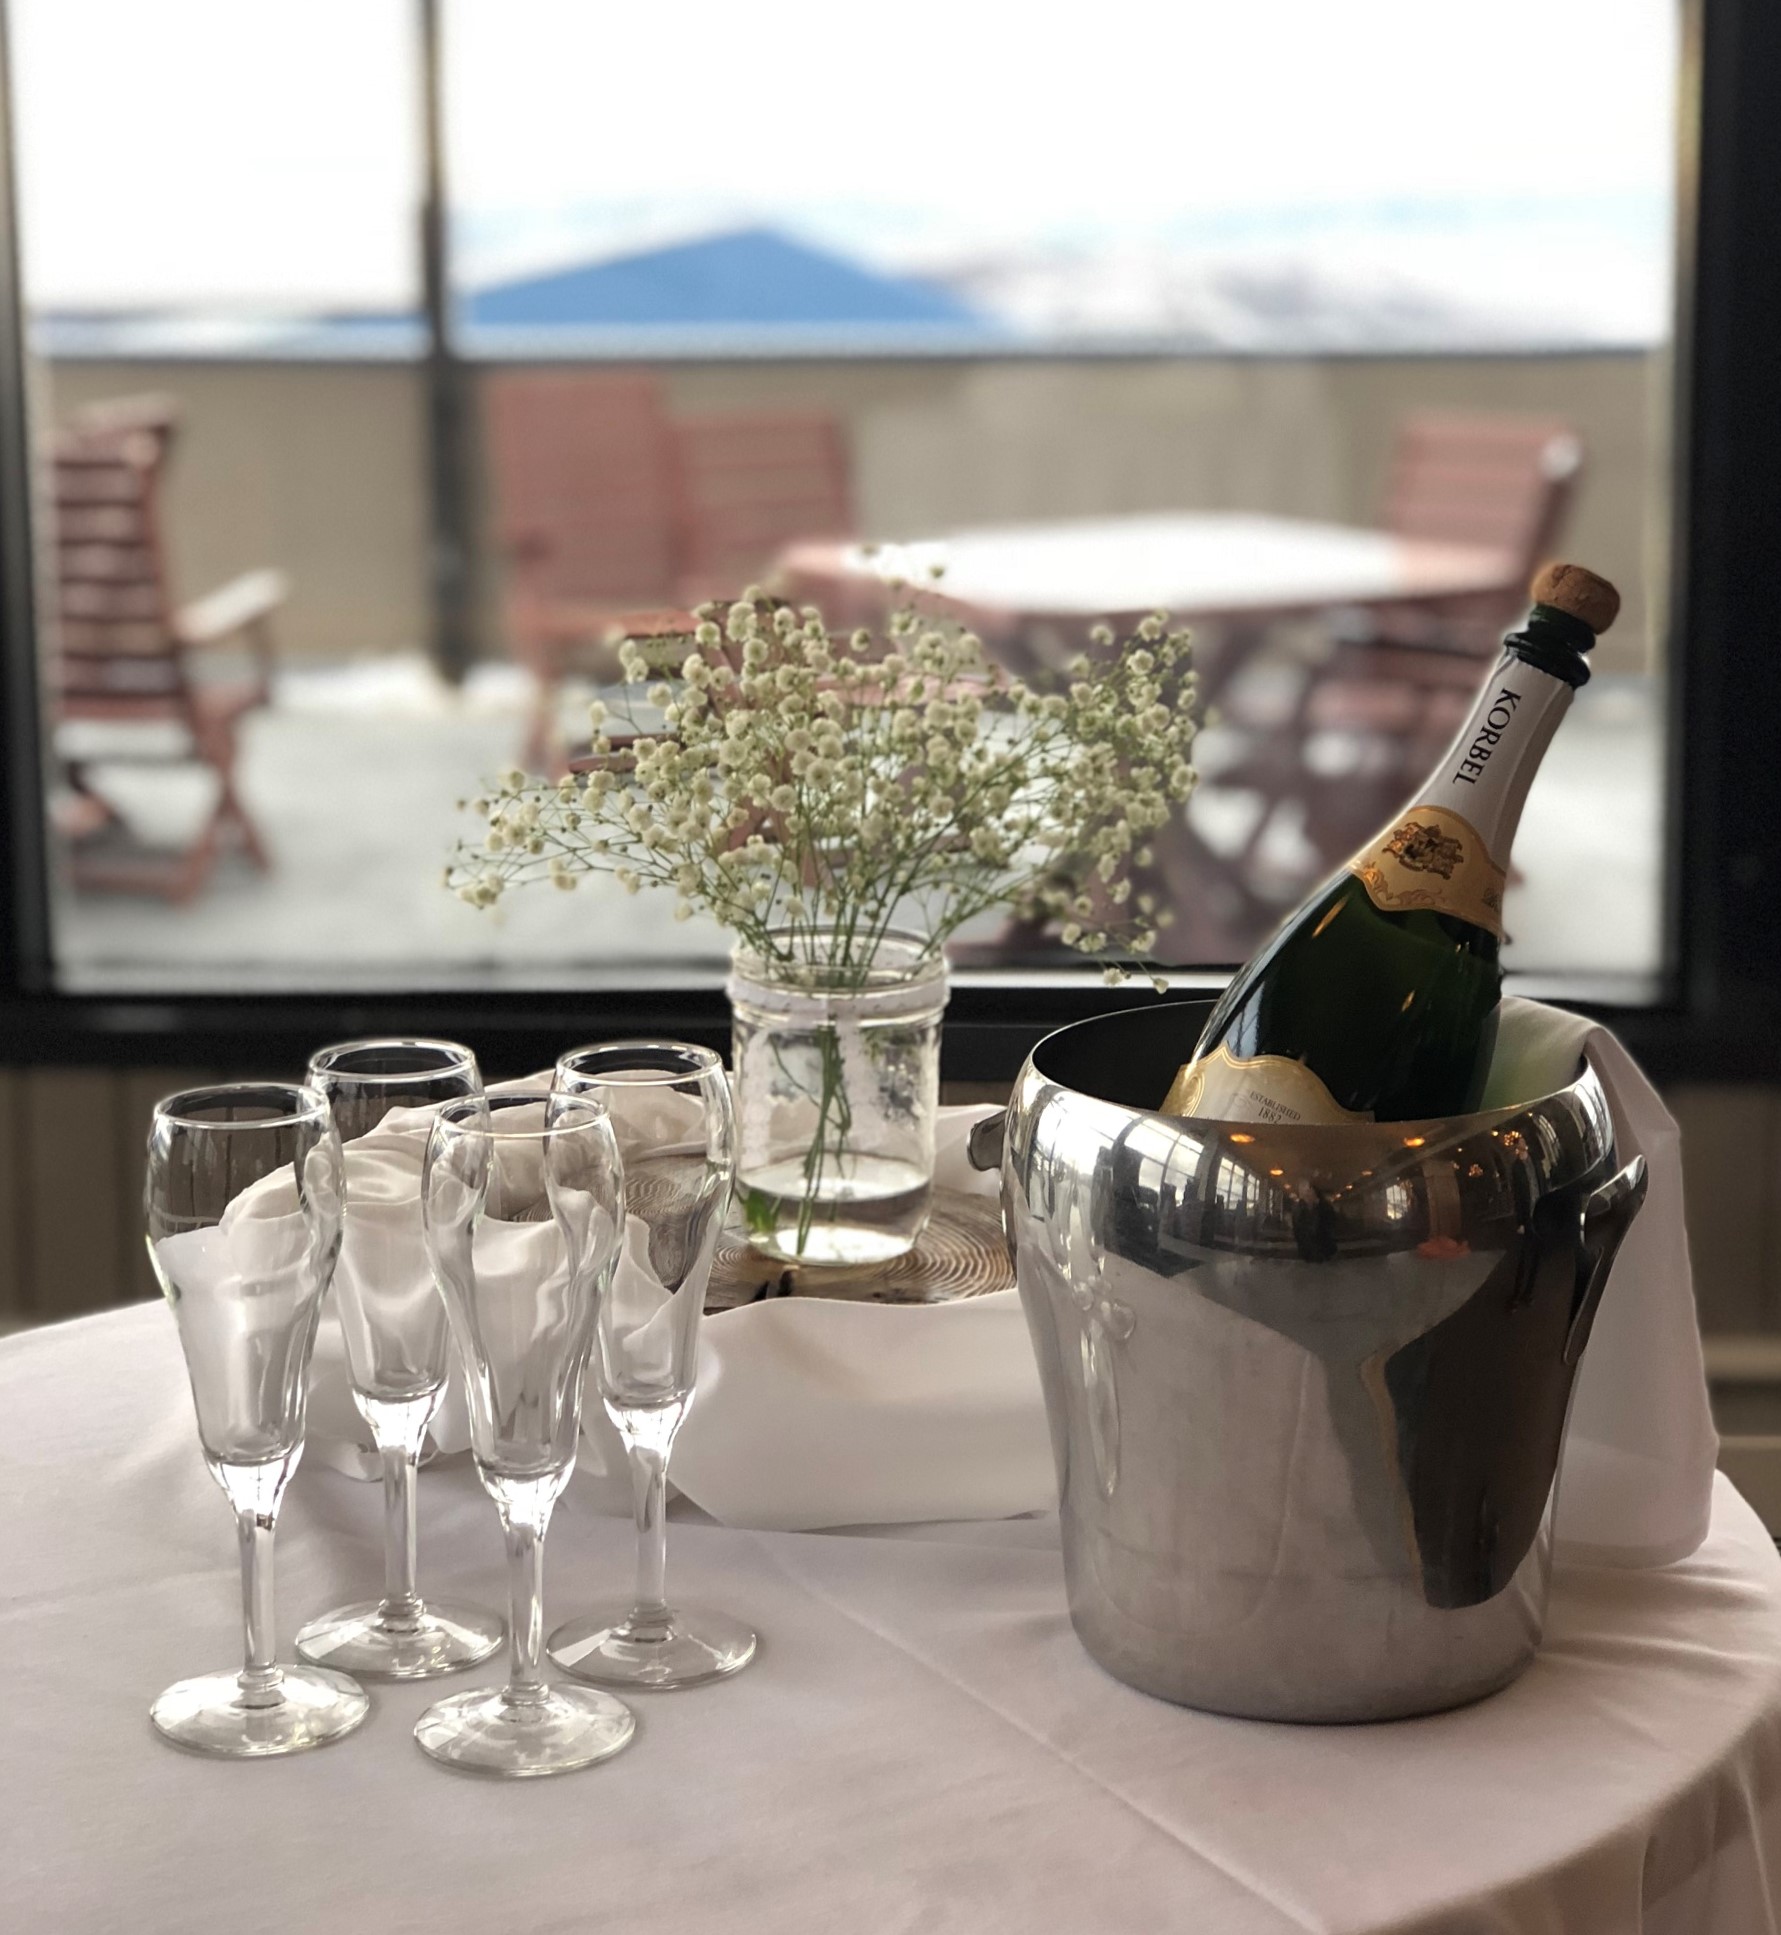
 This is when he reached into his pocket and got down on one knee and started saying a bunch of things (which I absolutely do not remember), and I might have cursed once (or twice) before actually saying yes (sorry, Mom). We hugged and cried, called our friends and families to tell them the good news, and finished the bottle of champagne before heading back down the mountain.
 All of our friends were at a restaurant waiting for us to celebrate together. Turns out no one was sick or sleeping. Looking back on that night there were so many red flags that I just completely missed along the way, but everything happens for a reason and it truly was the surprise of my life.
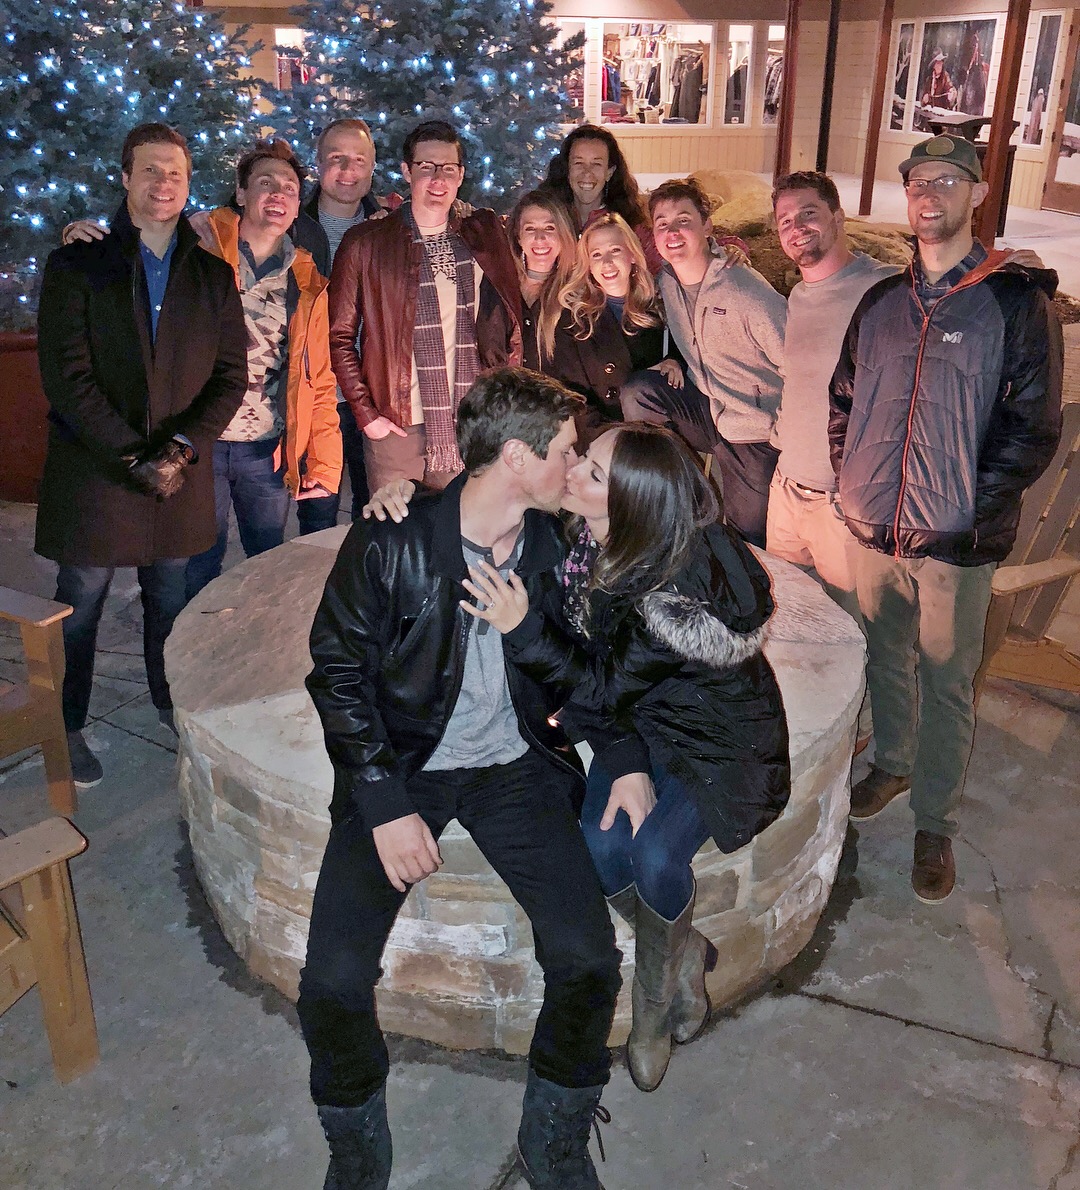


 3.
3.  6.
6.  1.
1.  1.
1. 
 1.
1.  3.
3.